Clappia helps you create custom apps for any business process. If your process involves printing or creating a PDF document of your app submissions, Clappia supports dynamic printing where a template document is merged with dynamic values captured in the app/forms.
Here are some of the use cases where people use dynamic printing -
Select the app you need to have a PDF for from your dashboard.
Then go to Design App > Configuration > Print Settings.

A right panel will appear where you can add PDFs. Click on Add Print Template. Then give a name to the PDF. You can have multiple PDFs configured for an app by clicking on ‘Add Print Template’ again.

Click on the edit icon and a pop-up window will appear where you can design the template for the PDF.
You can configure your template with the built-in text editor in Clappia which is similar to Doc/Word with all the text, header, footer, images, and the variables that need to be merged from the app submissions. Here is an example document:

In the above image, there are certain words in {} brackets. These are variables taken from the app. You can get these variables from the app that you have designed in the Design App section. In the print settings editor window, simply type in ‘@’ followed by the field name and you will see the desired field whose value you need to pull dynamically from your app’s submission.


The HTML editor is used to provide rich text formatting to your PDF.


In case you are not familiar with HTML to generate the desired format for your PDF, you can always use AI assistance online to help you generate the code and paste it into the HTML editor.
While editing on the HTML editor, you can also make use of variables to pull values from your app submissions dynamically by typing '@'.

The PDF editor allows you to enable headers and footers to include additional context such as logos, titles, page numbers, or disclaimers in your PDFs.
At the top of the editor, toggle the Enable Header and/or Enable Footer options.
Add your desired text, variables (using @), or images in these sections.
Click Save to apply the changes.
You can add external images to your PDF template by clicking on the Insert/Edit Image icon in the toolbar. A pop-up window will appear, allowing you to specify the image source URL, alternative description, width, and height. Once configured, the image will be embedded into your PDF template.
In the below image, the image is inserted into the header to add the company logo.


You can add images uploaded through app submissions to your PDF template by clicking on the Insert Images from Submissions icon in the toolbar. A pop-up window will appear, allowing you to select the desired field containing the image, adjust padding, and configure the width. Once configured, the image will be dynamically pulled into your PDF template based on the submission data.

With this option you can insert images (from the Camera, images & Files block) and signatures (from the Signature block) from your app.
Click here to know more about inserting Images from submissions.
You can add GPS locations captured through app submissions to your PDF template by clicking on the Insert Map from Submissions icon in the toolbar. A pop-up window will appear, allowing you to select the GPS field, adjust the map's height and width, and configure the display. Once configured, the GPS location will be dynamically added to your PDF template. The map will be displayed as a static image with a location pin at the GPS coordinates captured in the app submission.

Click here to know more about inserting GPS Location from submissions
You can dynamically generate QR codes in your PDF template by clicking on the Insert QR Code from Submissions icon in the toolbar. A pop-up window will appear, allowing you to select the field whose data you want encoded, configure the padding, width, and optionally specify the section index for copied sections. Once configured, the QR code will be dynamically generated in your PDF template based on submission data.

Click here to know more about generating QR Codes within Clappia.
You can now apply conditional formatting to any text inside the Print Template. This allows you to change how specific text appears in your PDFs, or hide it completely, based on conditions using field variables and formulas.
This is useful when you want certain information in the PDF or print output to stand out (for example, highlight urgent cases), or to hide details that are not relevant for a particular submission.
How to apply conditional formatting
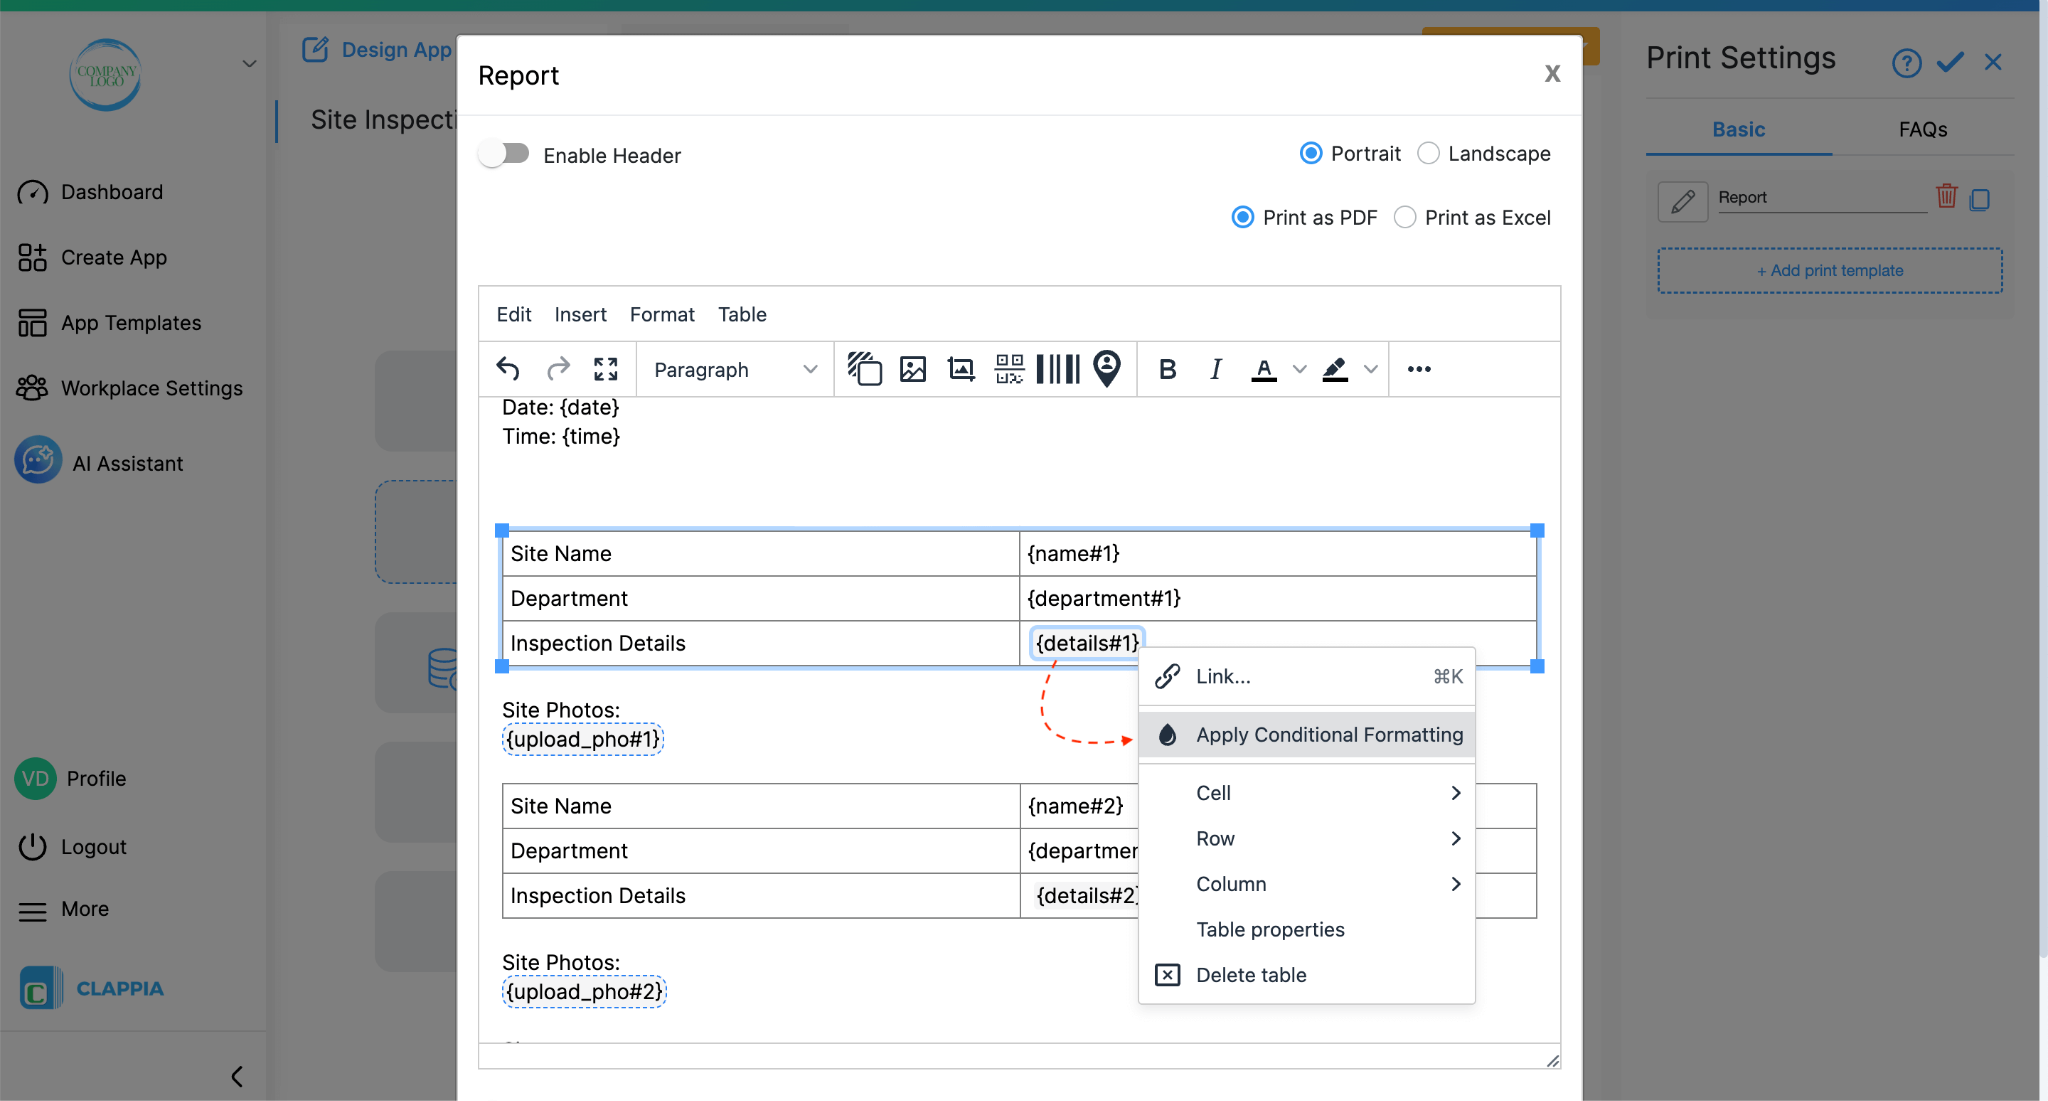
Highlight the text in the print template that you want to format and right-click on the highlighted text. Choose Apply Conditional Formatting from the menu.
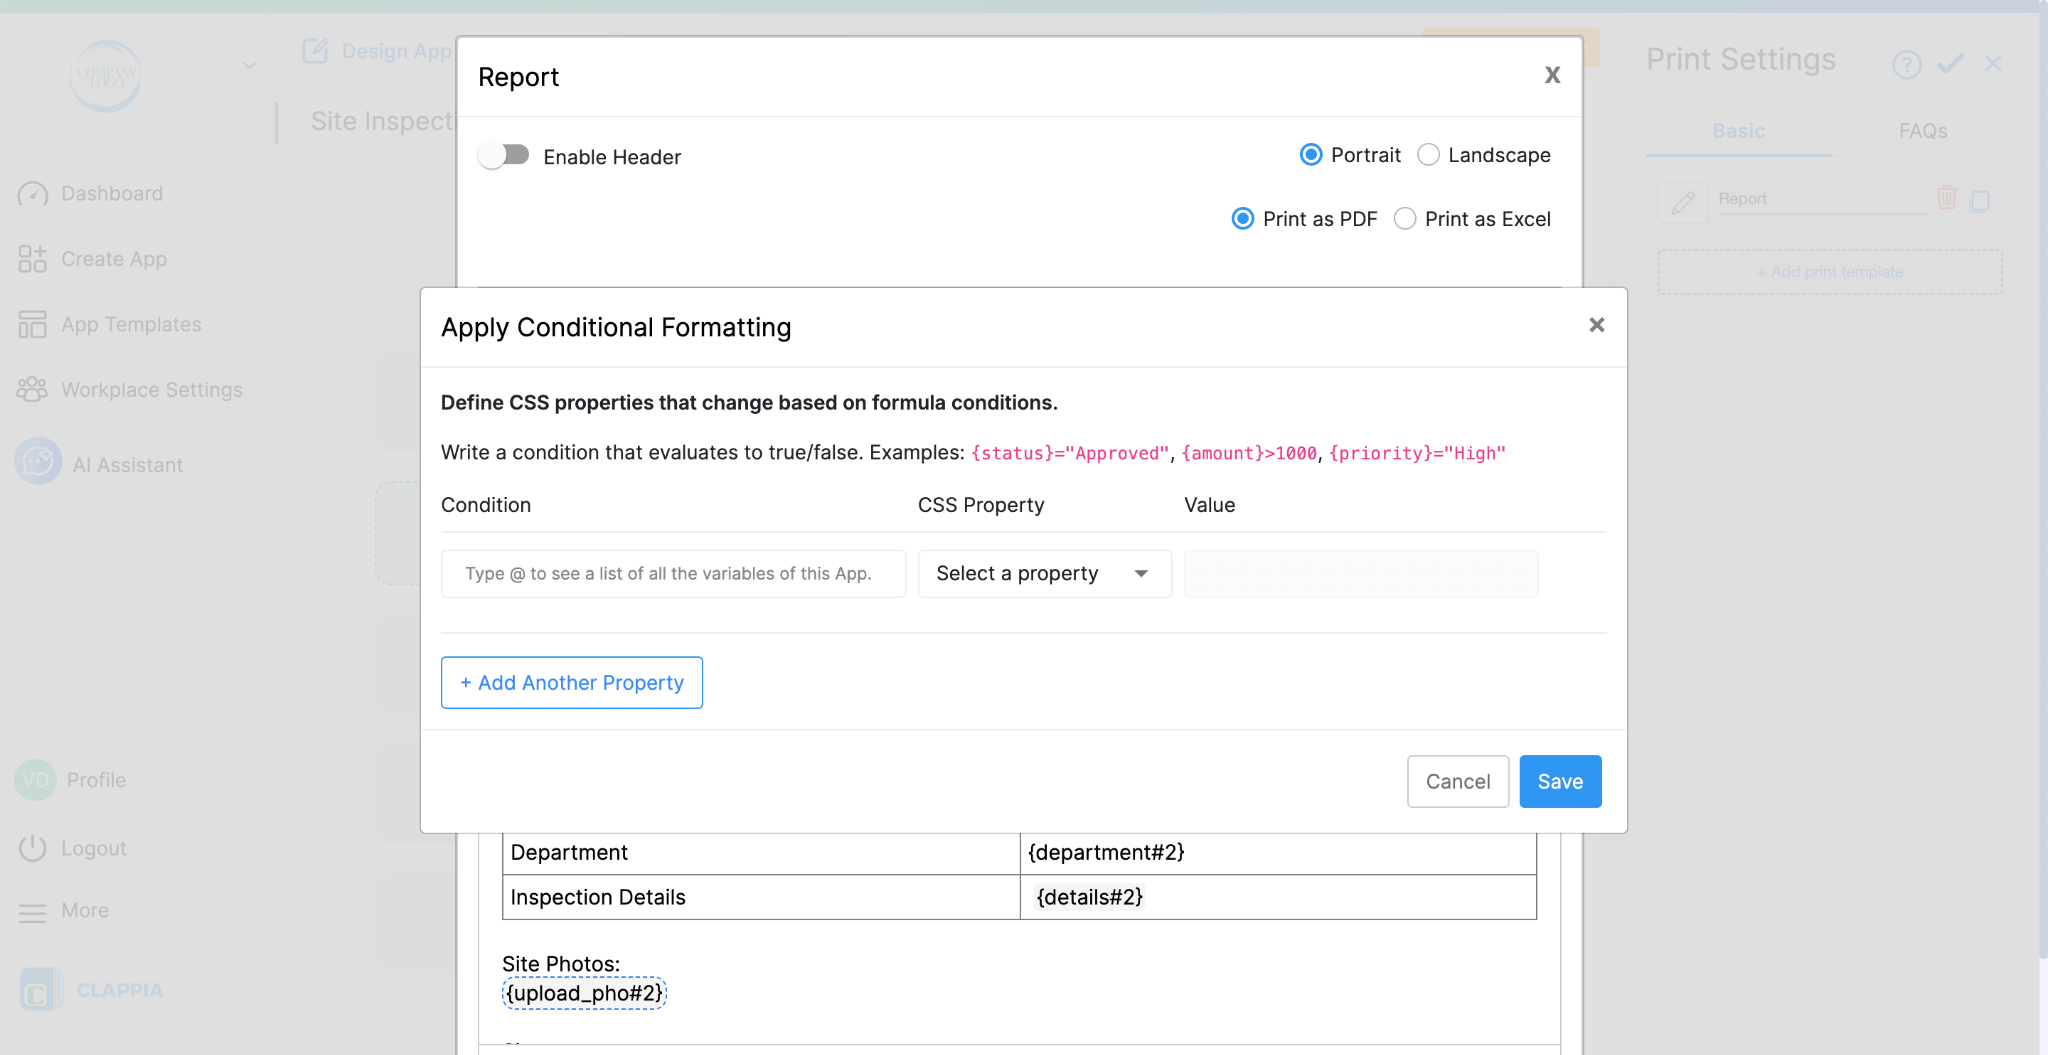
Inside the Conditional Formatting panel, you can:
Add a condition using the same formula style used across Clappia. For example, {details}="In Order", where ‘details’ is a Multi line text field in Clappia. You can type @ to select the fields from your app.
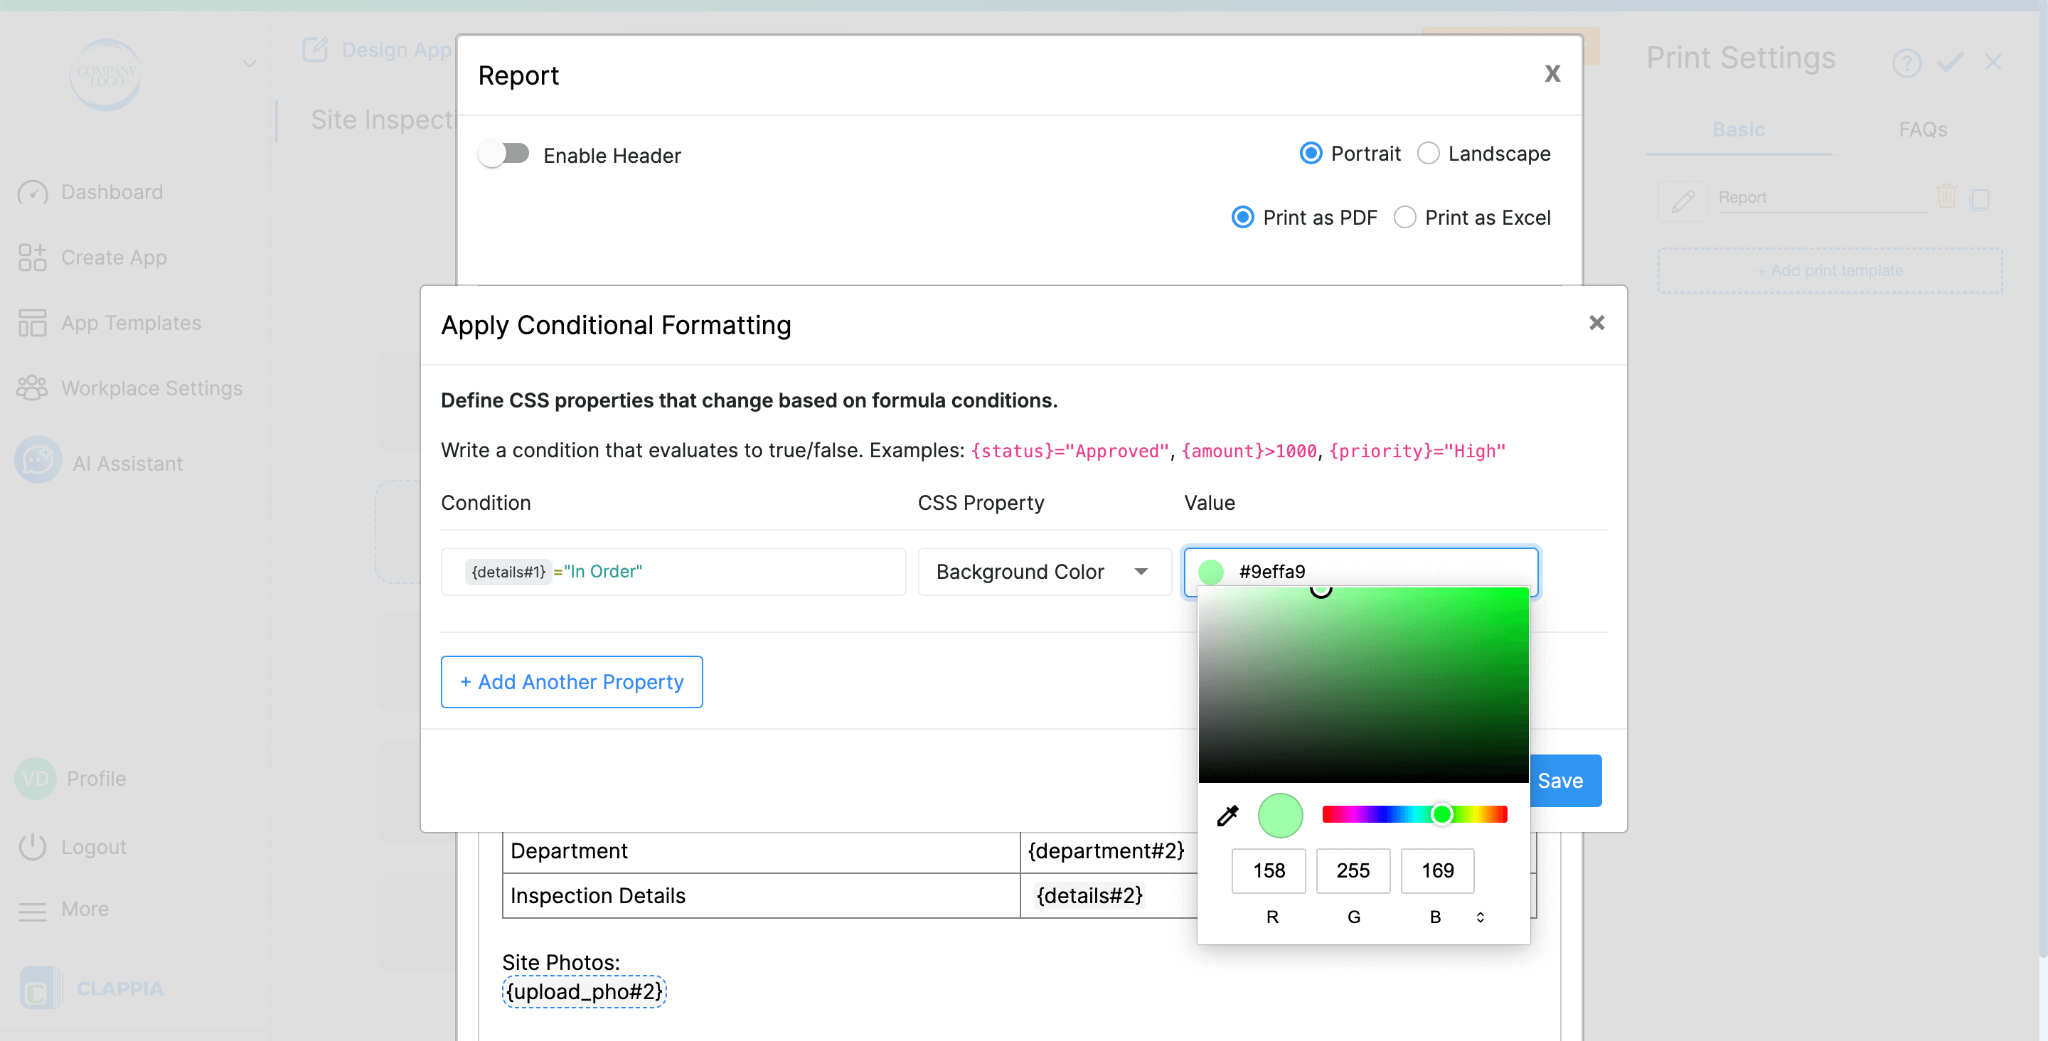
Choose a CSS Property to apply when the condition is true:
You can add multiple properties by clicking on ‘Add Another Property’ for the same condition or add multiple conditions.
In the image example you can see the text appears with a different background colour in the PDF when the ‘details’ field value is “In Order”:
Condition: {details} = "In Order"
CSS Property: Background Colour
Value: (choose a colour)
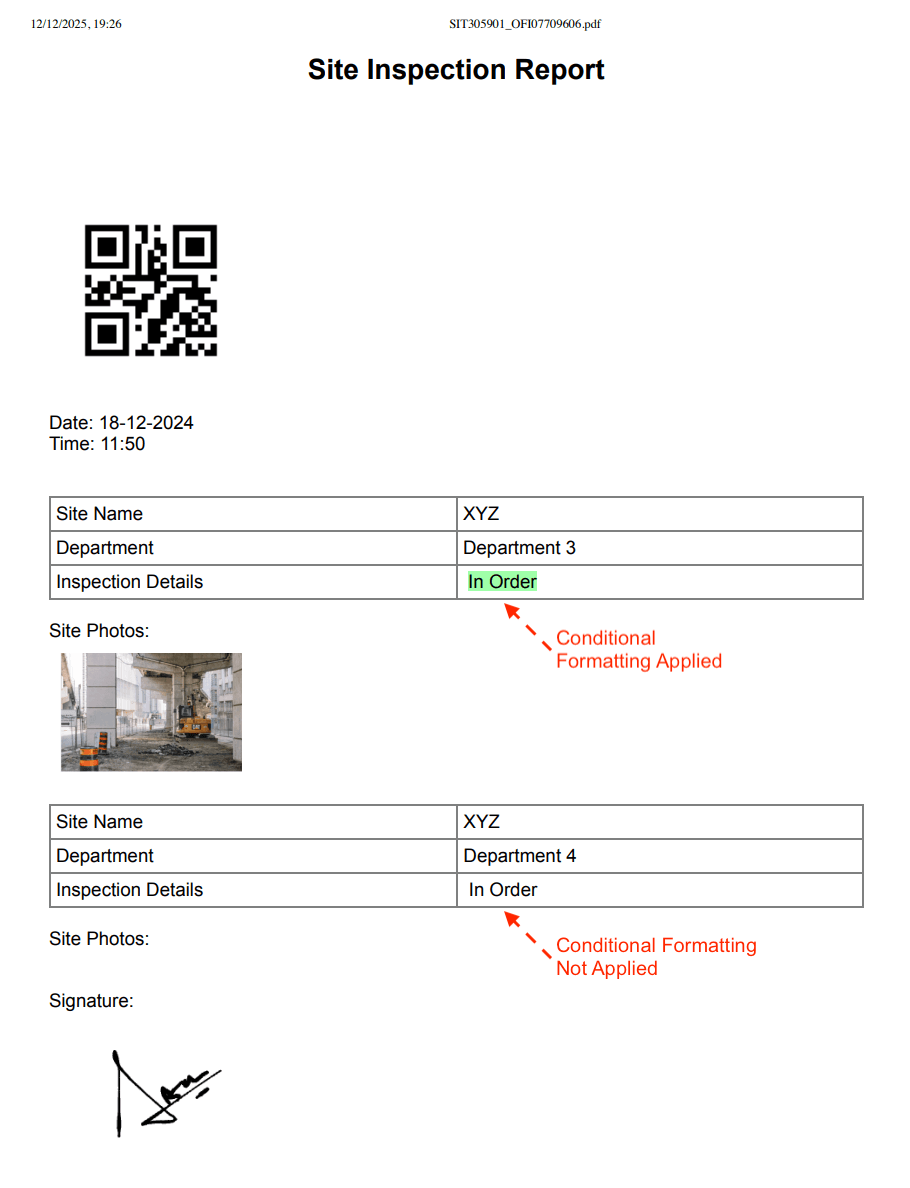
Similarly, you can hide an entire line of text if it should not appear.
Make submissions in your app:
When a user opens the app, they will be taken to App Home, where the app is live and ready to be used. Once they fill in the fields and click on ‘Submit’, the submission is made.
To locate app submissions go to the Submissions tab and click on a particular submission. Submissions can be viewed only by admins or to those users who have been given permissions.
Once a submission is selected, a right panel will appear showing all the details submitted.

To locate the PDF, click on the PDF icon at the top of the right panel. A print preview of the PDF will appear, with the exact template as configured.

You can save the PDF to your system or print it.
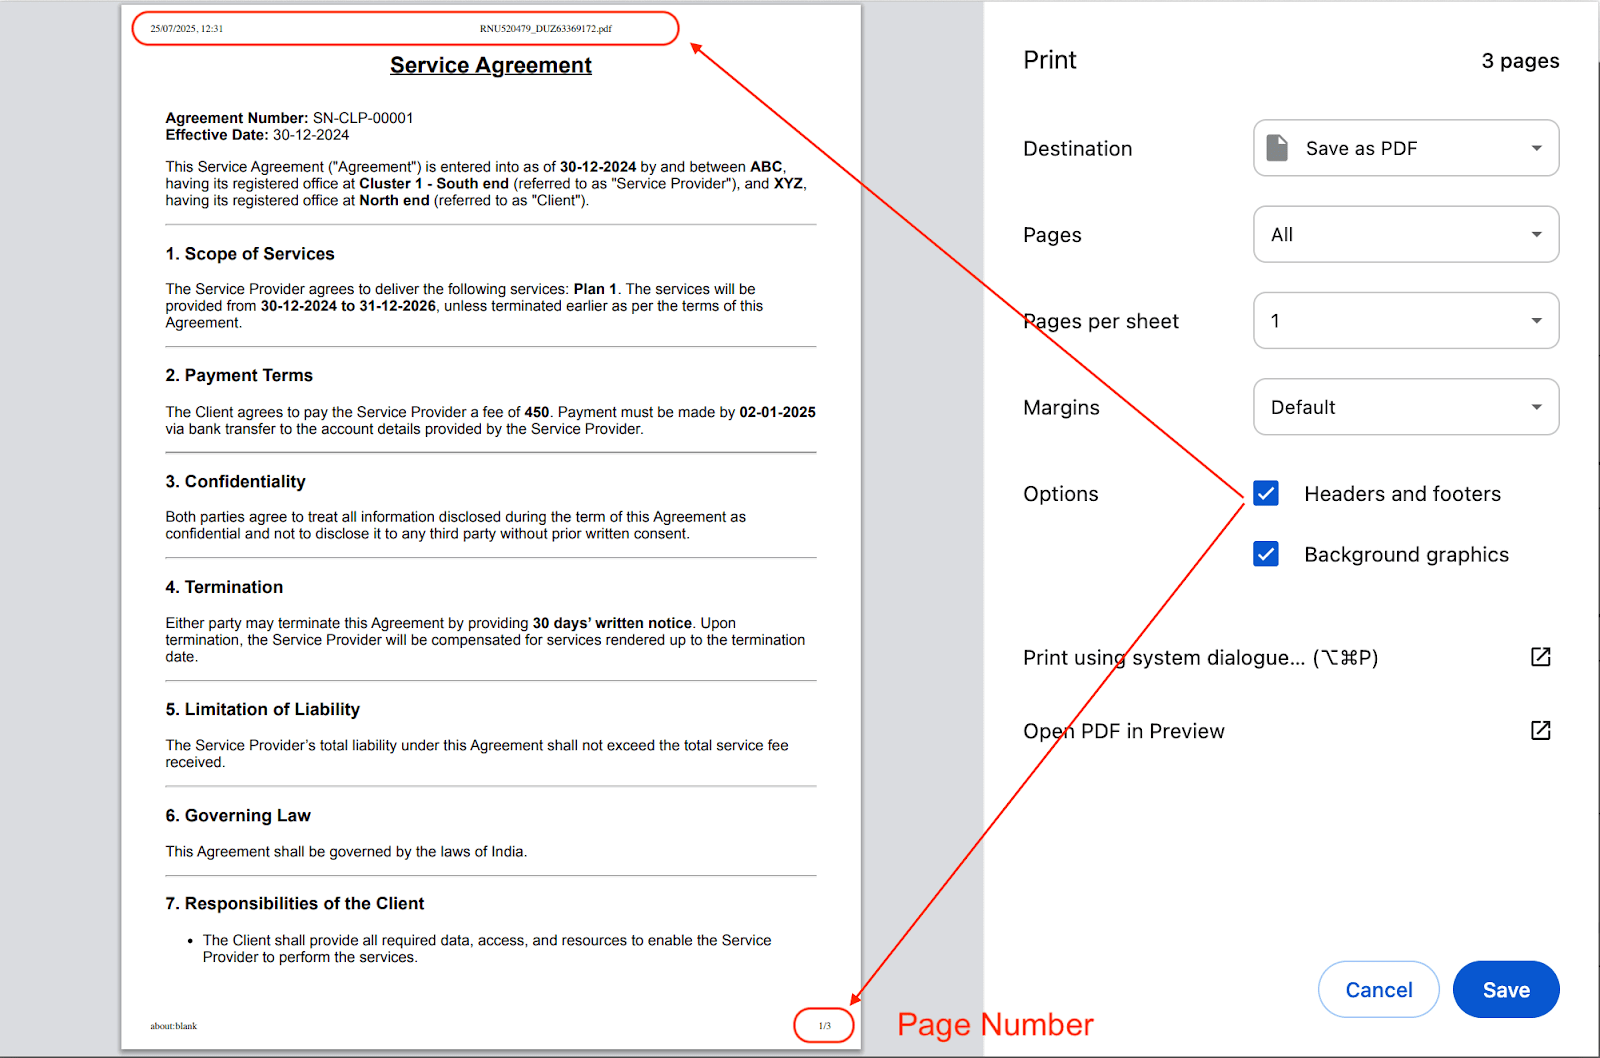
When you open a PDF for a submission, it first appears in the print preview window. In this preview, page numbers are included automatically.
If you don’t see page numbers, check the Options section in the print preview and enable “Headers and footers.” This will display:
If needed, you can turn off headers and footers to hide these details.
You can also print or save PDFs to your mobile device from the mobile app. If you have not downloaded the Clappia mobile app, you can do so either on PlayStore or AppStore.

Open the Clappia mobile app, and all your apps should be visible to you. Select the app where Print Settings was configured. Click on the submissions icon at the bottom. Select a submission. Click on the print icon. You will see the print preview of that submission. You can either print it or save it to your mobile device by changing the option at the top.

In addition to printing PDFs, you can now configure your print template to download as an Excel file. When setting up your print template, you’ll see the option at the top to choose between Print as PDF or Print as Excel. Select Print as Excel if you want your submission data to be exported in spreadsheet format.

Once this option is selected and saved, the behavior of the submission changes as follows:
In the example below, there are some values entered in the fields as well as two images uploaded to the app.

However, when printing as a spreadsheet, only the first uploaded image is entered in the cell.

Because of these current limitations, it's recommended to carefully plan the structure of your table when selecting the Print as Excel option.
For full formatting flexibility, including headers, footers, multiple images, and multi-line content, use the Print as PDF option instead.
If a PDF template is no longer required, you can delete it to keep your app organized.
Navigate to Design App > Configuration > Print Settings.
Click the Trash Bin icon next to the template's name.

You can create a copy of an existing PDF template for reuse or to make modifications without affecting the original.
Navigate to Design App > Configuration > Print Settings.
Locate the PDF template you want to copy.

Click the Clone icon (represented by two sheets of paper) next to the template's name.

The copied template will appear in the list with a default name like "[Original Name] (Copy)."

Click the Edit icon to rename or make edits to the copied template as needed.


If there are copyable sections in the app and you want to print the data for all copies of that section, you can use variable names with suffixes like #1, #2, and so on. For example, if the variable name is {payment}, and the copyable section is configured for 3 copies in the app, you will see {payment#1}, {payment#2}, {payment#3} available for selection in the Print Settings.

Simply type @ in the print template editor, and all the variables, including those with suffixes for the copyable sections, will appear for you to select. These fields dynamically pull data from the respective copies created in the app submissions.


If you have added a table to the print template and included variable fields in the cells, blank submissions for these fields will result in the respective cells being left empty.

However, if an entire row in the table is blank, you can configure the table to automatically delete those rows.
In the print template, select the table whose rows need to be dynamically deleted.
Click on Table in the toolbar.
Select Table Properties from the dropdown menu.

In the pop-up window, navigate to the Class dropdown and select Delete empty rows.

Save the settings.

This will ensure that rows with entirely blank cells are removed from the generated PDF.

Once a print template is configured in Clappia, users can view and download the PDF document by clicking the PDF icon within each submission. However, if users prefer a direct link in the submissions table or need the link to appear in Google Drive (when integration is enabled), they can do so by leveraging workflow configurations.
This ensures that each submission automatically updates to include a print preview URL as a clickable link.
To make the print template link accessible as a clickable URL directly in the submissions list, follow the steps below:

Note: It would be better to have the Edit Submission node under the ‘New Submission flow’ so that whenever a submission is made, the submission is edited immediately (unless you have a different requirement).

In the right configuration panel:

<iframe width=\"200\" height=\"100\" src=\"https://www.youtube.com/embed/4bvRWQbfR-0\" title=\"Form to PDF ● Clappia App Building ● No-Code Low-Code Platform\" frameborder=\"0\" allow=\"accelerometer; autoplay; clipboard-write; encrypted-media; gyroscope; picture-in-picture; web-share\" allowfullscreen></iframe>

L374, 1st Floor, 5th Main Rd, Sector 6, HSR Layout, Bengaluru, Karnataka 560102, India

3500 S DuPont Hwy, Dover,
Kent 19901, Delaware, USA


3500 S DuPont Hwy, Dover,
Kent 19901, Delaware, USA

L374, 1st Floor, 5th Main Rd, Sector 6, HSR Layout, Bengaluru, Karnataka 560102, India

