
Still need help?

Creating apps in Clappia using Google Forms is a convenient way to transform existing Google Forms into fully functional no-code applications. This step-by-step guide will walk you through the process, from connecting your Google account to customizing your newly created app.

Log in to your Clappia dashboard and click on the More option in the left panel. From the dropdown, select Create App from Google Forms.

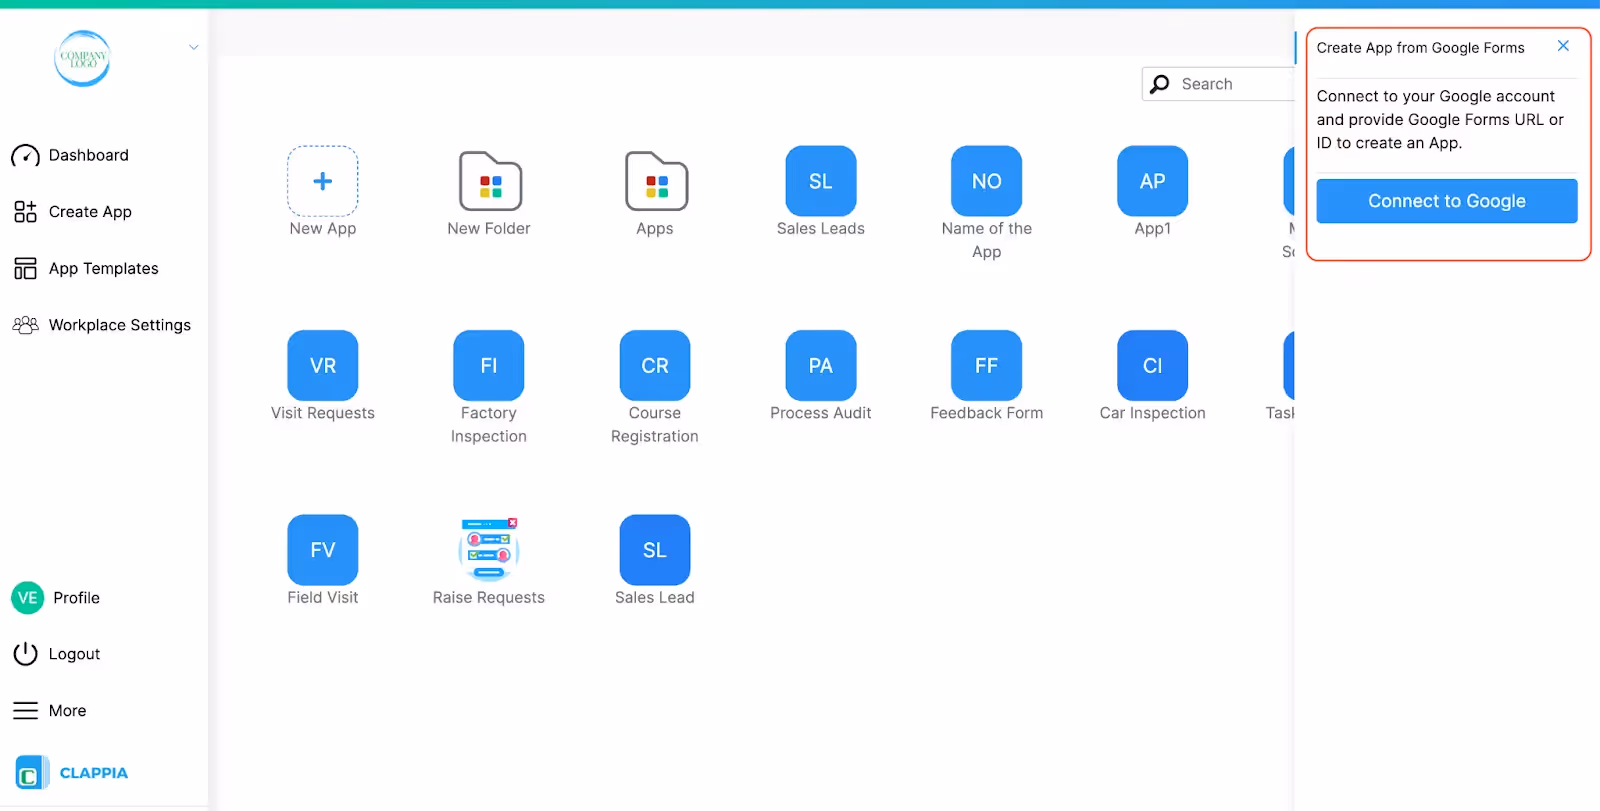
A right panel will appear, prompting you to connect to your Google account. Click on Connect to Google. A pop-up window will appear.
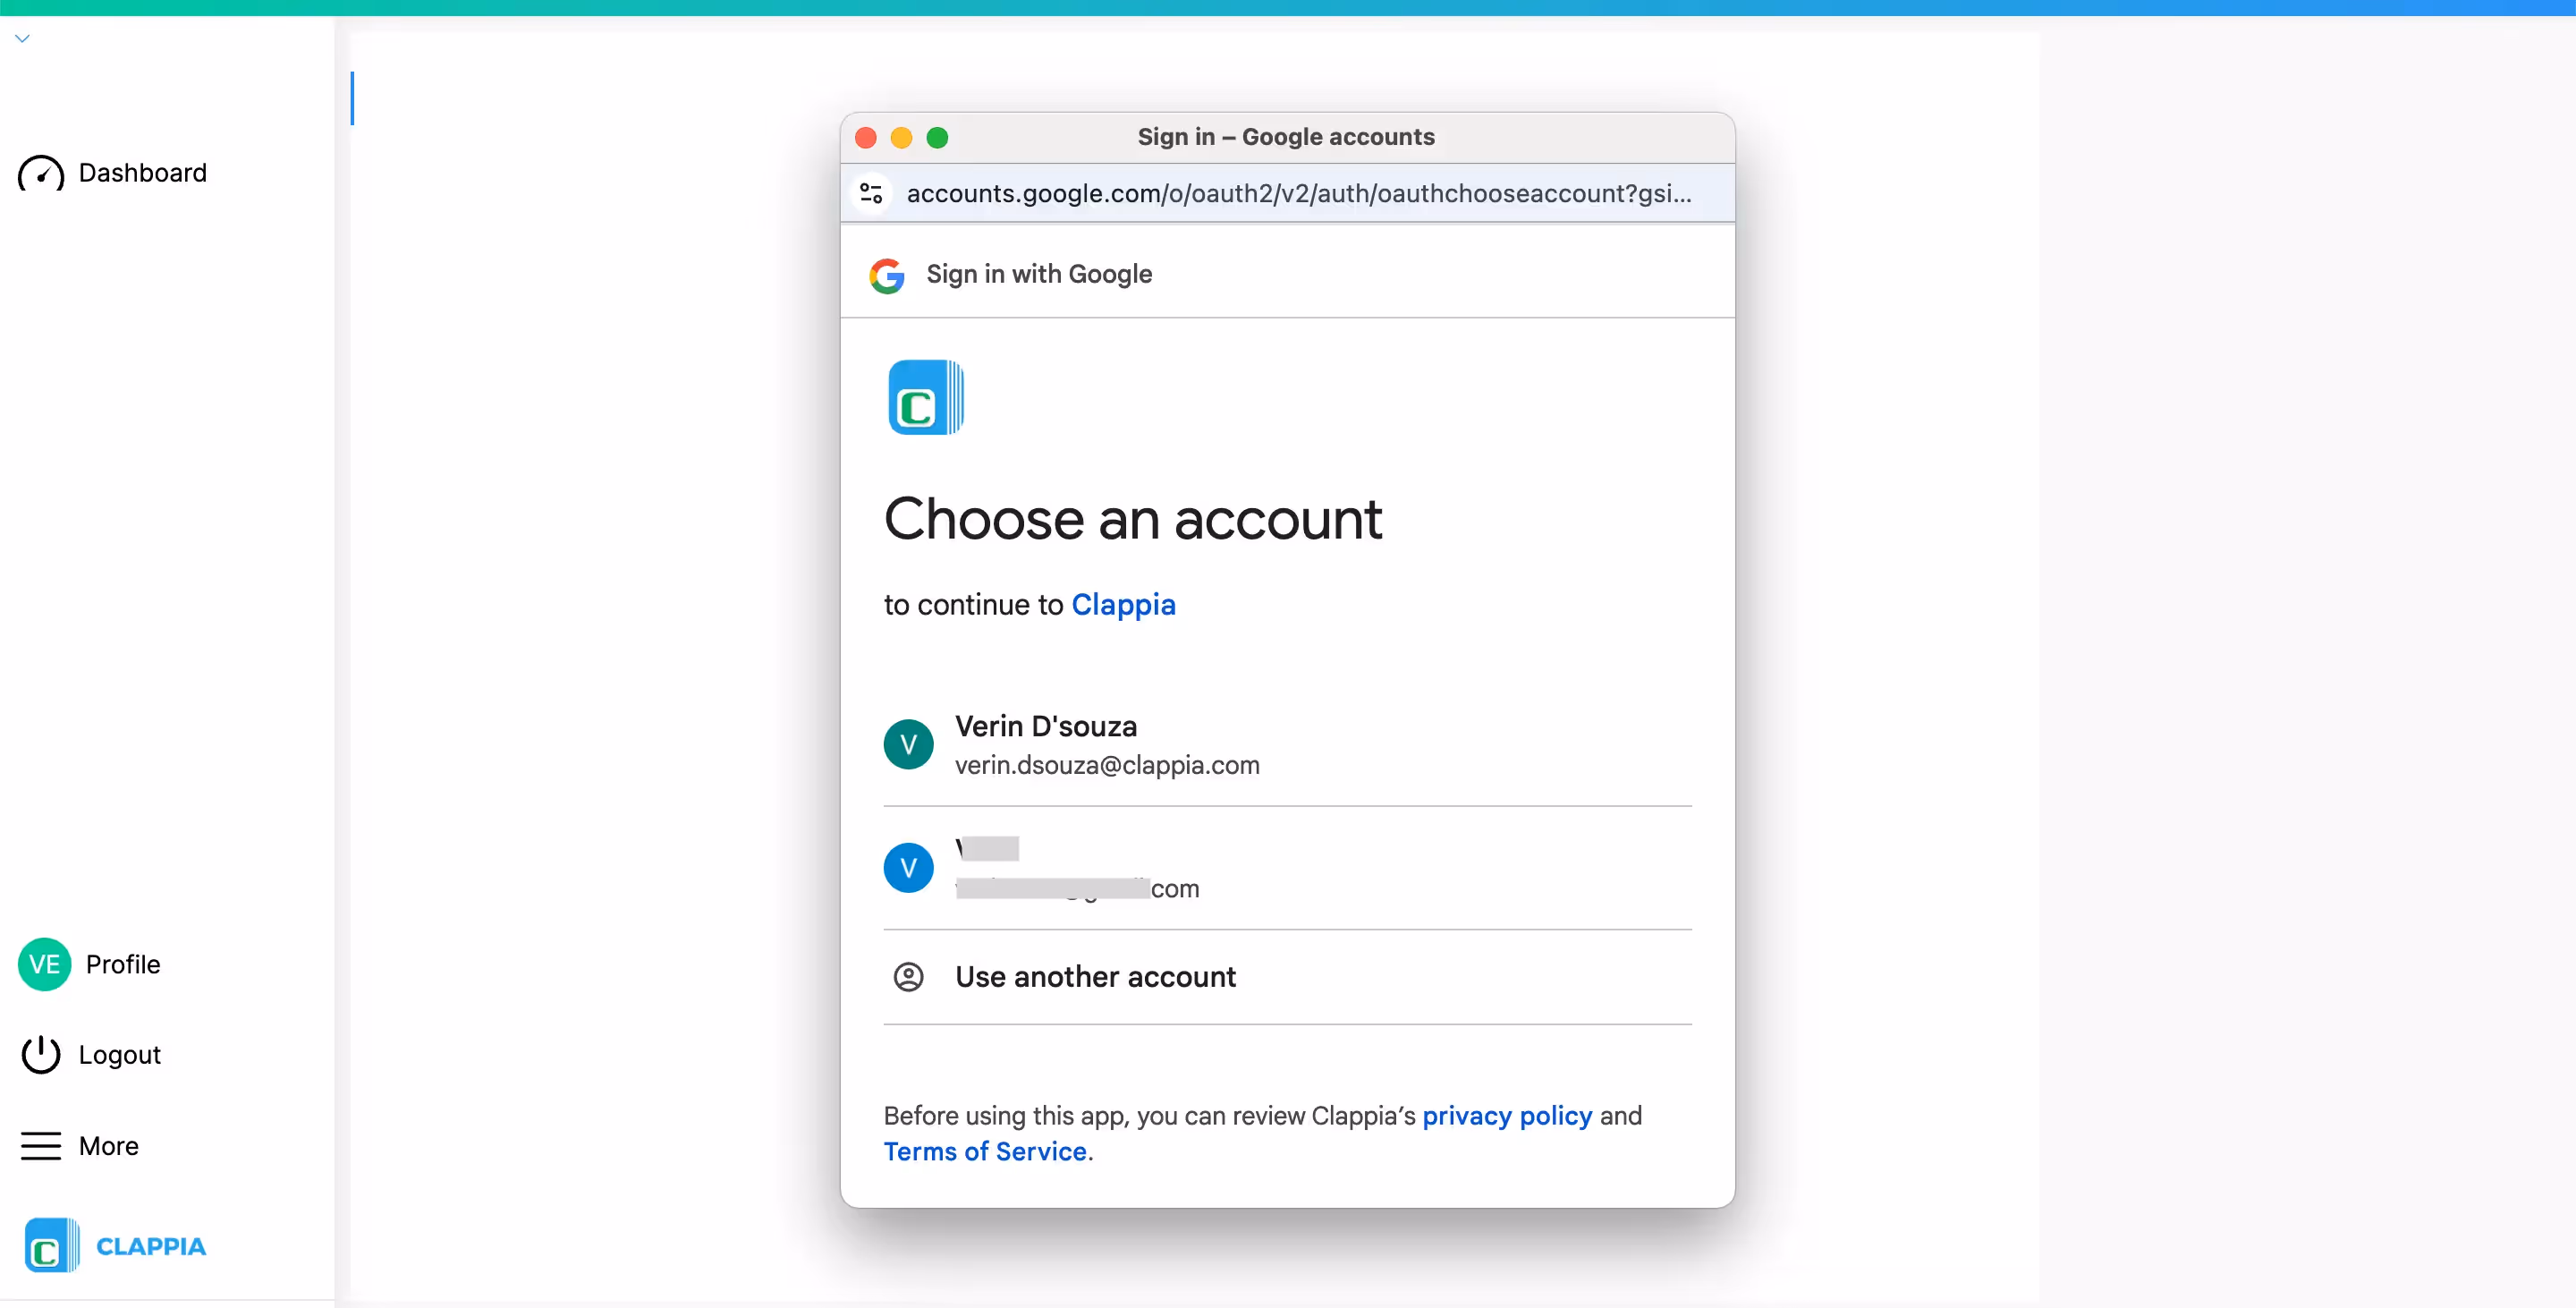
Select the Google account that contains your Google Forms.
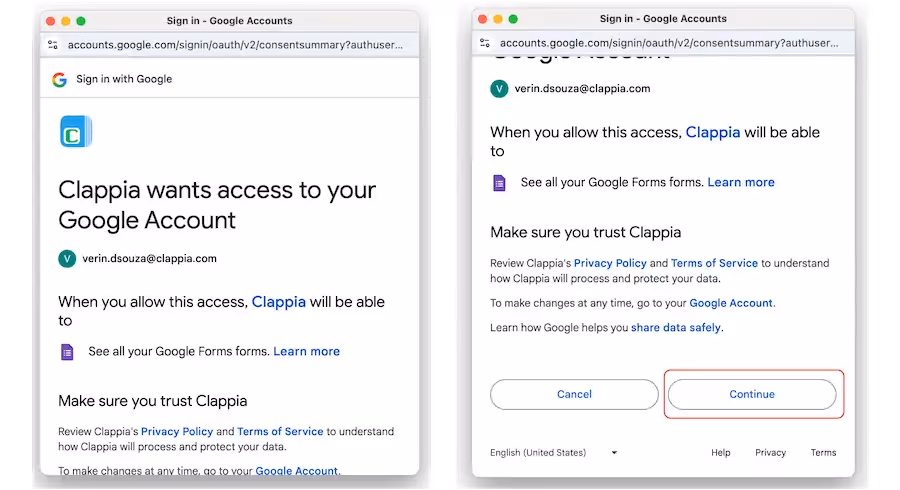
Grant the necessary permissions to Clappia by clicking on Continue.
Once this is done, Clappia will be connected to your Google account.
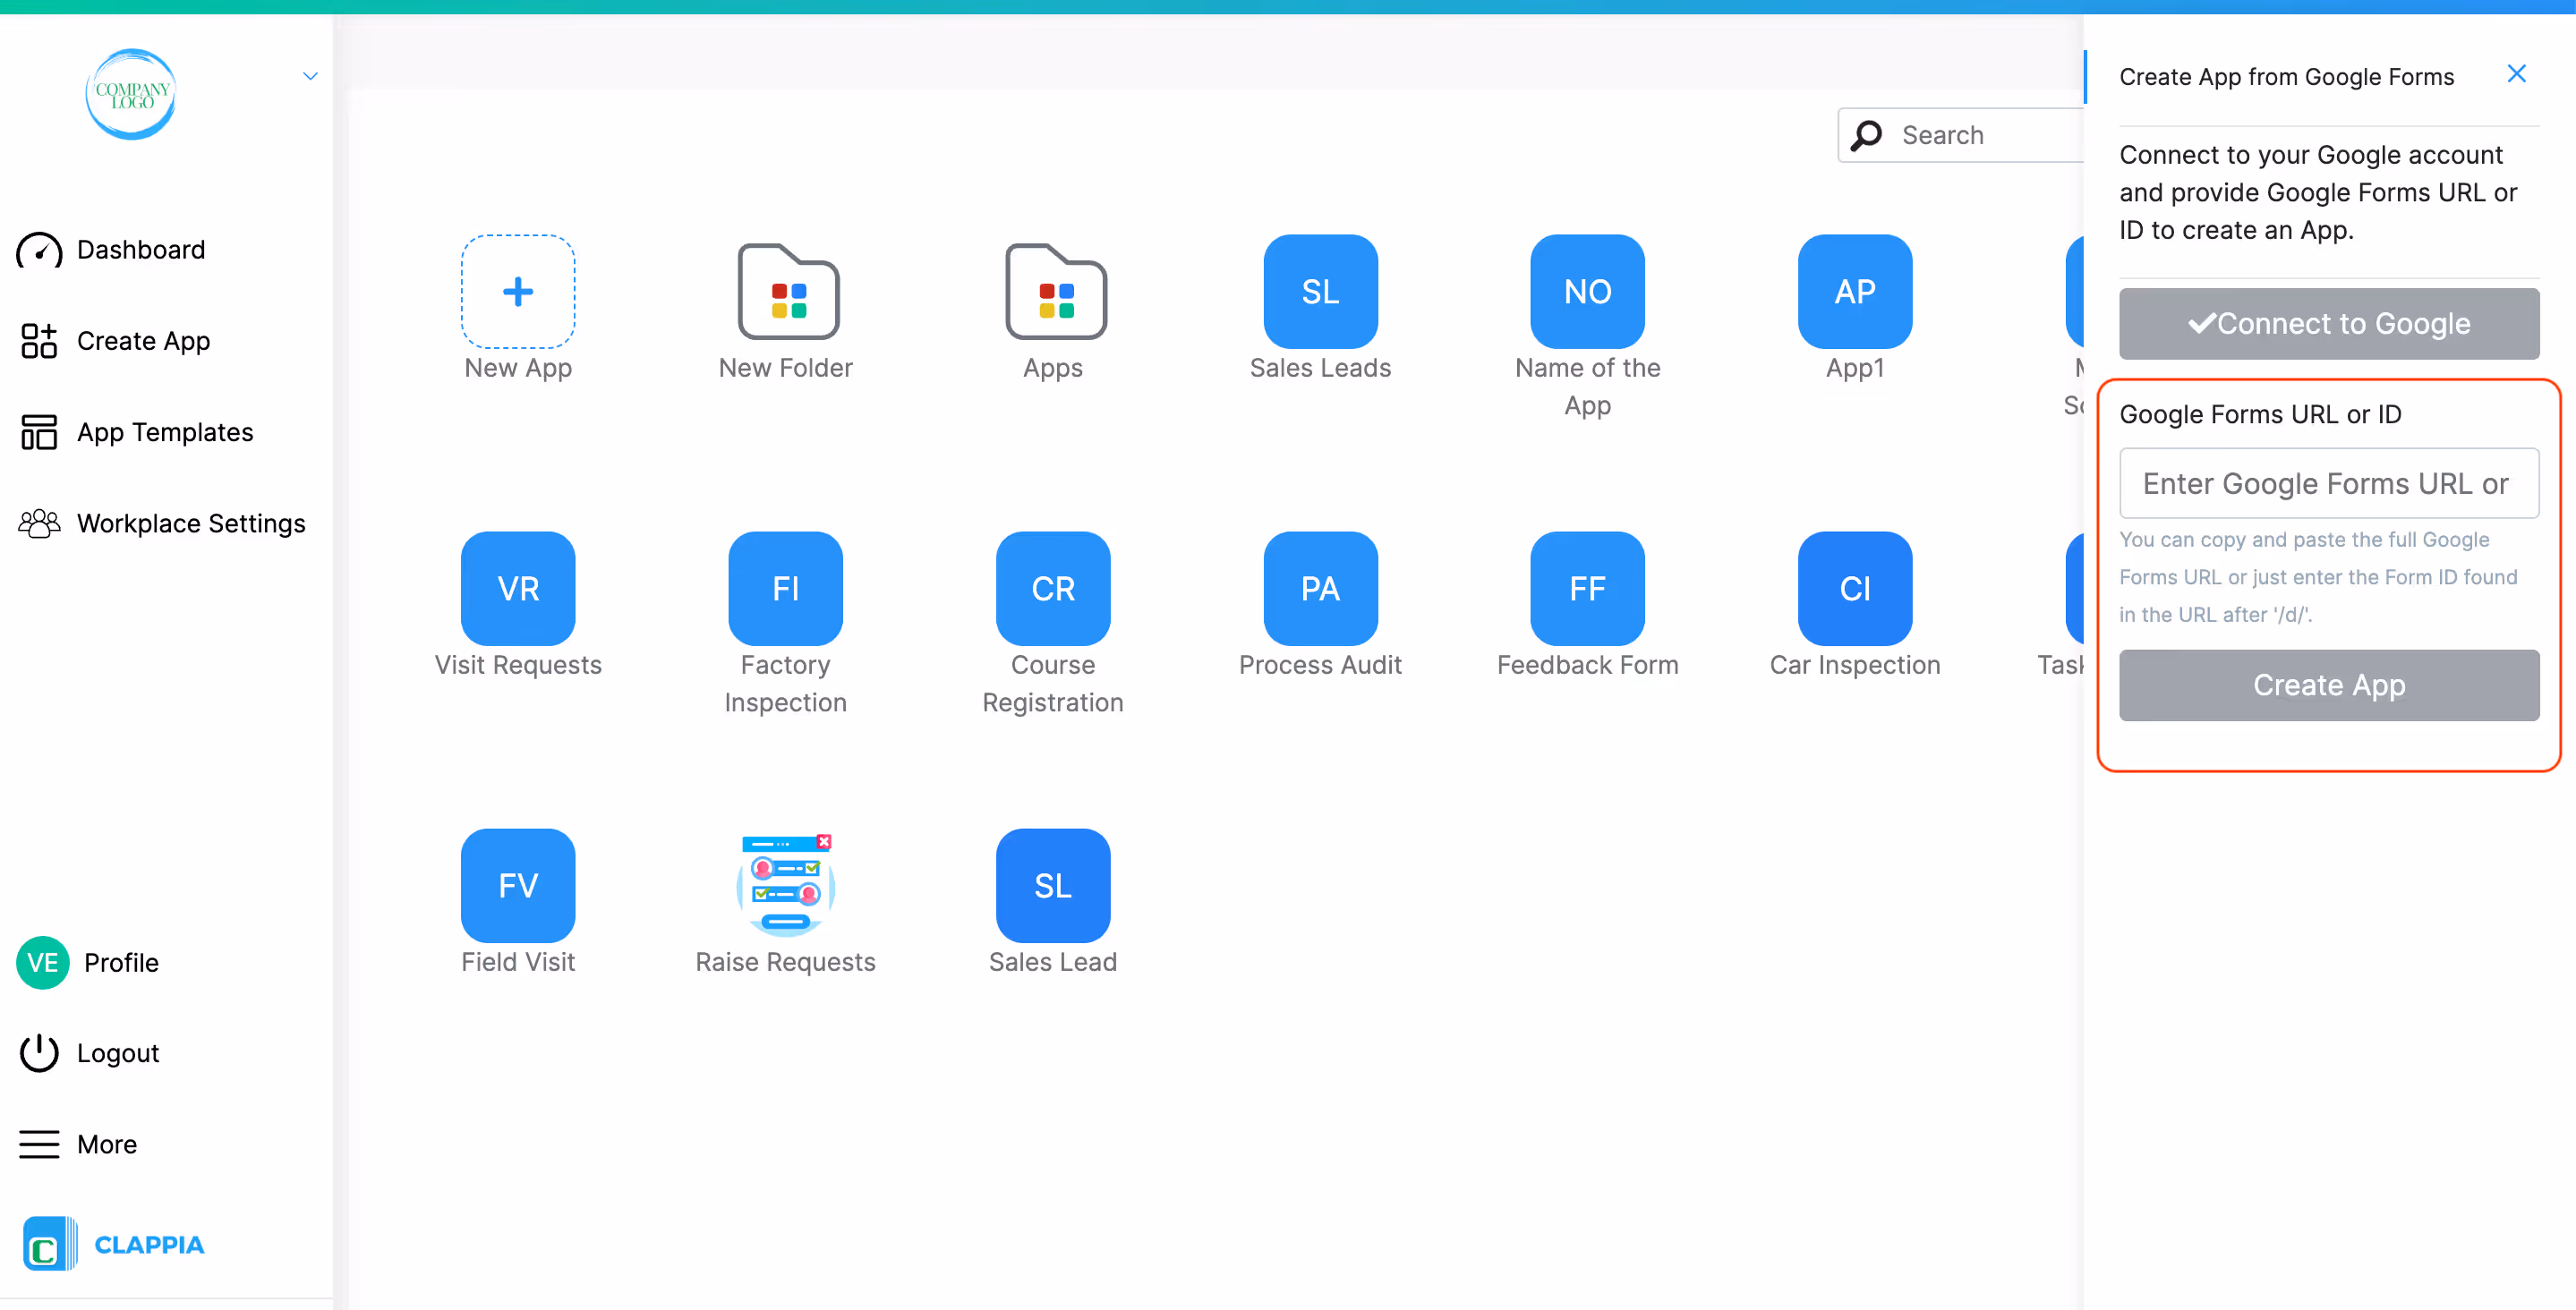
After connecting to Google, you will see a field to enter the Google Forms URL or ID. Go to your Google forms.
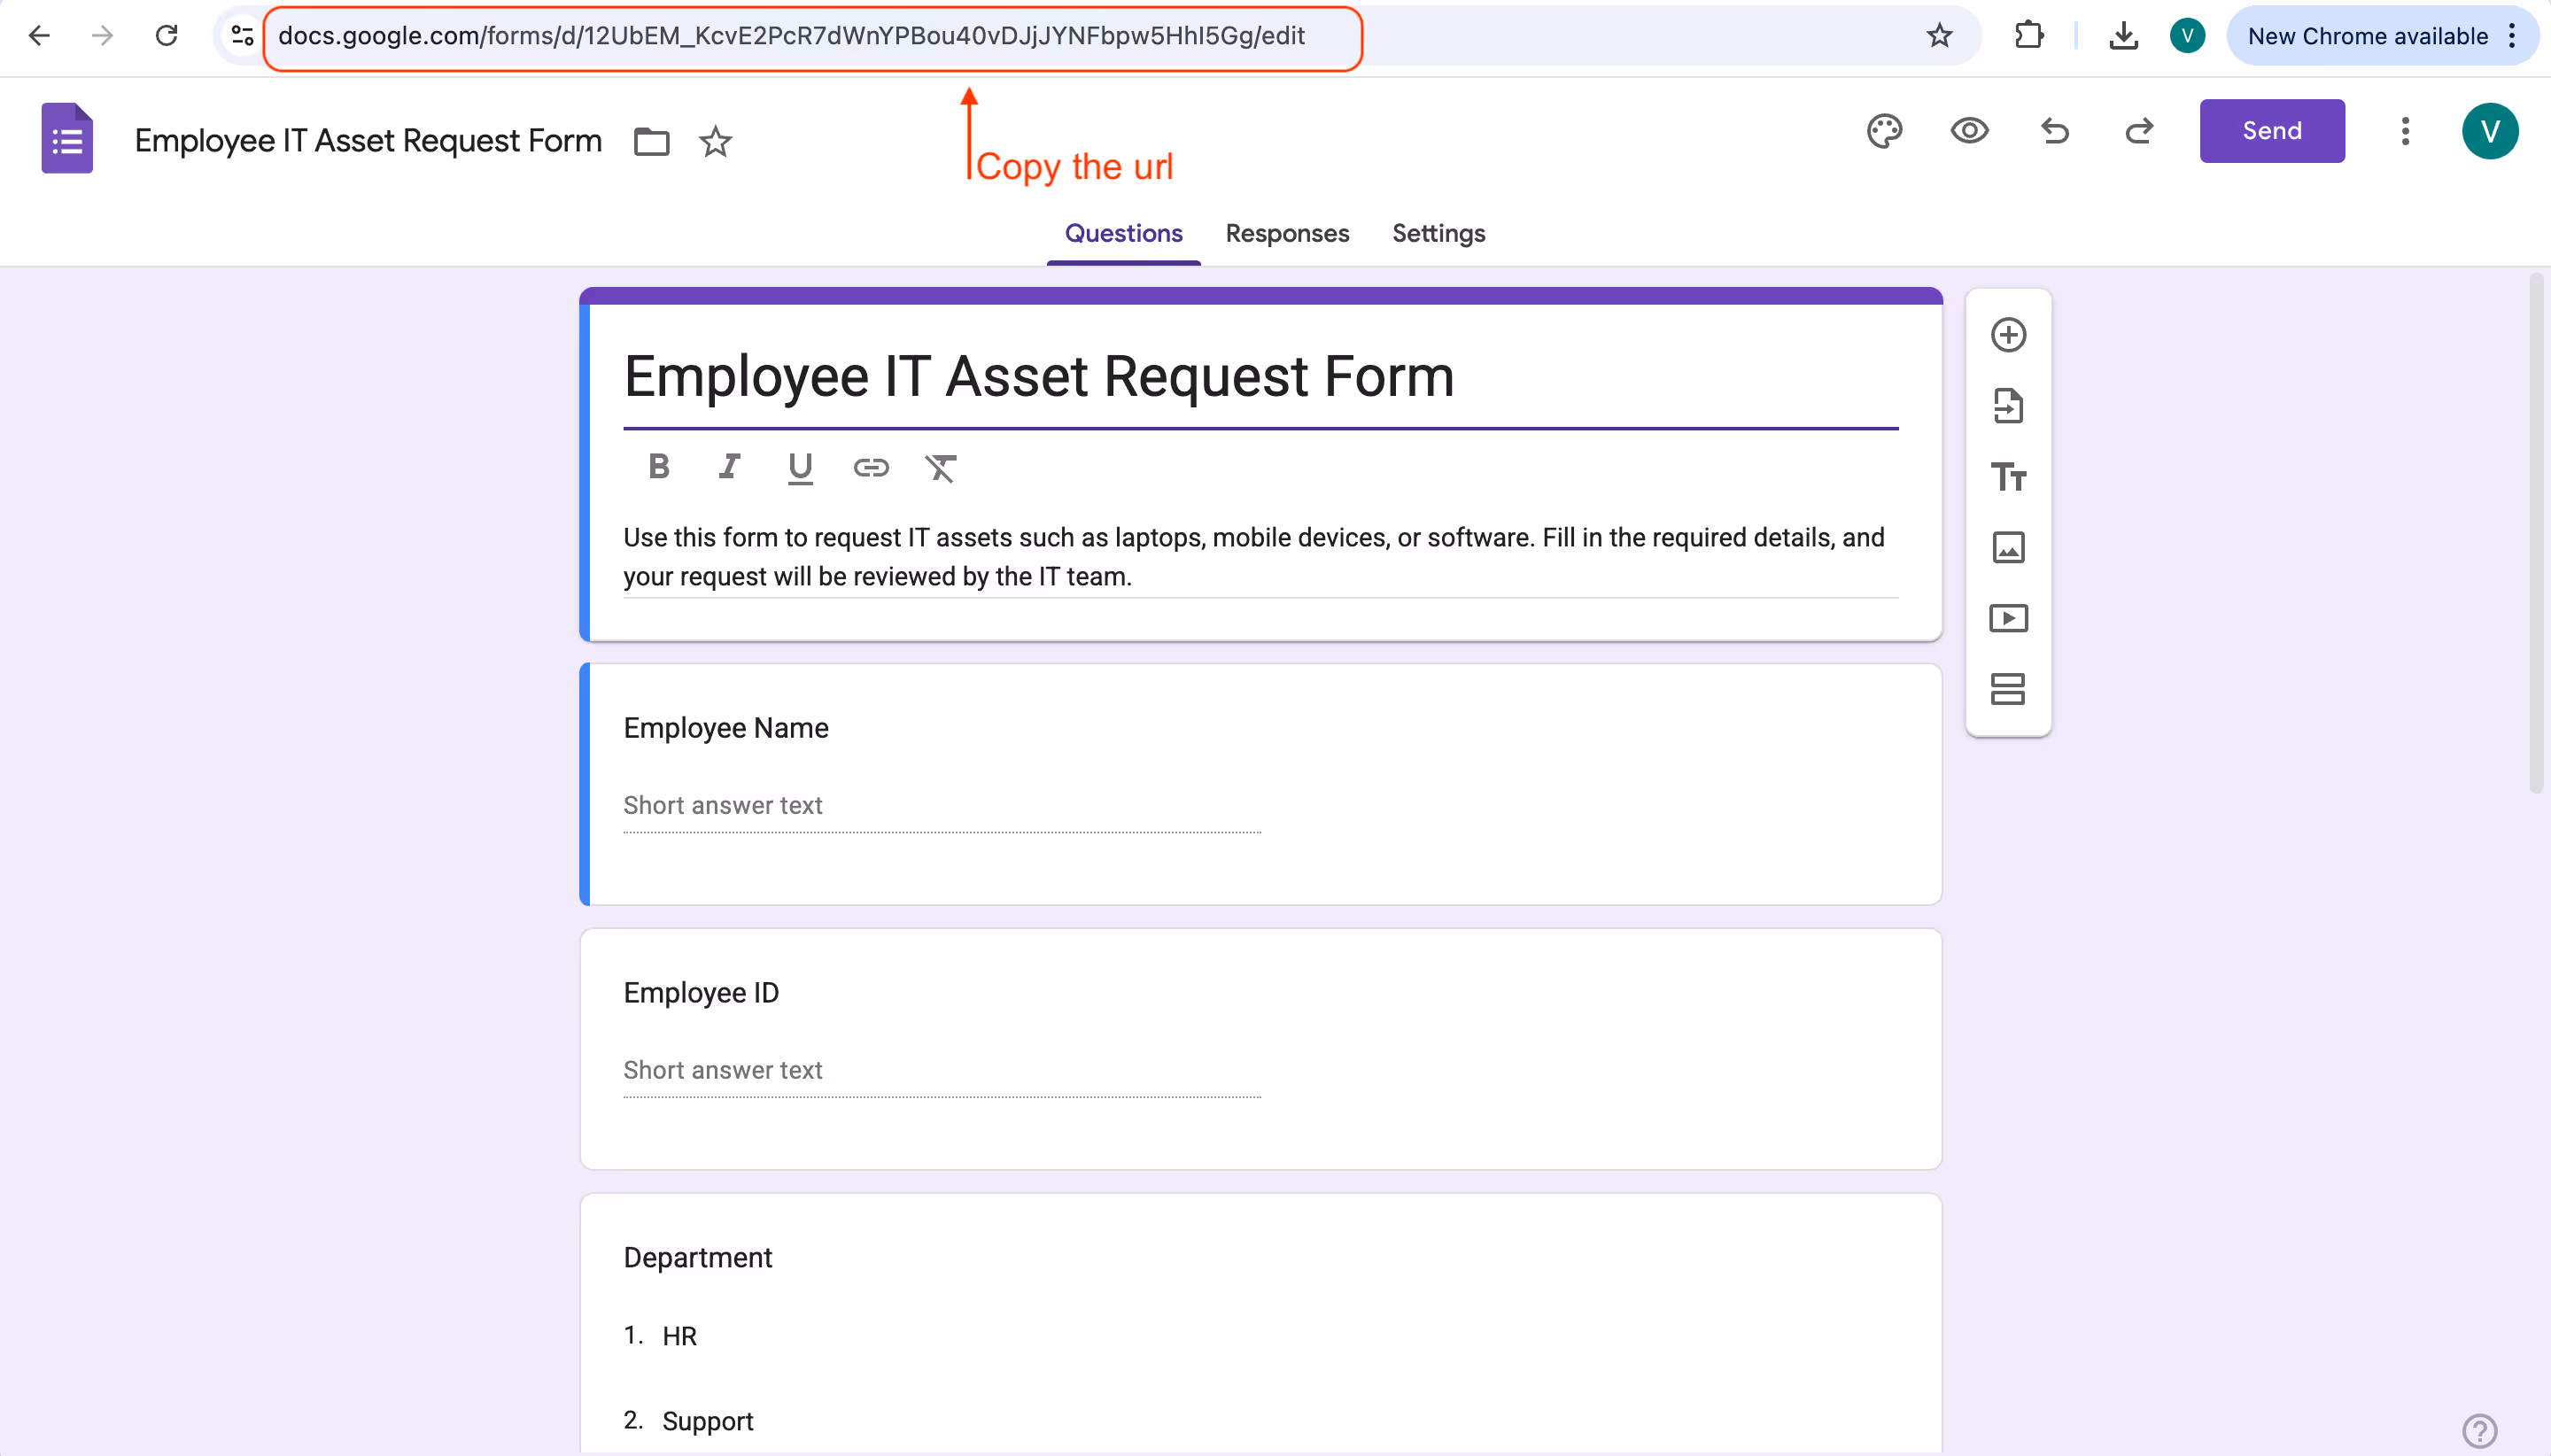
Copy the URL of your Google Form or extract its unique ID.
Note: Do not use shared or shortened links. If you click ‘Send’ in Google Forms and generate a shared link or use the shortened URL, these links will not work in Clappia. The app creation process requires the full URL that appears when you have editor access.
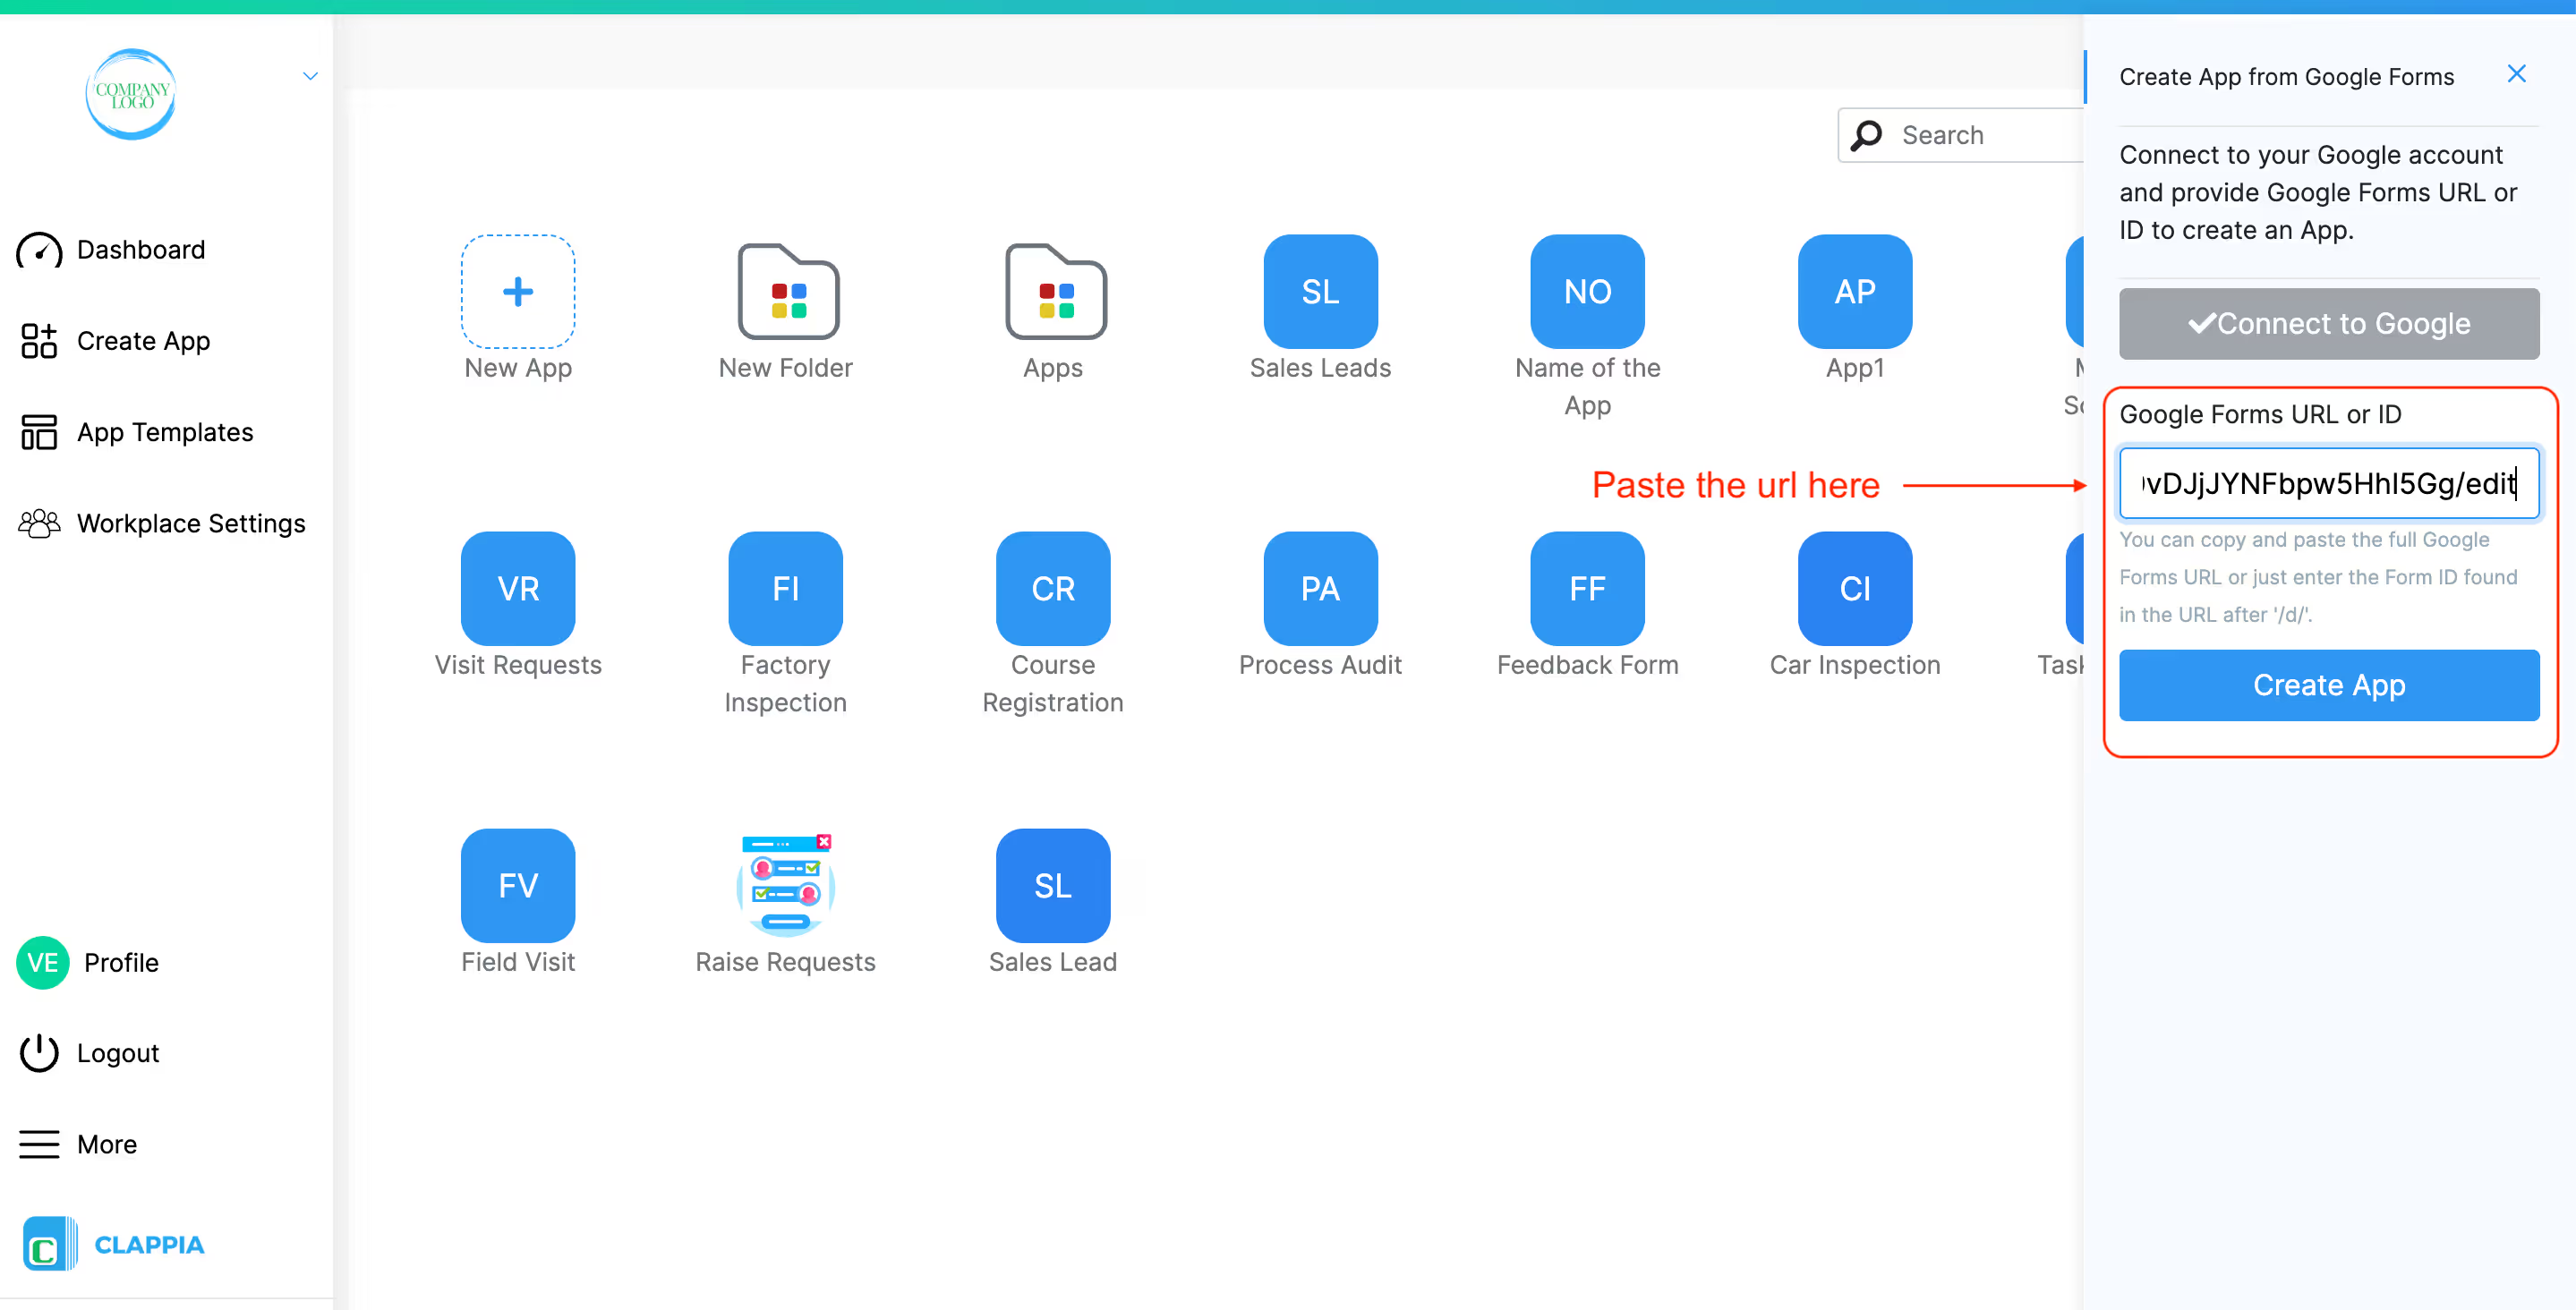
Paste it into the provided field. Click on Enter to create the app.

Once the Google Form is linked, Clappia will instantly create an app based on its structure.
The following table shows how Google Forms fields are converted into Clappia fields:
After the app is created, you can go to the Design App tab to modify its structure.
Once customized, your app is ready to use, and users can access it on the web or through the Clappia mobile app.
Note
Any changes made to the original Google Form after the app has been created will not be reflected in the Clappia app. If you want to include updates from your Google Form, you will need to create a new app using the updated form.

L374, 1st Floor, 5th Main Rd, Sector 6, HSR Layout, Bengaluru, Karnataka 560102, India

3500 S DuPont Hwy, Dover,
Kent 19901, Delaware, USA


3500 S DuPont Hwy, Dover,
Kent 19901, Delaware, USA
L374, 1st Floor, 5th Main Rd, Sector 6, HSR Layout, Bengaluru, Karnataka 560102, India
.svg)
