Once you have created an app and submitted some data, you can access and view your submissions. There are instances where certain fields or columns may not be required or are unnecessary to be seen when viewing all submissions together.
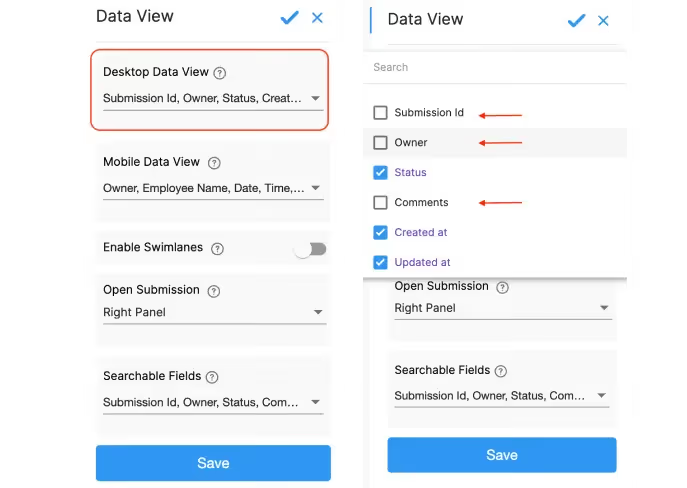
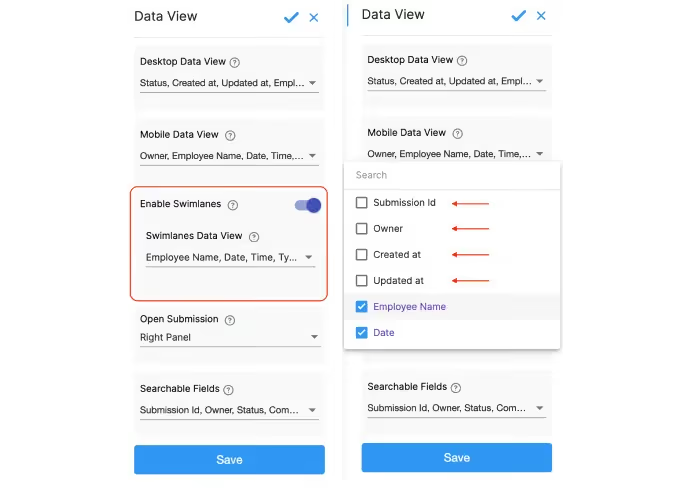
Once you have created your app, and submitted some data, navigate to the Submissions tab to view all submissions. Let’s say, for example, the ‘Submission ID’, and ‘Owner’ columns are not required in the desktop view.



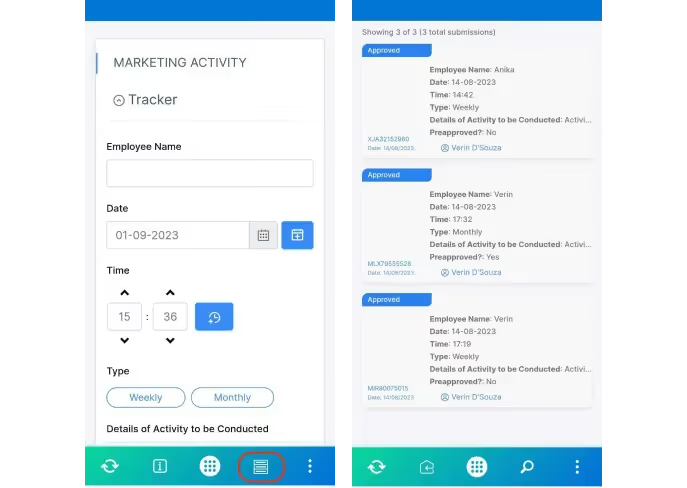

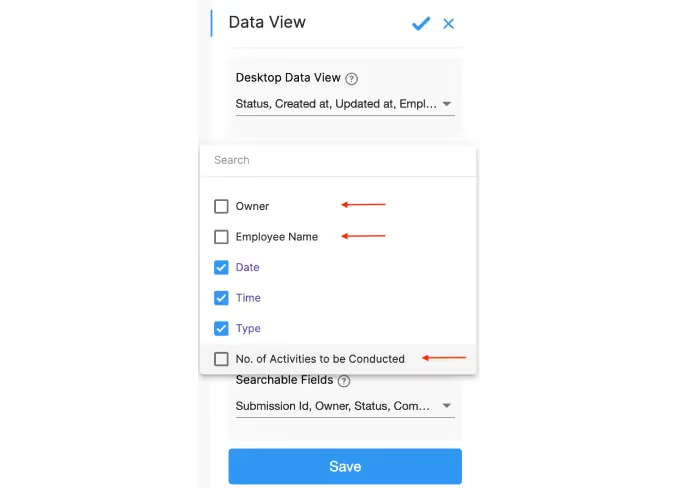
The mobile app will now not show these columns in the submissions tab.
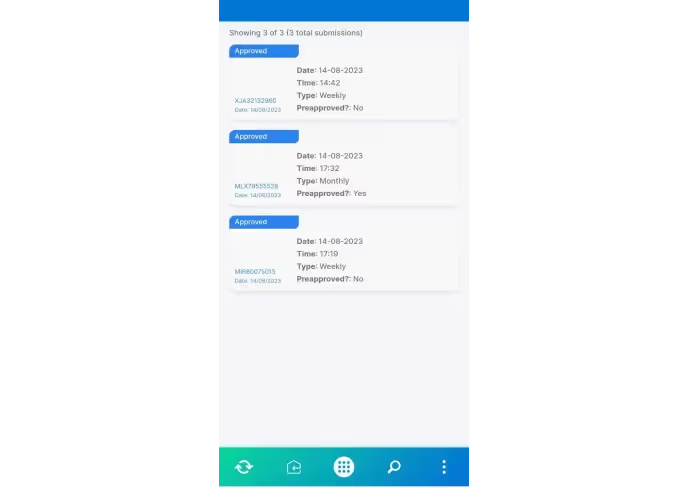
Note: You can select up to 10 fields from the App that will appear in the Submissions tab of the Mobile App.
Rearranging columns in the standard view of the Submissions tab through the Data View option is not currently supported. You also cannot drag-and-drop or reorder columns in the Submissions tab.
If you need to change the column order, you must do it from the Design App section where the fields were originally added. Simply drag and drop the fields before or after any other field as needed. The order you set there will be reflected in the Submissions tab.
In the Submissions tab, you can view submission data under different statuses configured in your app. This is possible only if you have configured your app to have statuses. Click here to know how to configure statuses for an app.



You can click on the icon again to revert to the previous view if you wish.
Since submissions in swimlane view are sorted based on statuses, you can reorder the status columns to prioritize important ones:

Go to Design App > Configuration > Status. Hover over the dotted icon next to each status and drag and drop them into the desired order.

The new order will be reflected in the swimlane view, ensuring that important statuses appear first.

In the Submissions tab, by default when a submission is opened to view its details, a right panel appears. This format allows users to review data without leaving the main submissions page.

You can change this to a Modal view that opens submissions in a centered, overlay window for a more focused view as shown below.

Go to Design App tab > Configuration > Data View. In the Data View’s right panel, click on Open Submission. Select between two viewing options: Right Panel or Modal.
If Modal is selected, then in the Submissions tab, when a submission is opened, it will be opened as the centered overlay window.
Control which columns are searchable within the Submissions tab. By adjusting Searchable Fields in Data View settings, you can specify which columns users can filter or search through in the submissions list. Unselecting a column here will prevent users from using that specific column for search purposes, providing greater control over how data is accessed and viewed.
To filter through submissions in the Submissions tab, click on the search bar at the top.

Click on All Fields to see which columns can be used to filter the submissions. By default, all fields are visible.


Let’s say the submissions need to be filtered by the column named “Preapproved” as shown below.

It yields the following results.

If you want to restrict certain fields to filter submissions with, then in Design App tab > Configuration > Data View, on the right panel click on Searchable Fields.

Select the fields you want to be able to filter the submissions with. Let’s say only the “Date field is selected here.
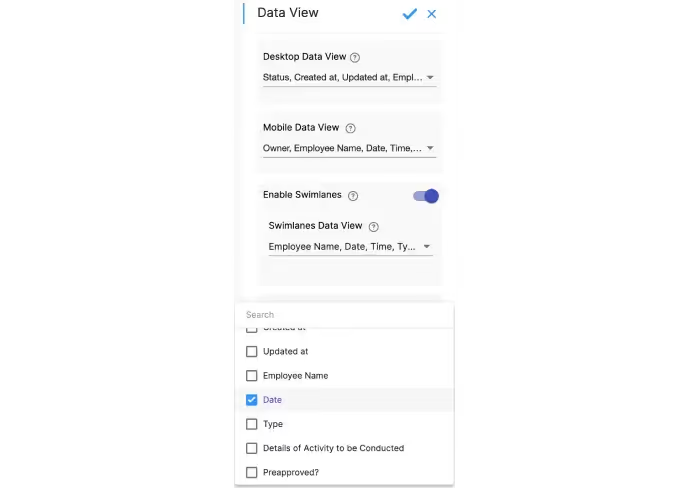
In the Submissions table, if submissions are to be filtered, only the date field is available (and archived submissions by default).


L374, 1st Floor, 5th Main Rd, Sector 6, HSR Layout, Bengaluru, Karnataka 560102, India

3500 S DuPont Hwy, Dover,
Kent 19901, Delaware, USA


3500 S DuPont Hwy, Dover,
Kent 19901, Delaware, USA

L374, 1st Floor, 5th Main Rd, Sector 6, HSR Layout, Bengaluru, Karnataka 560102, India

