Insert background images in PDFs generated through the Print Settings feature. This allows for custom branding, watermarking, or overlaying designs on the generated documents. Users can choose between static background images (fixed images) or dynamic background images (images pulled from app submissions).
If you would like to know how to set up PDFs for your submissions, check out this help guide: Dynamic Printing
Use Cases for Background Images in PDFs
Branded Reports – Add company letterheads or logos as a background.
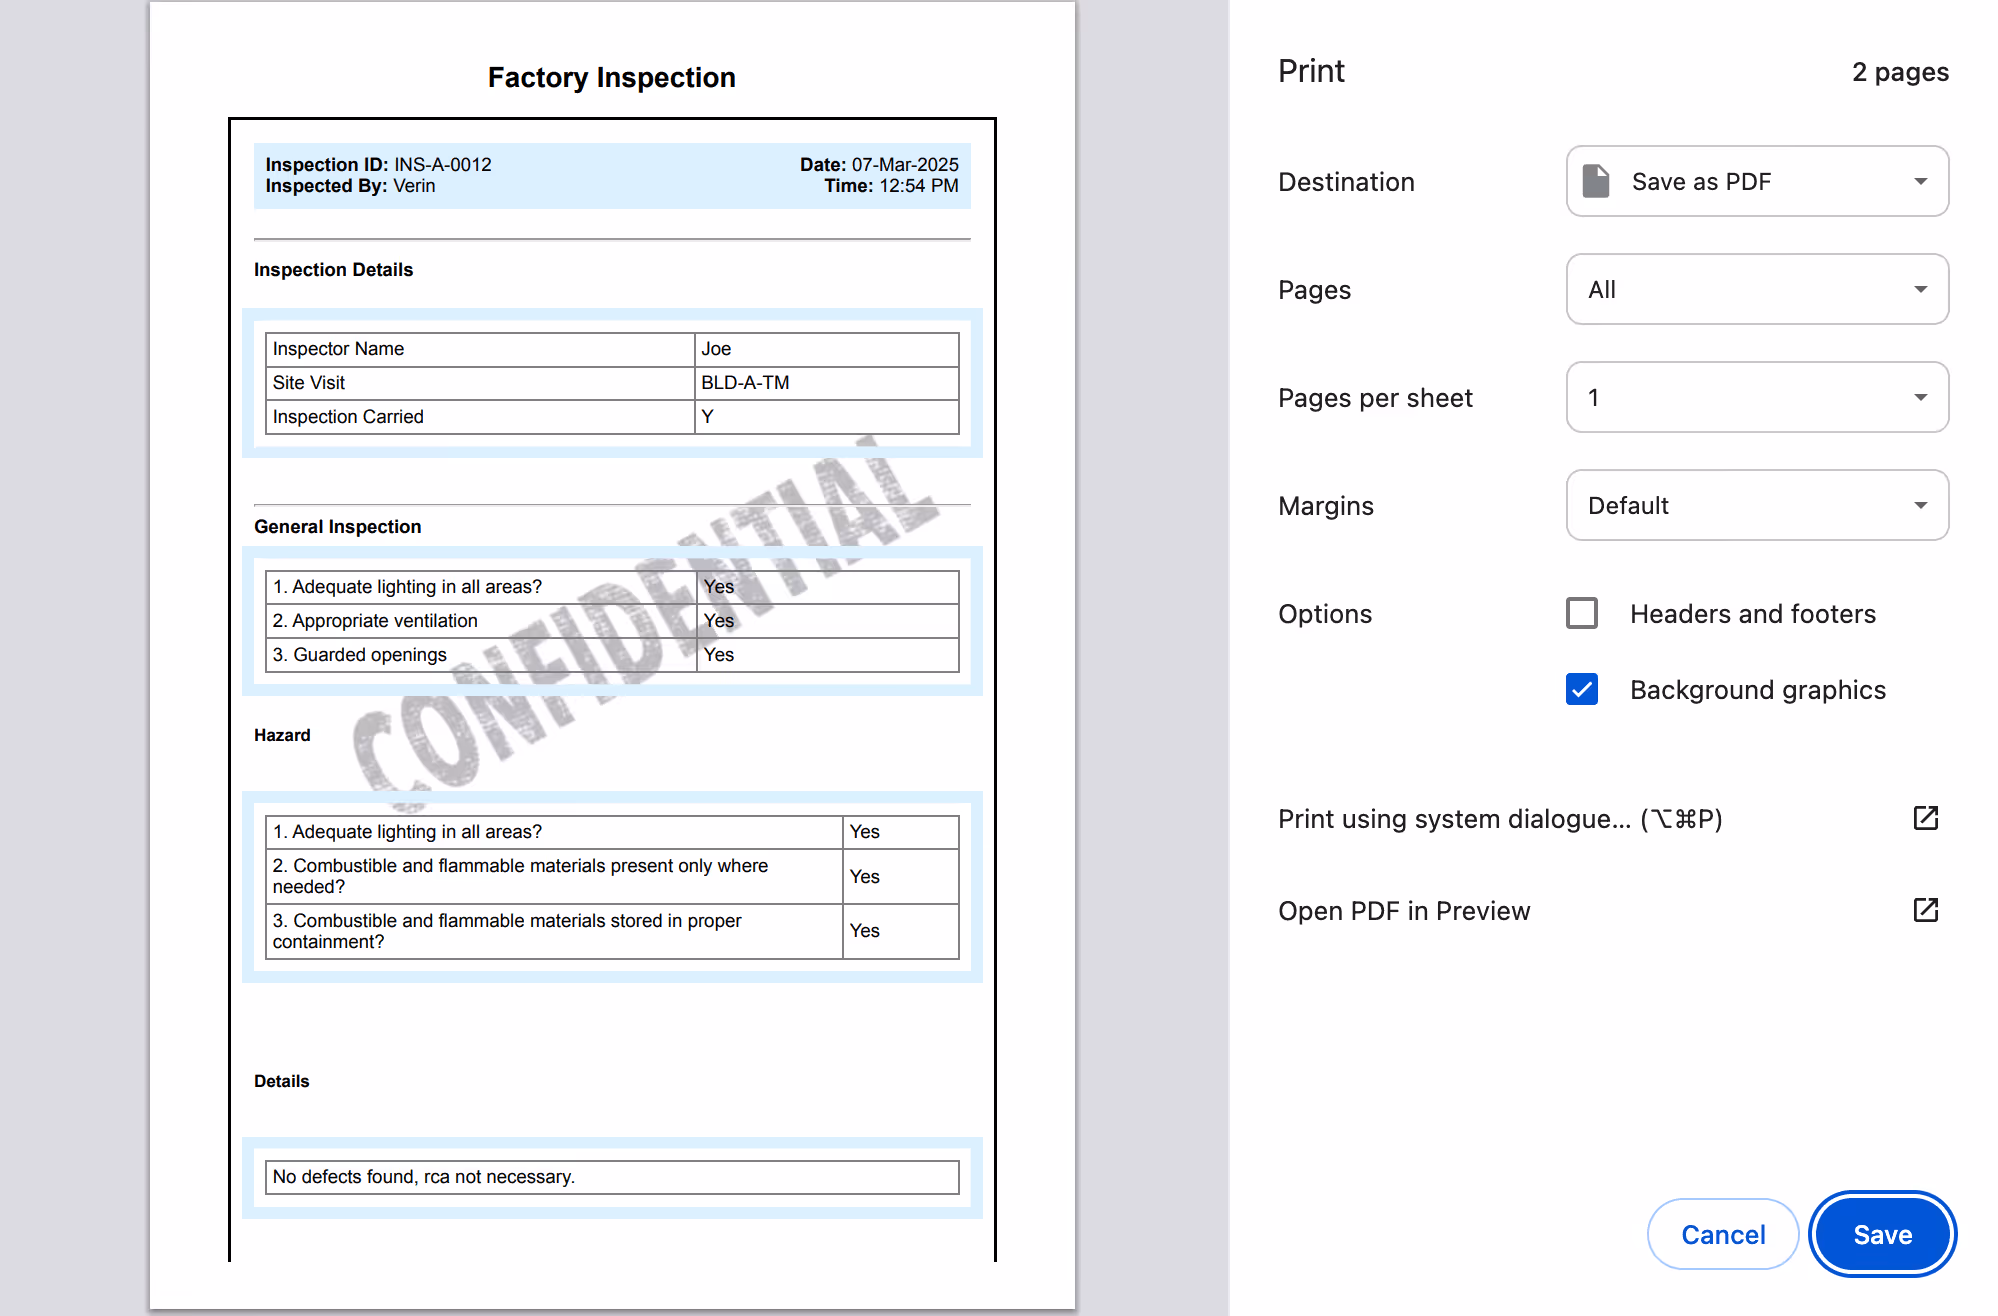
Watermarks – Overlay a watermark (e.g., "Confidential," "Draft") on documents.
Form Templates – Use pre-designed templates as a background for structured documents.
Stamps or Seals – Dynamically insert verified stamps or approval seals based on submissions.
Official Letters – Maintain the original document format by using scanned letter templates.
How to Add a Background Image in PDFs
Step 1: Access Print Settings
In the Clappia Dashboard, select the app where you want to configure the PDF.
Click on Design App > Configuration > Print Settings.
A right panel will appear. Click on Add print template or select an existing template by clicking the pencil icon (edit).
A pop-up window will open, allowing you to design the template.
Step 2: Insert a Background Image
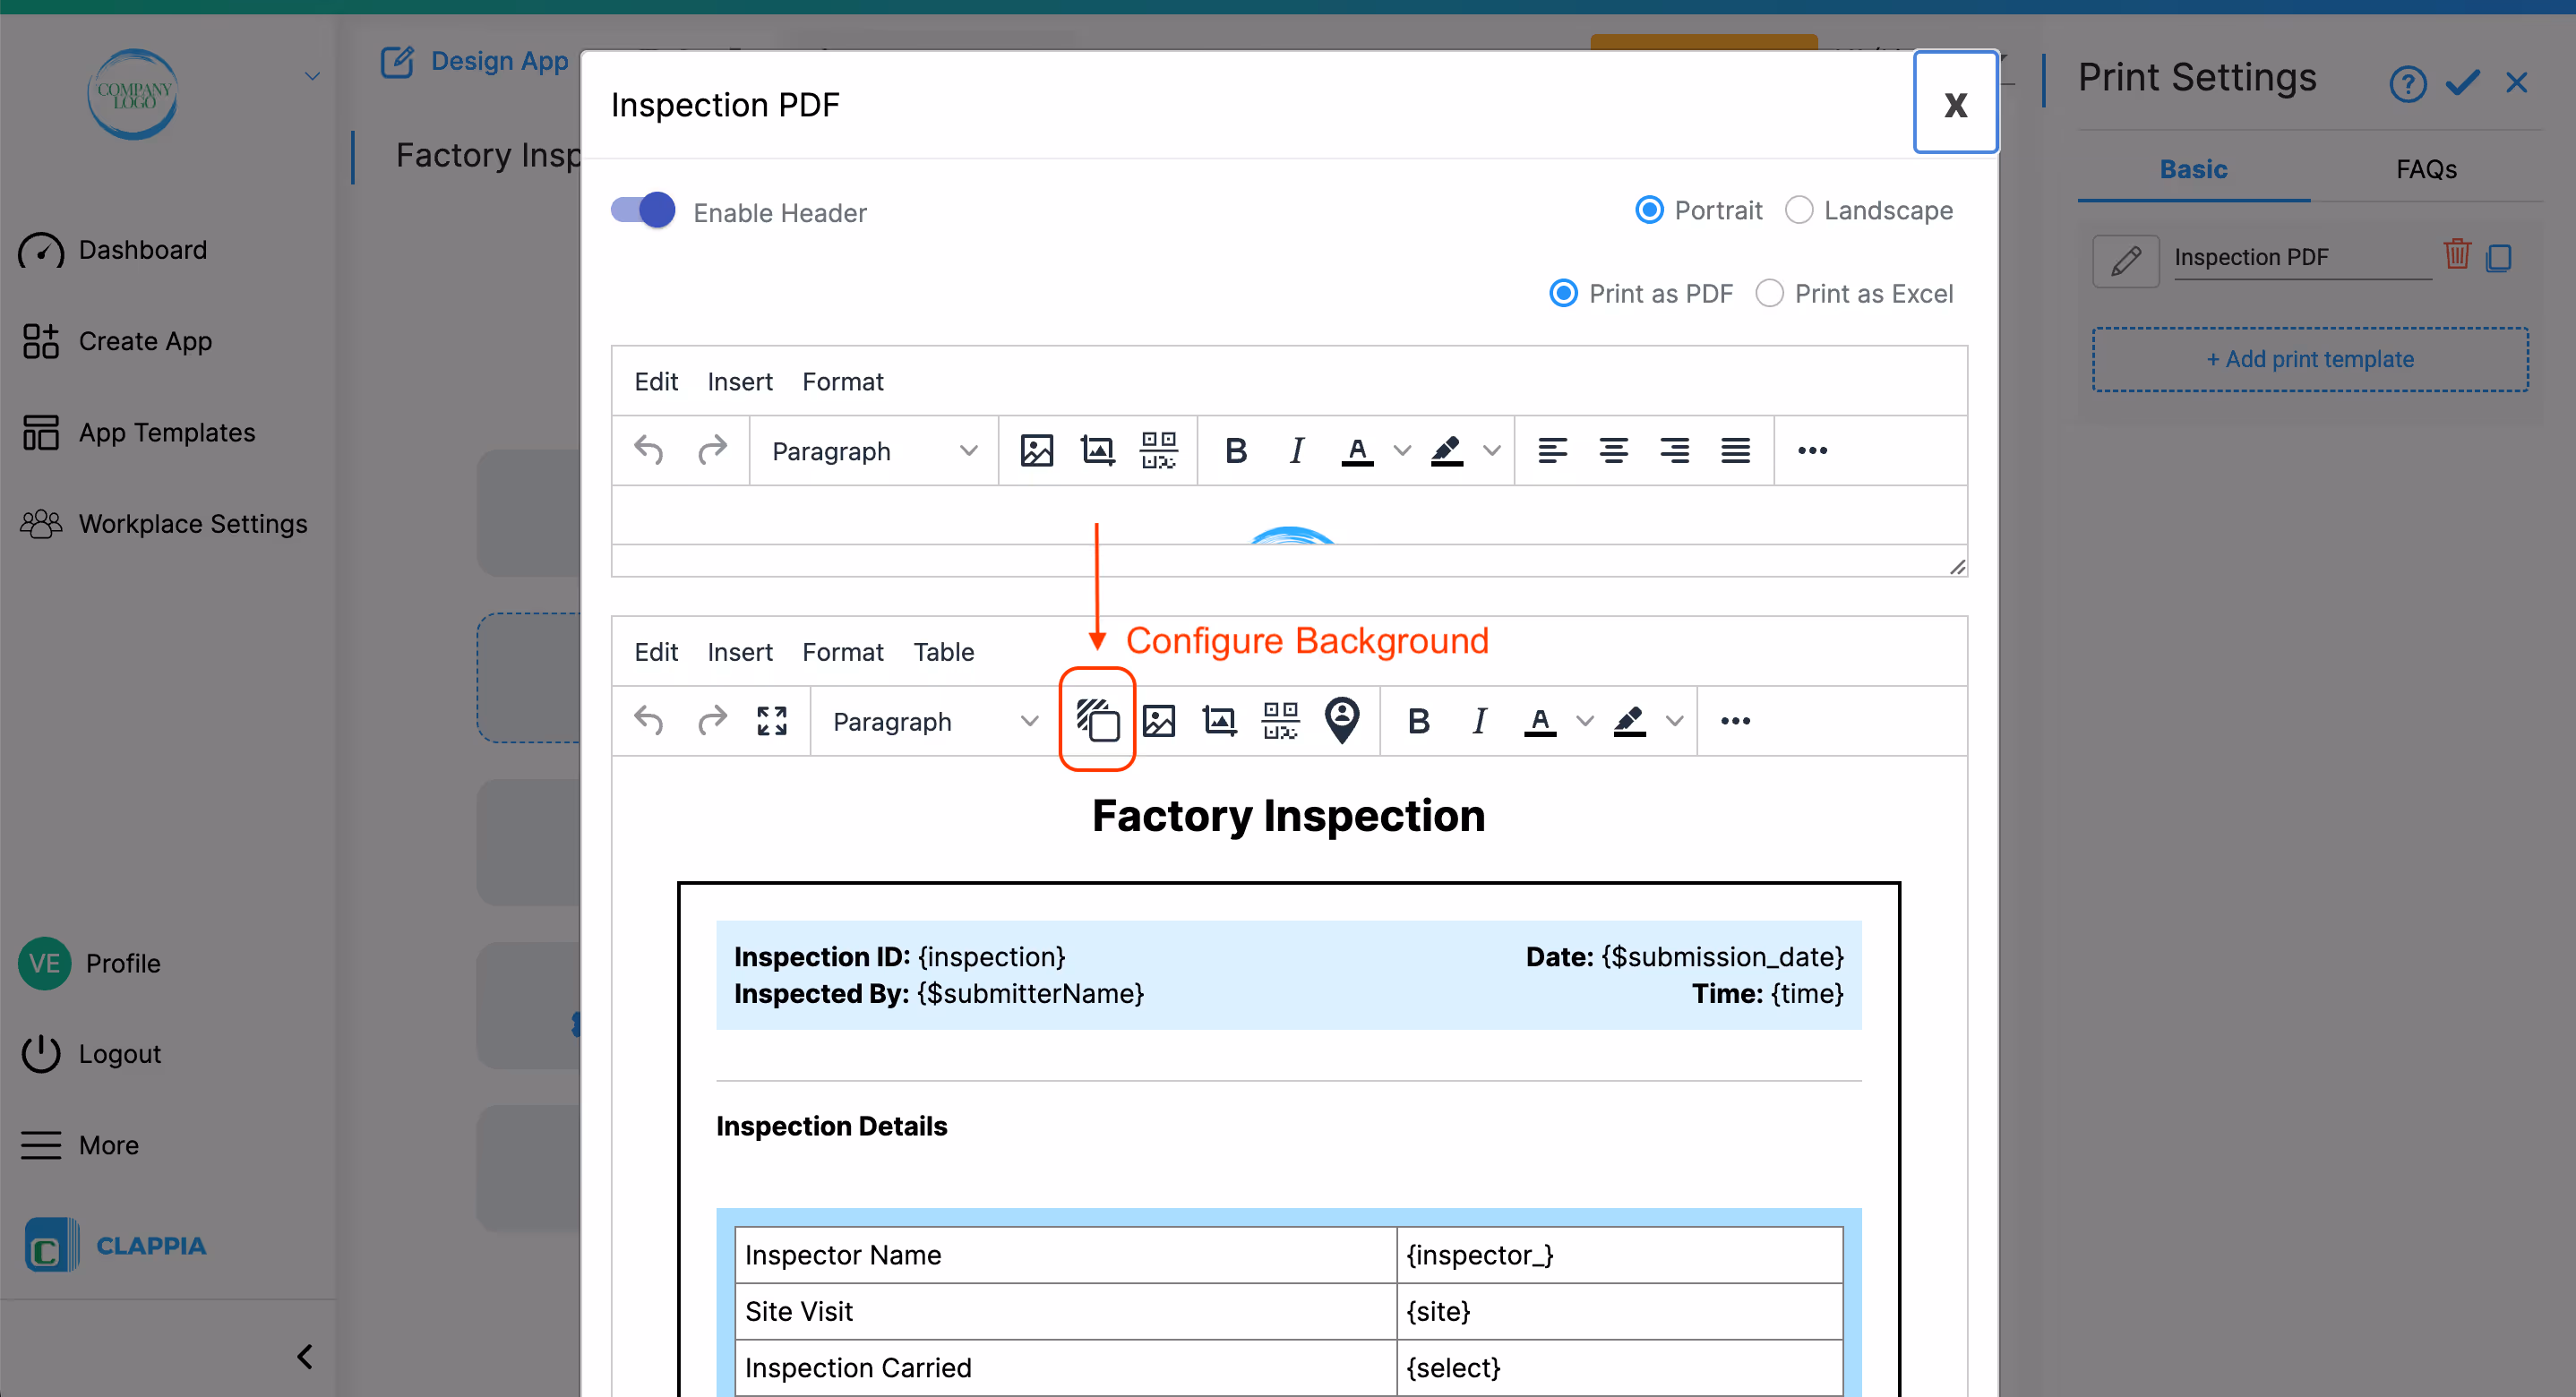
In the print template editor, click on the Configure Background icon from the toolbar.
A window will appear with the following options:
No Background – Keep the PDF background blank.
Static Image – Upload a fixed background image.
Dynamic Image – Use an image dynamically pulled from a submission field.
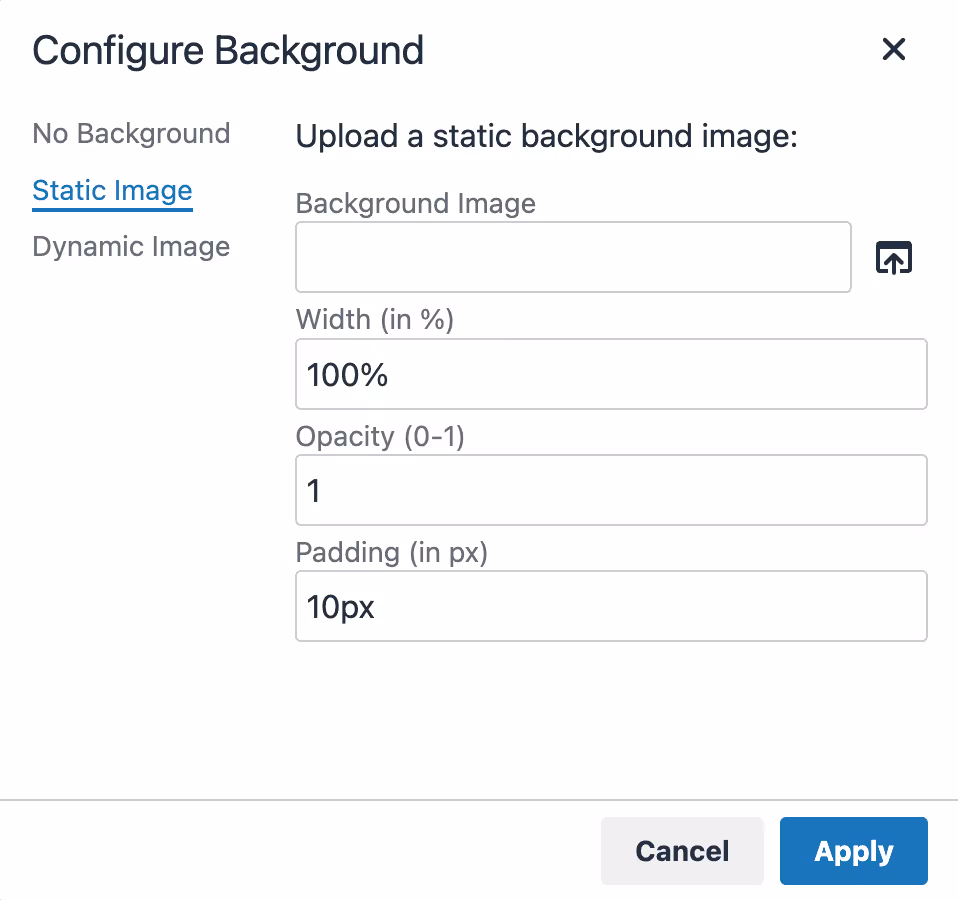
Adding a Static Background Image
A static background image remains the same for all PDF submissions.
Click on Static Image in the Configure Background window.
Upload the image by clicking on the icon next to the Background Image field and selecting the required image from your system.
Adjust the settings:
Width (%): Define how much space the image occupies in the document.
Opacity (0-1): Control the transparency of the image (e.g., 0.5 for semi-transparent watermark).
Padding (px): Adjust the spacing of the background image from the document margins.
Click Apply to save the background settings.
Click Save on the overall print template to save the changes.
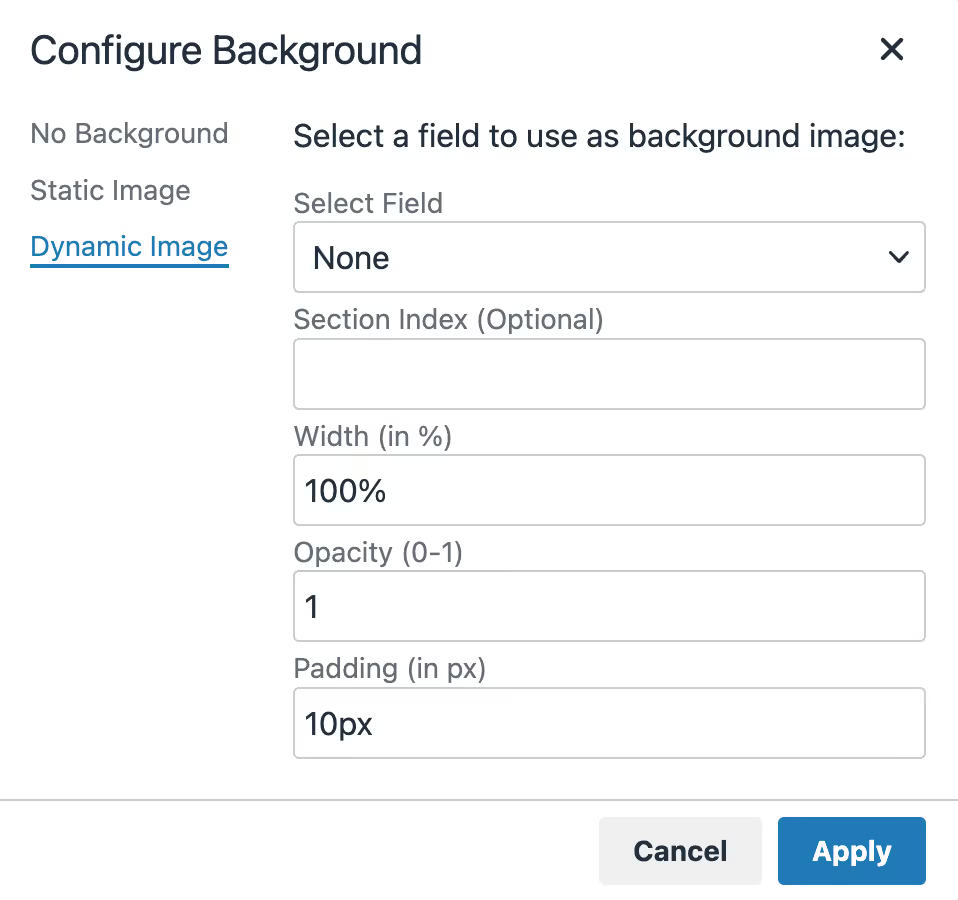
Adding a Dynamic Background Image
A dynamic background image changes based on submission data and can be pulled from an image field in the app.
Click on Dynamic Image in the Configure Background window.
Select the field from which the background image will be sourced (e.g., a Camera, Images & Files block in the app).
(Optional) Enter the Section Index if using a copyable section, to pull an image from a specific section instance. If you have 3 copies of a section and need to pull an image from the first copy, type in 1.
Adjust the settings:
Width (%): Define the size of the background image.
Opacity (0-1): Set transparency for the image (e.g., 1 for full visibility, 0.5 for a watermark effect).
Padding (px): Modify spacing from the document edges.
Click Apply to save the changes.
Click Save on the overall print template to save the changes.
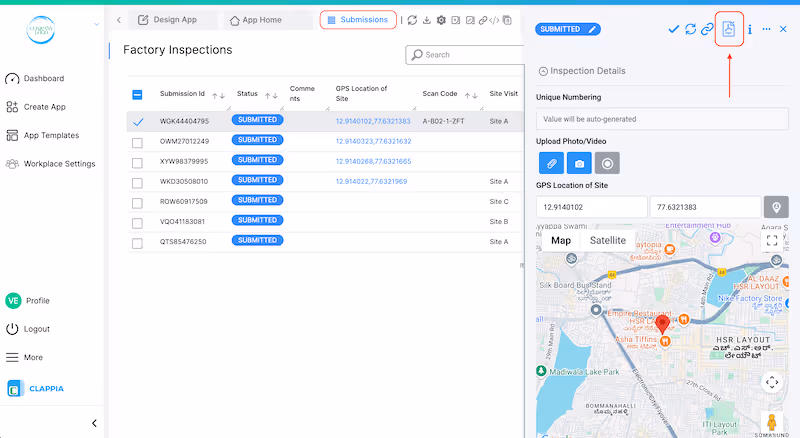
Viewing the Background Image in Generated PDFs
To preview, go to the Submissions tab in the app.
Select a submission and click on the PDF icon at the top of the right panel.
The print preview will display the configured background image.
The PDF can be downloaded or printed as required.
This feature helps maintain document consistency, apply watermarks, and improve the presentation of PDFs generated from Clappia submissions.
FAQs
Try our free plan
It will answer many more questions within just 15 minutes.


.svg)
