

Still need help?

This article explains how to use the Clappia apps on your mobile phone that are created in your Clappia workplace.
If you haven’t created any apps, Click here to create an app or contact your workplace admin or a team member who has created the app.
All the apps created on the Clappia platform can be accessed through the Clappia Mobile App, which can be downloaded from the Google Play Store or Apple App Store. Once you sign in, all the apps assigned to you or created by you are available immediately. No additional setup is required.


1. Apps created on the Clappia platform are immediately available to use on the web and on the Clappia Mobile App for both Android and iOS devices.
2. No need to download the installation files and then host them in the Google PlayStore and Apple’s Appstore.
3. All of your Clappia apps work offline (both Android and iOS). Users can record and submit the data without connecting to the internet. The data gets automatically synced once the mobile phone is connected to the internet.
4. You can assign the app to any user, and they can log in to the Clappia Mobile App to see and use the apps assigned to them.
Create your app in the web version.

Instantly get the app on the mobile device after downloading the Clappia mobile app. All your apps that you create will be visible on the app.

Select the app you want to view or use.

To create a new submission, open the app and fill in the required details. Once completed, click Submit to save the submission.
View your submissions by clicking the Submissions option located at the bottom of the app. The icon is highlighted in the image below.

All submissions submitted by users through both the web and mobile apps will be visible here.

Open any submission to view all the details.

To edit an existing submission, click on the required submission. If the fields are not greyed out, you can modify the field values and save the changes.
If you do not want users to edit certain fields, there are multiple ways to restrict this. The simplest method is to disable editing for those fields. Click here to learn how.
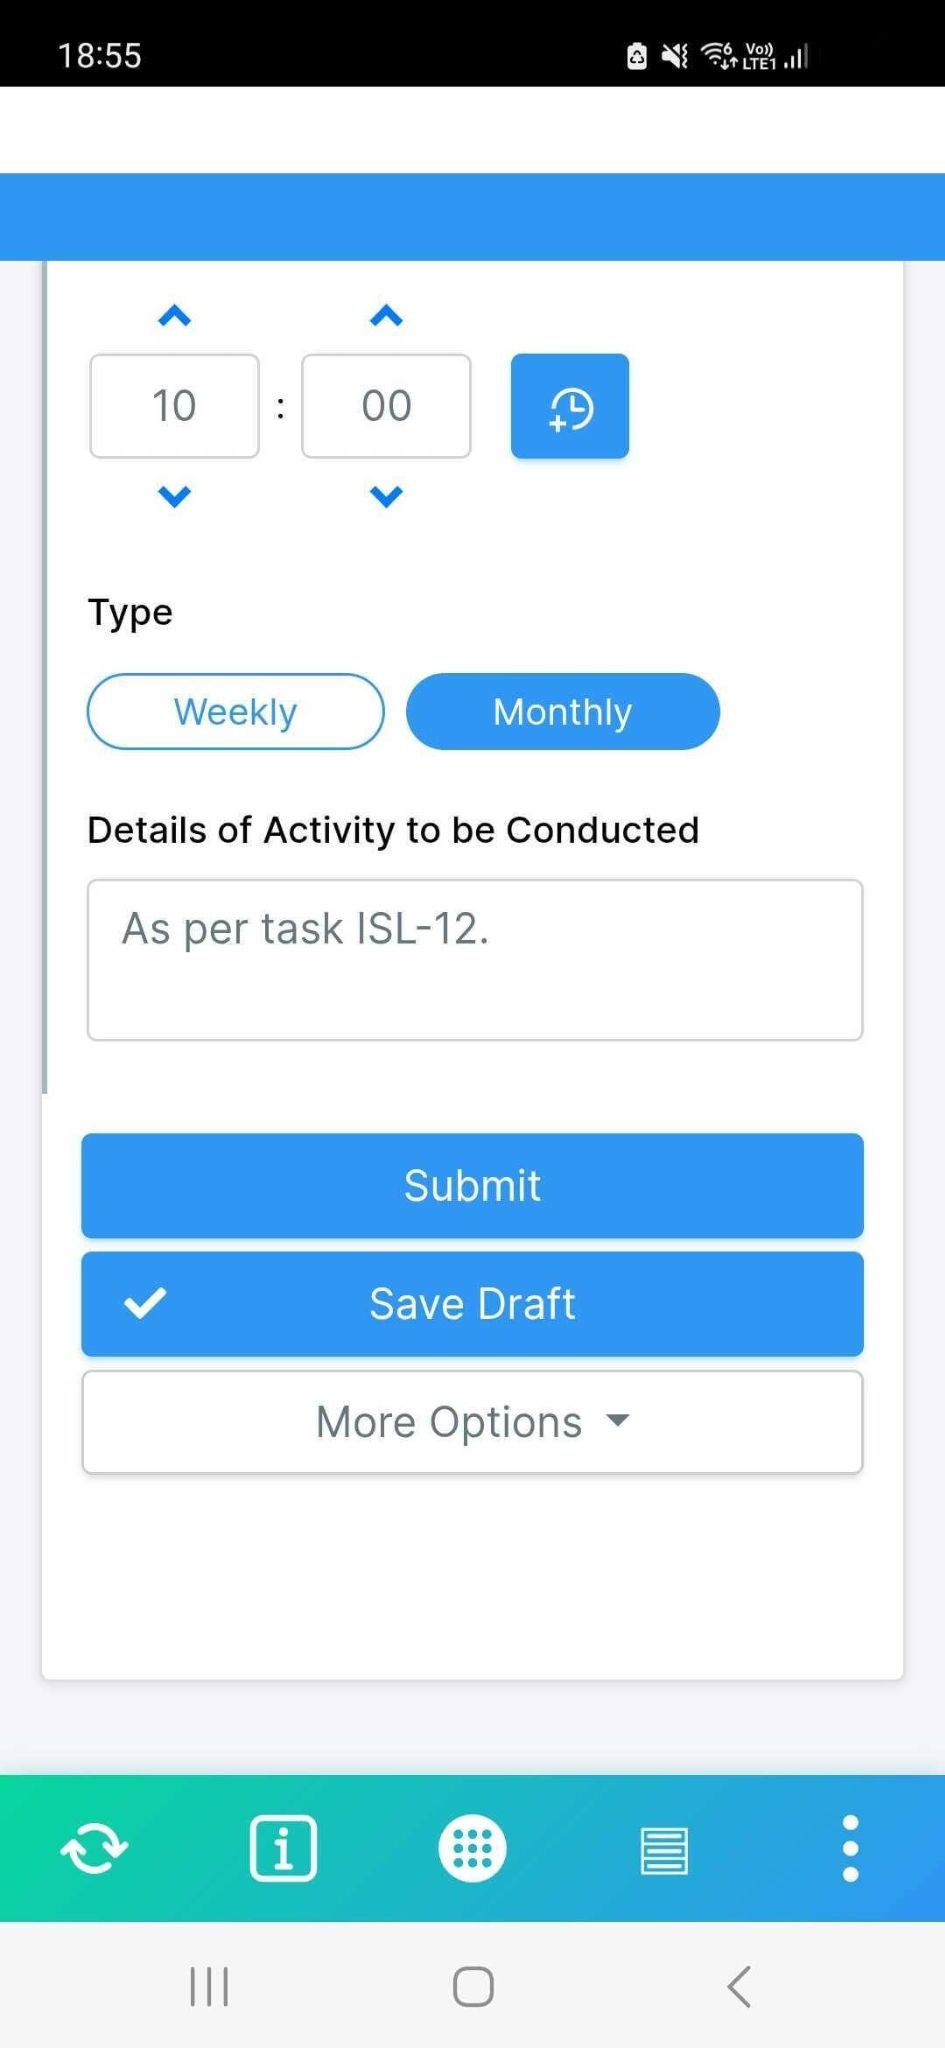
The Save Draft option allows you to partially fill in a form and save your progress without making a final submission. You can also create multiple drafts.
To view your drafts, click the Submissions option.
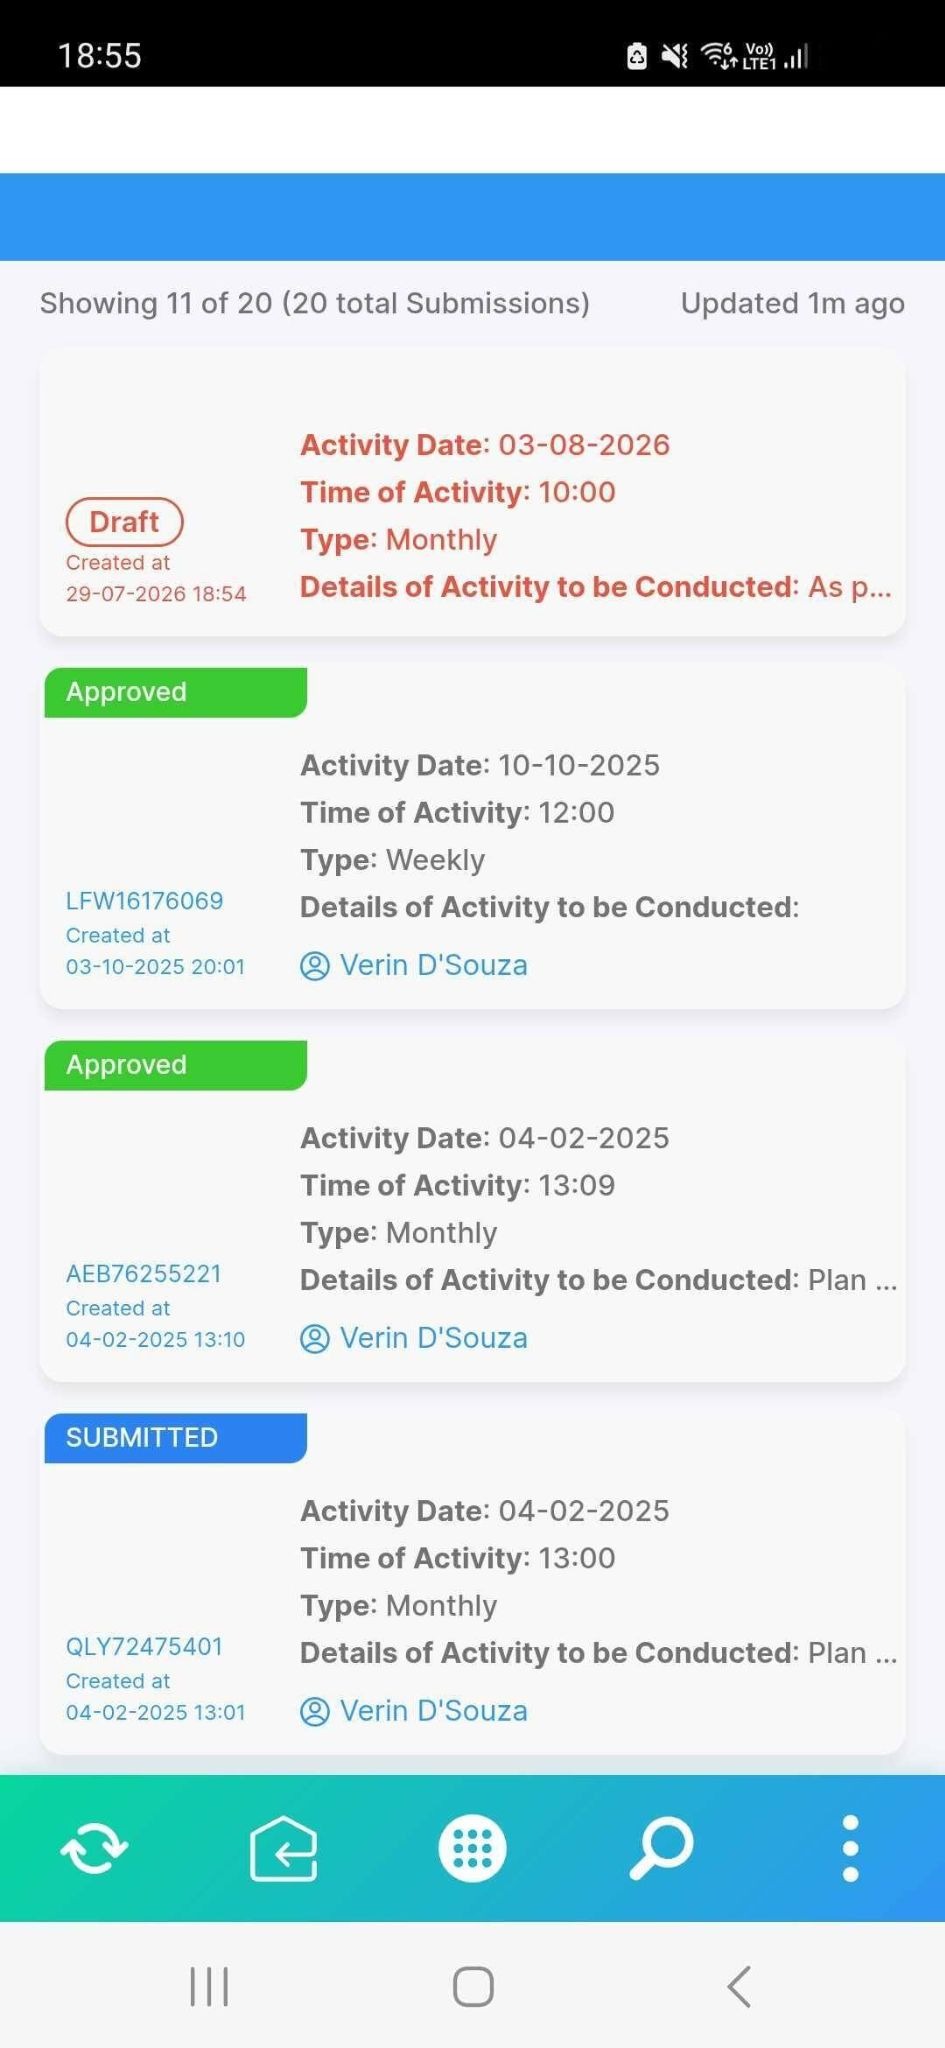
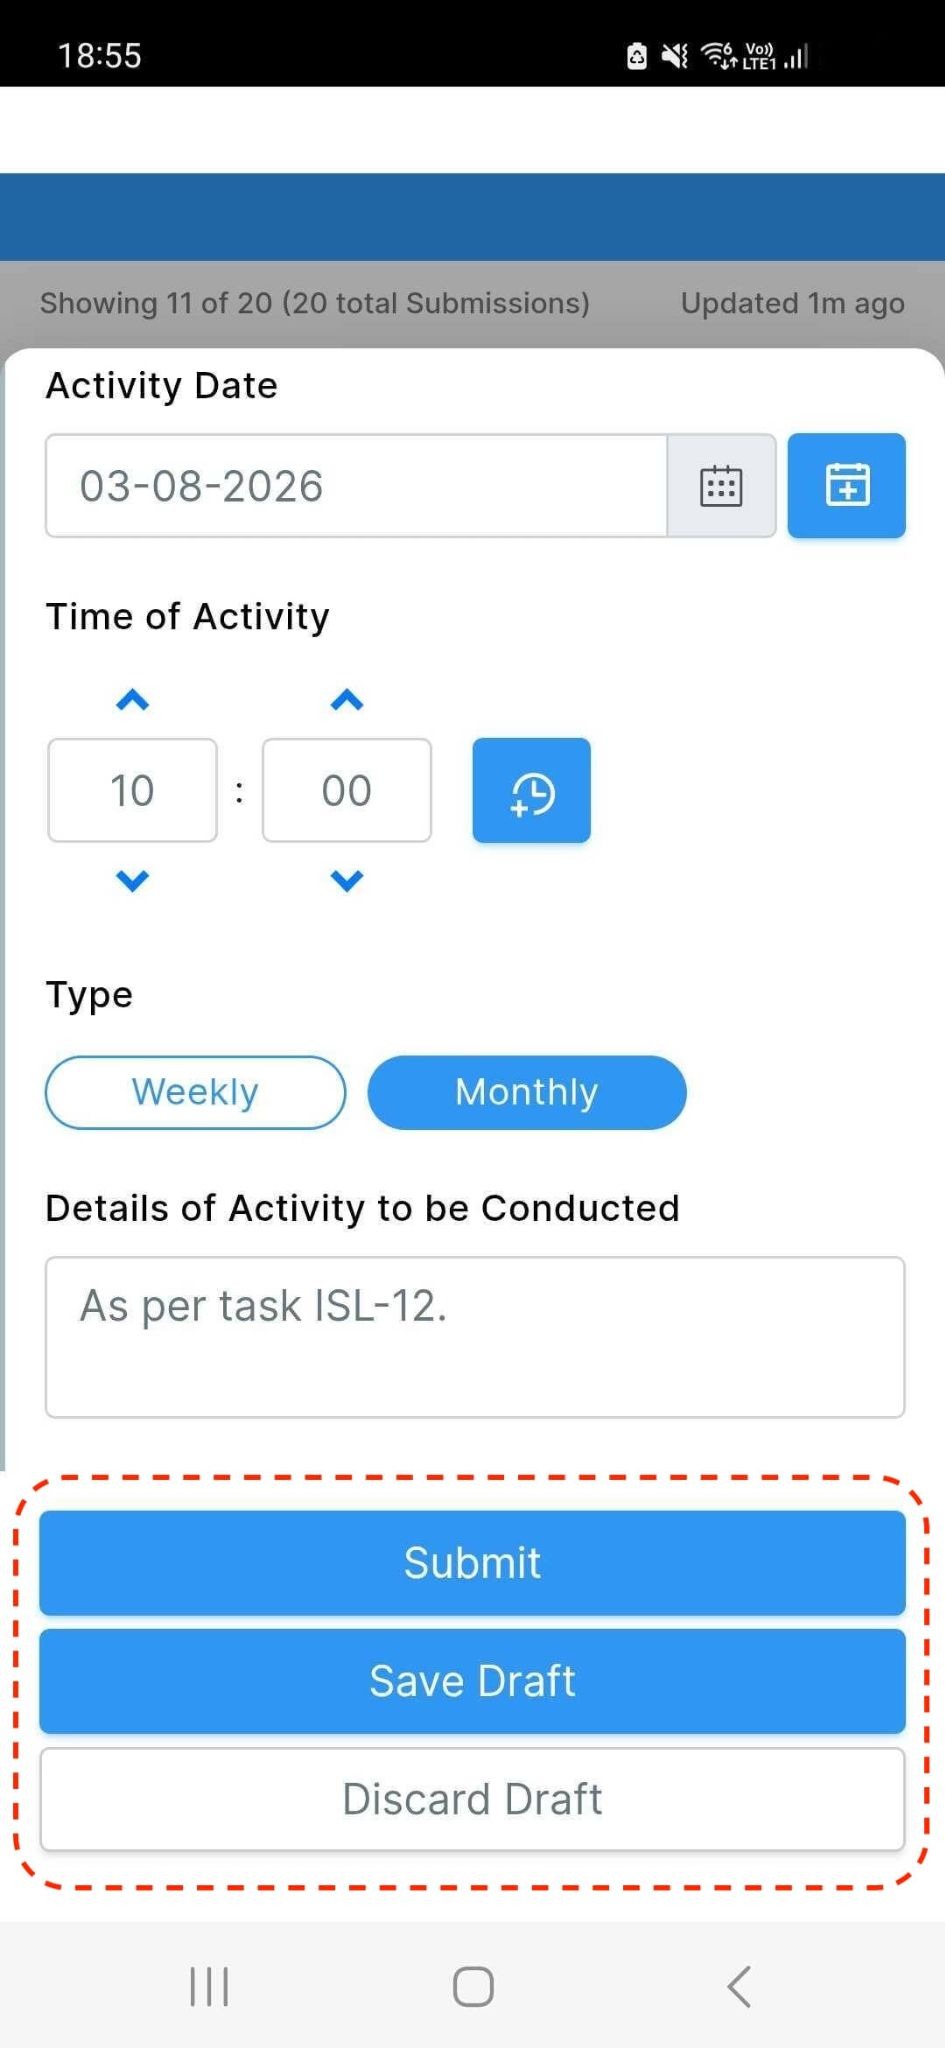
Drafts are clearly highlighted and can be edited, submitted as final submissions, or deleted.
This is located at the bottom of the app or form.
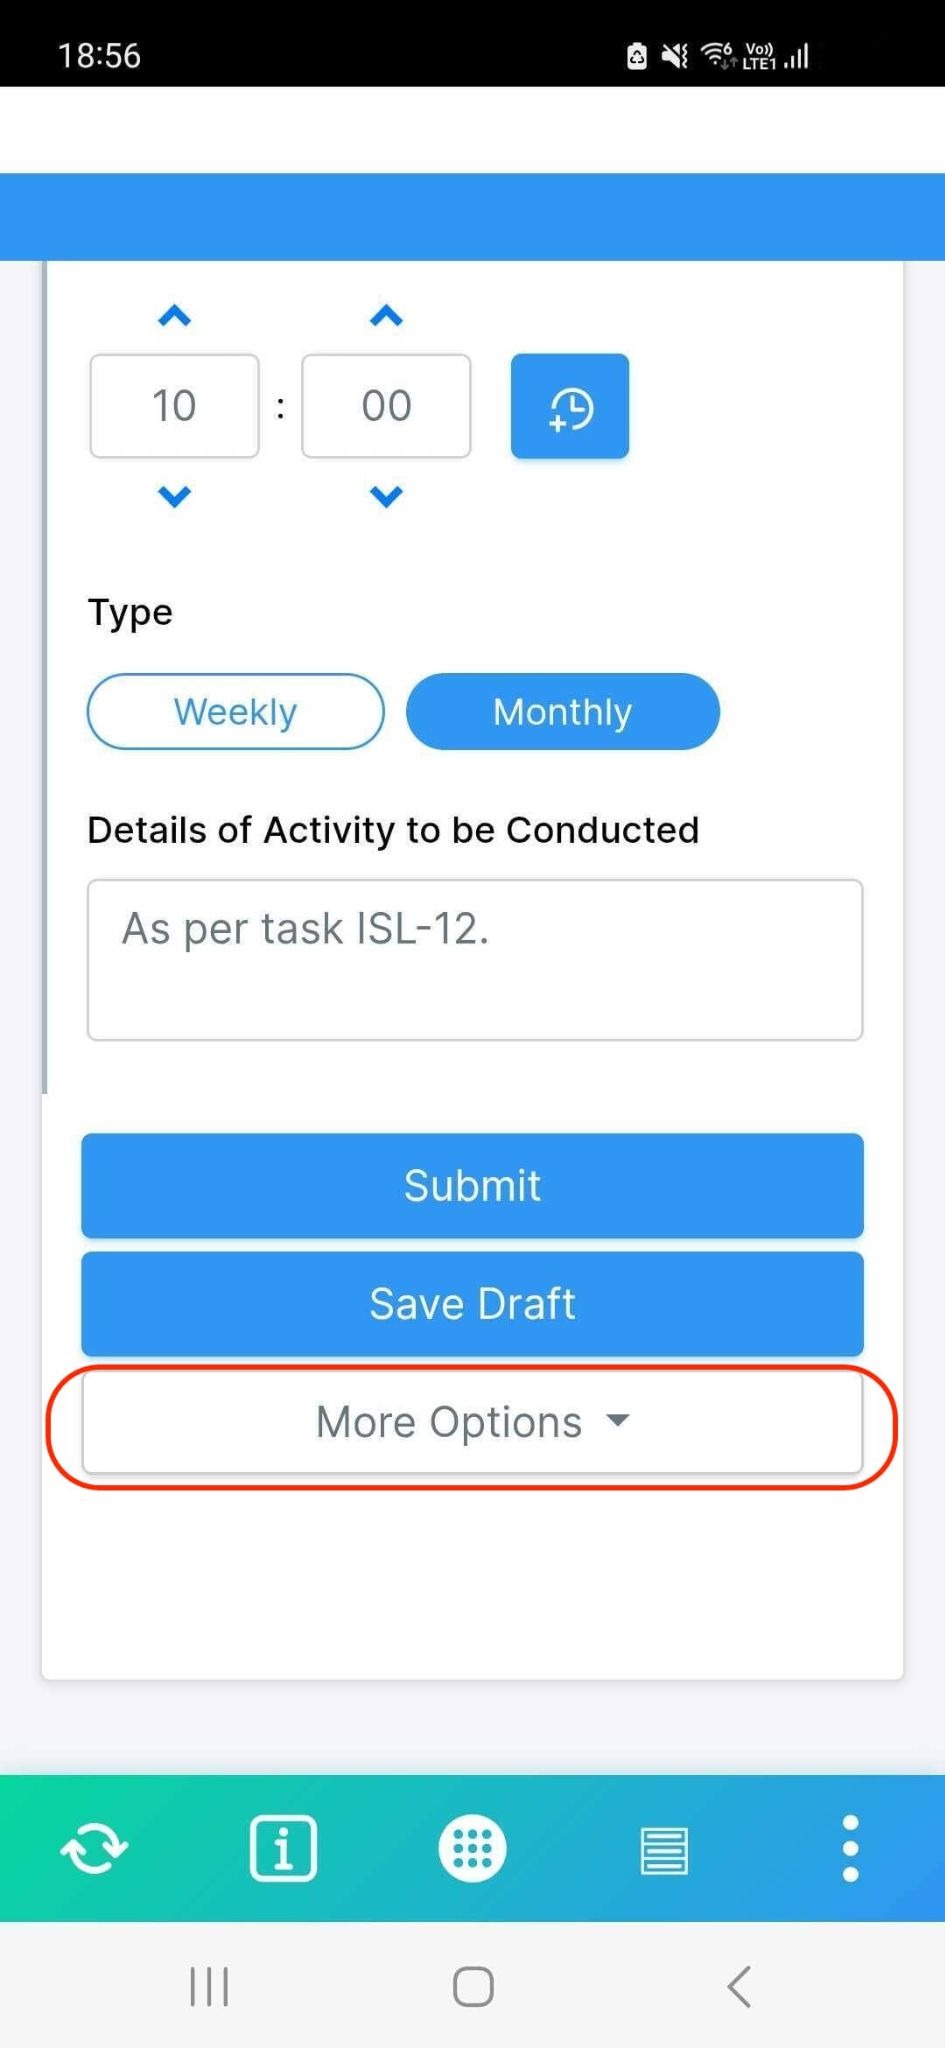
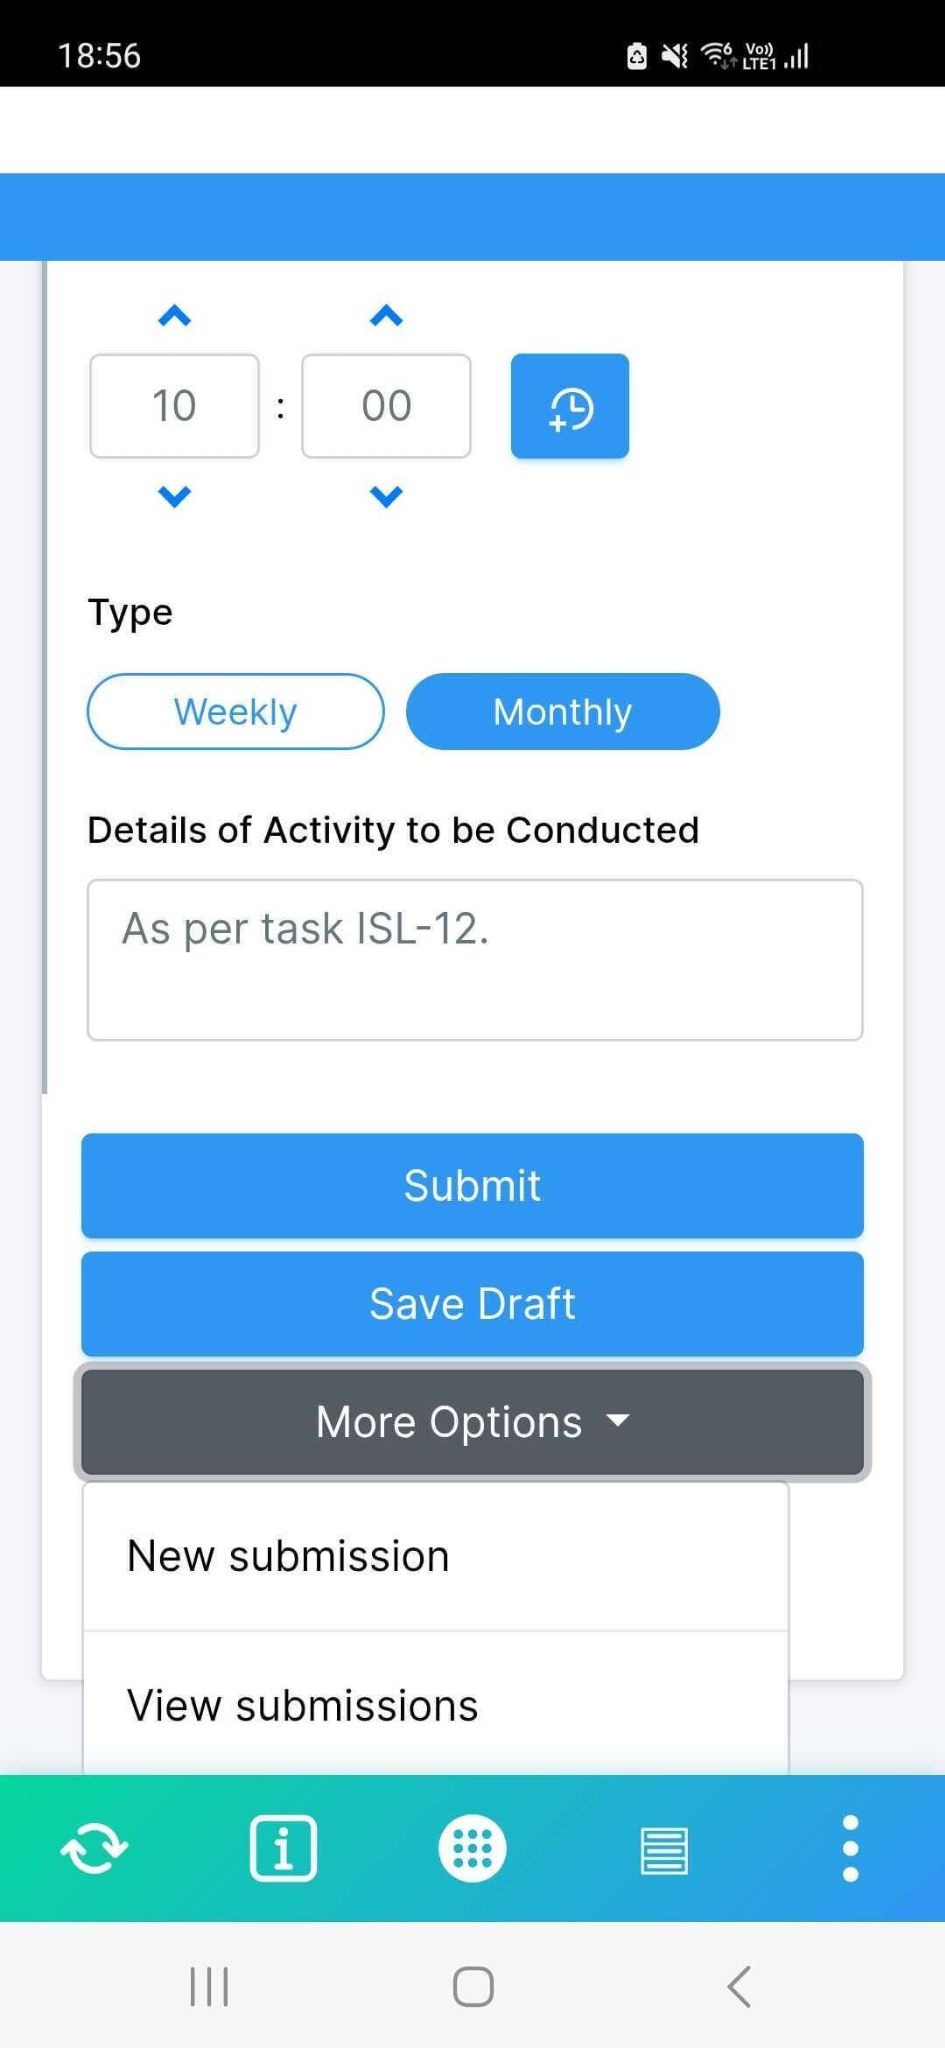
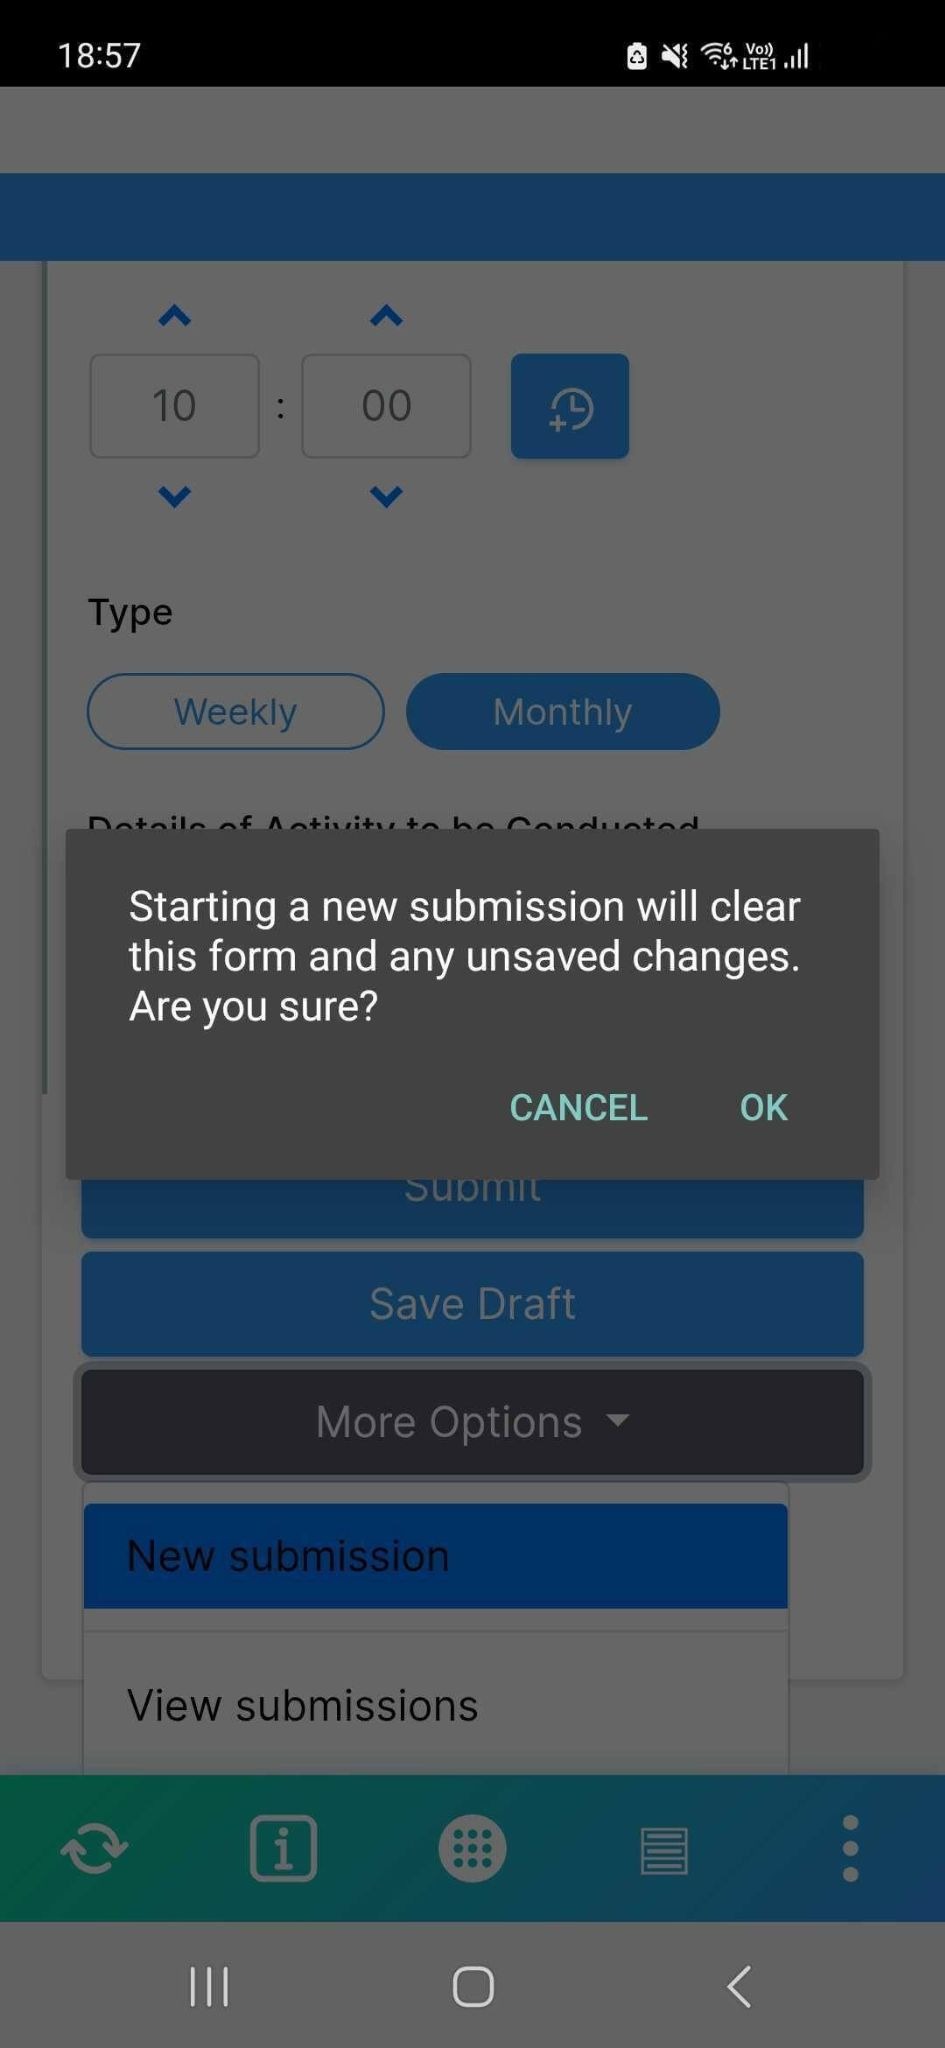
When you click on it, you will see the following options:
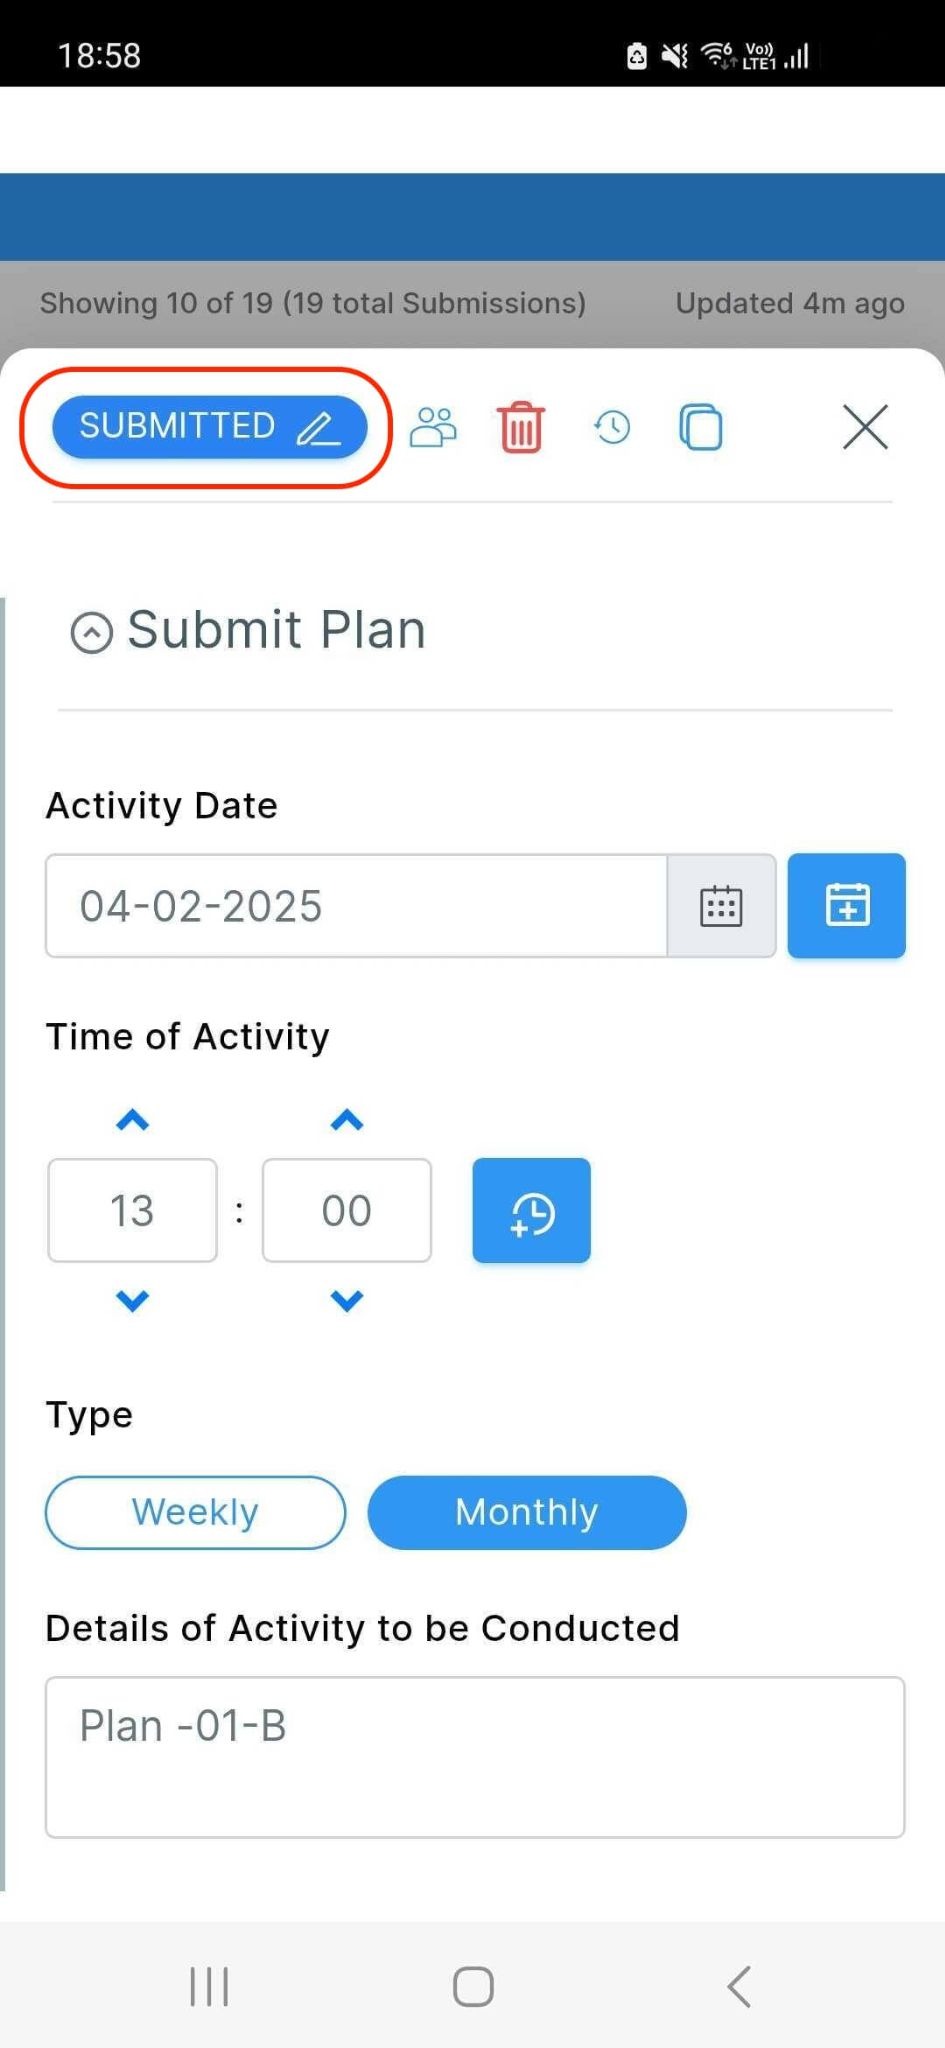
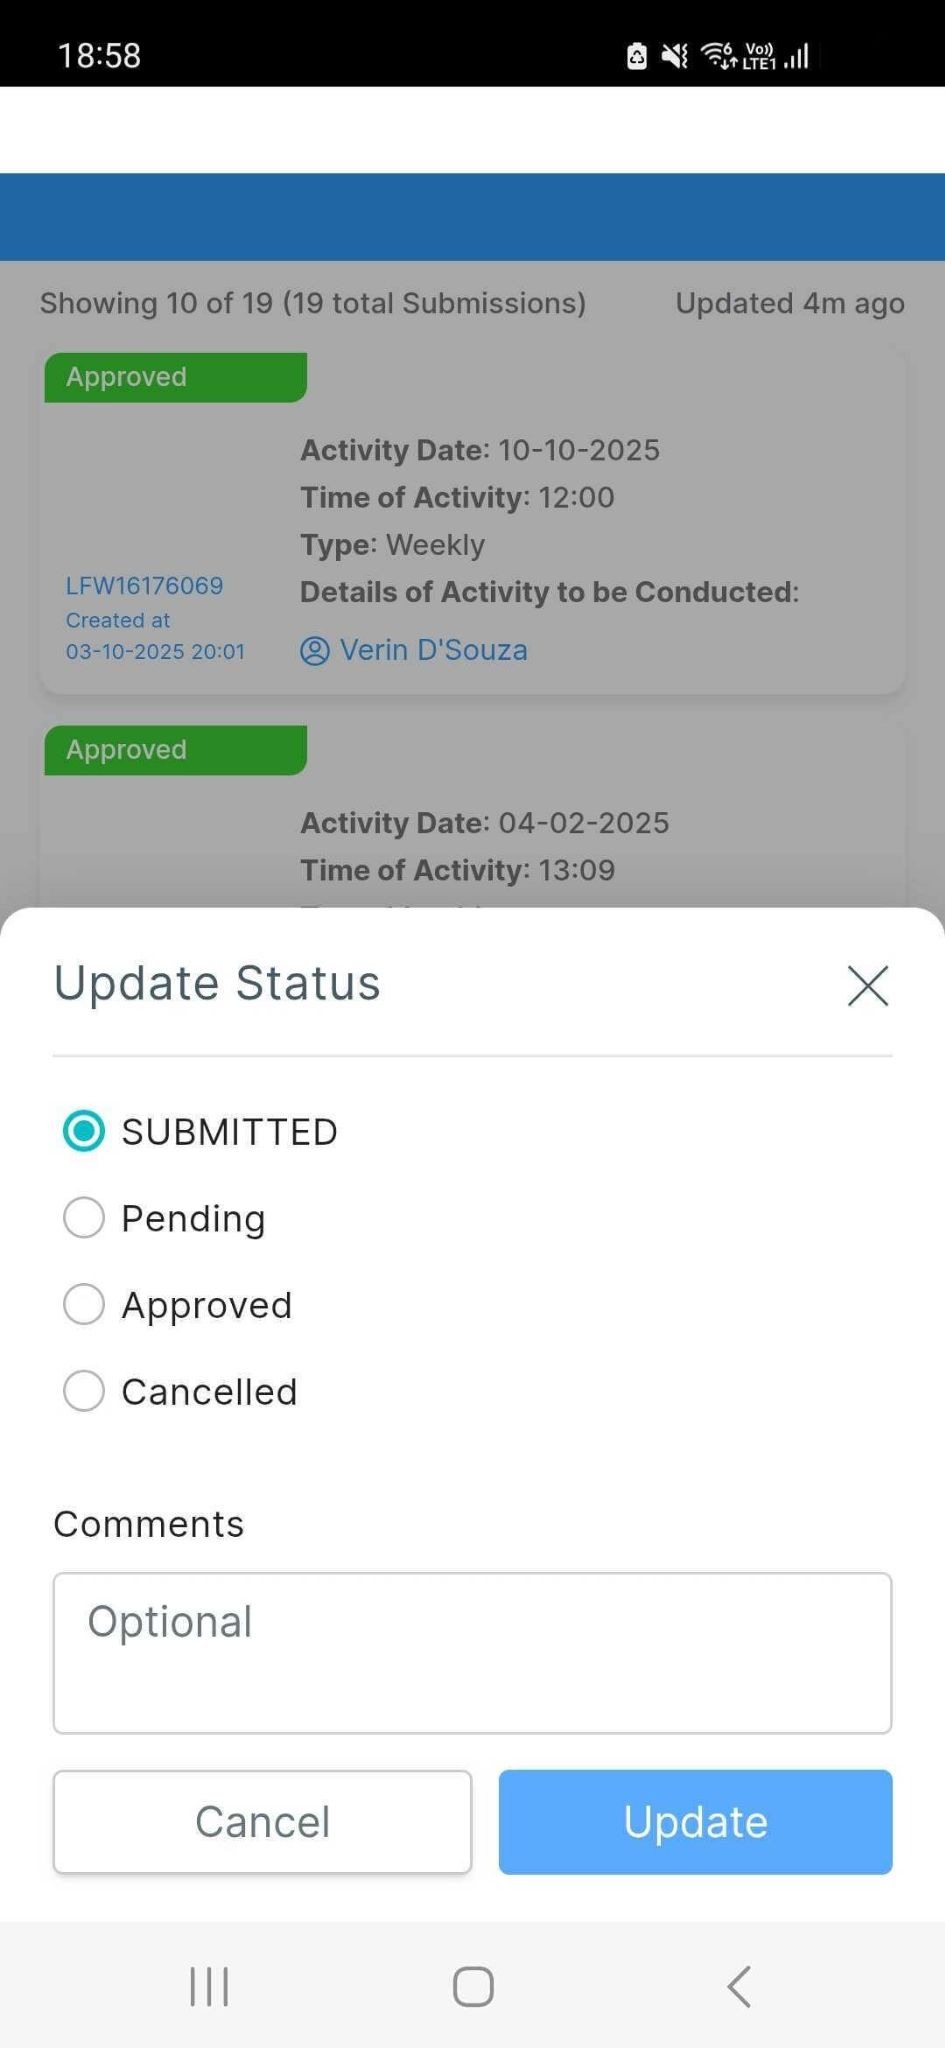
You can also change the status of your submissions if you have relevant permissions to the app and if statuses have been configured for the app.
You can also give comments when changing statuses in the mobile app.
The user who submits a submission is its owner.
To change the owner, open the required submission and click the Update Owners icon at the top, as shown in the image.
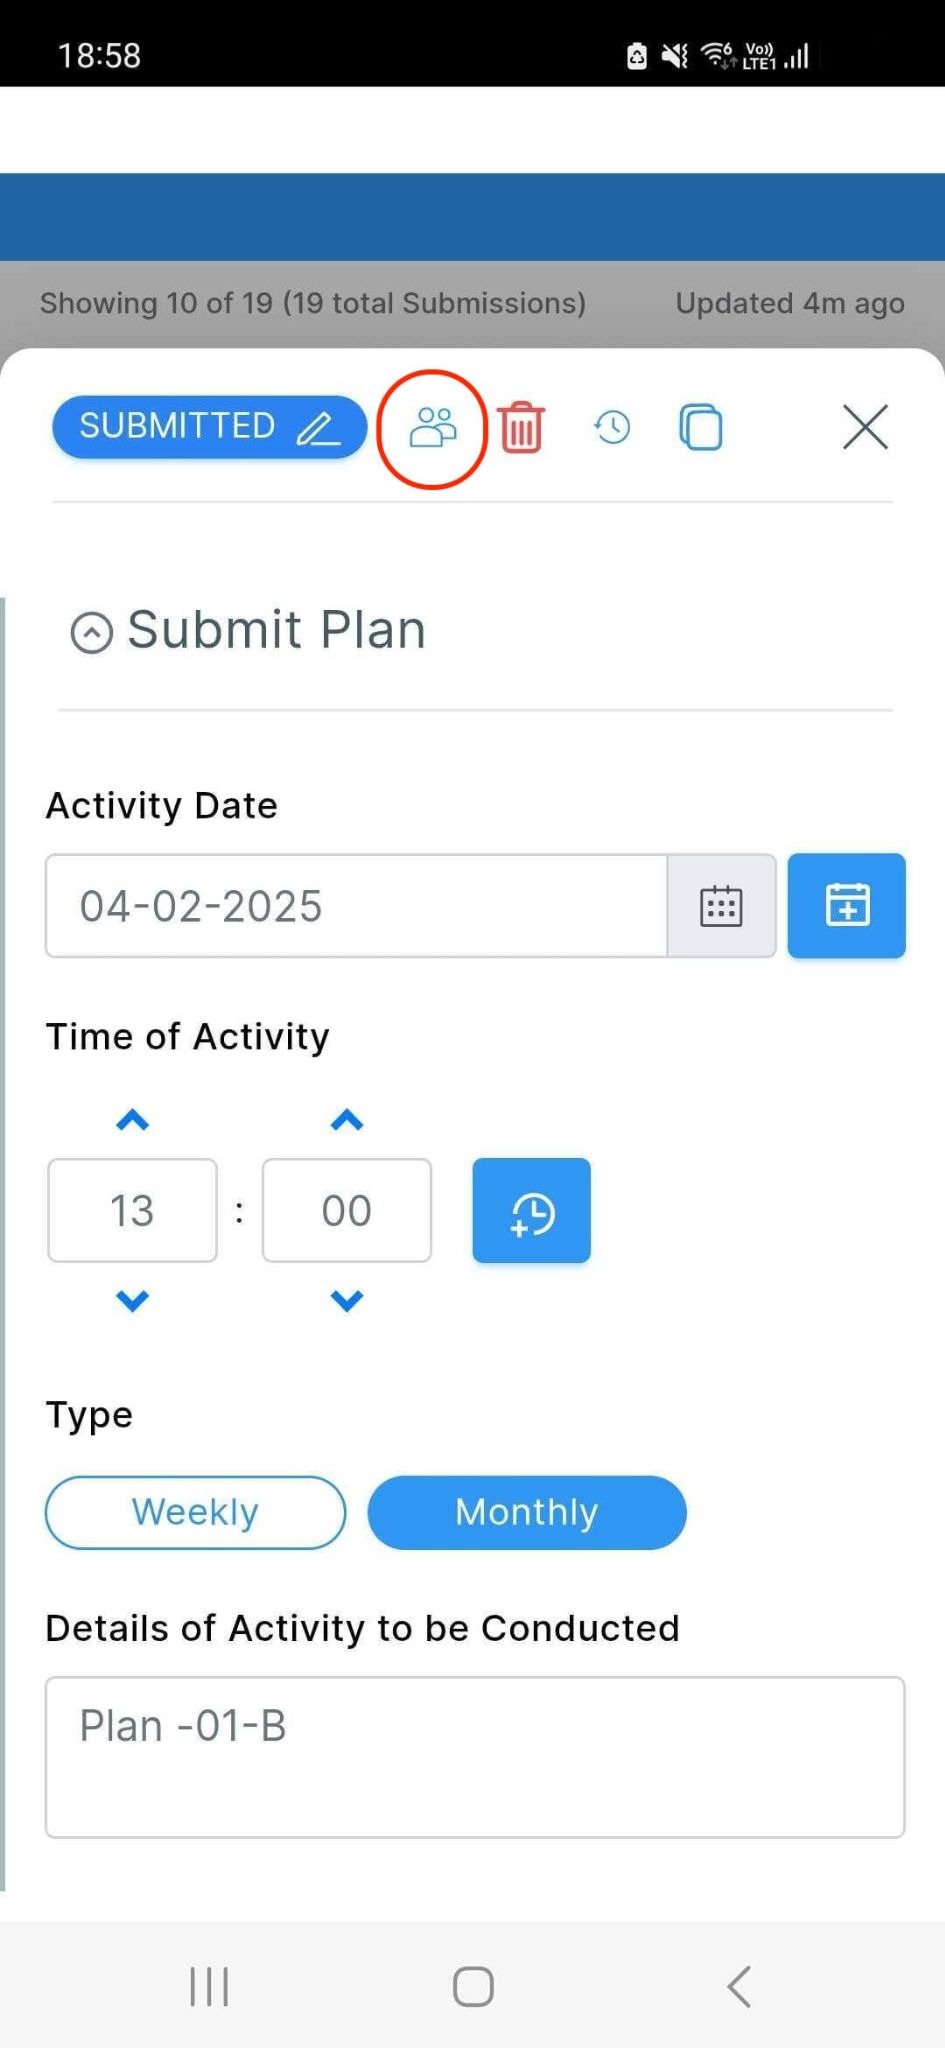
In the Select Users option, you will see a list of all users assigned to the app. Select the required user to make them the owner of the submission.
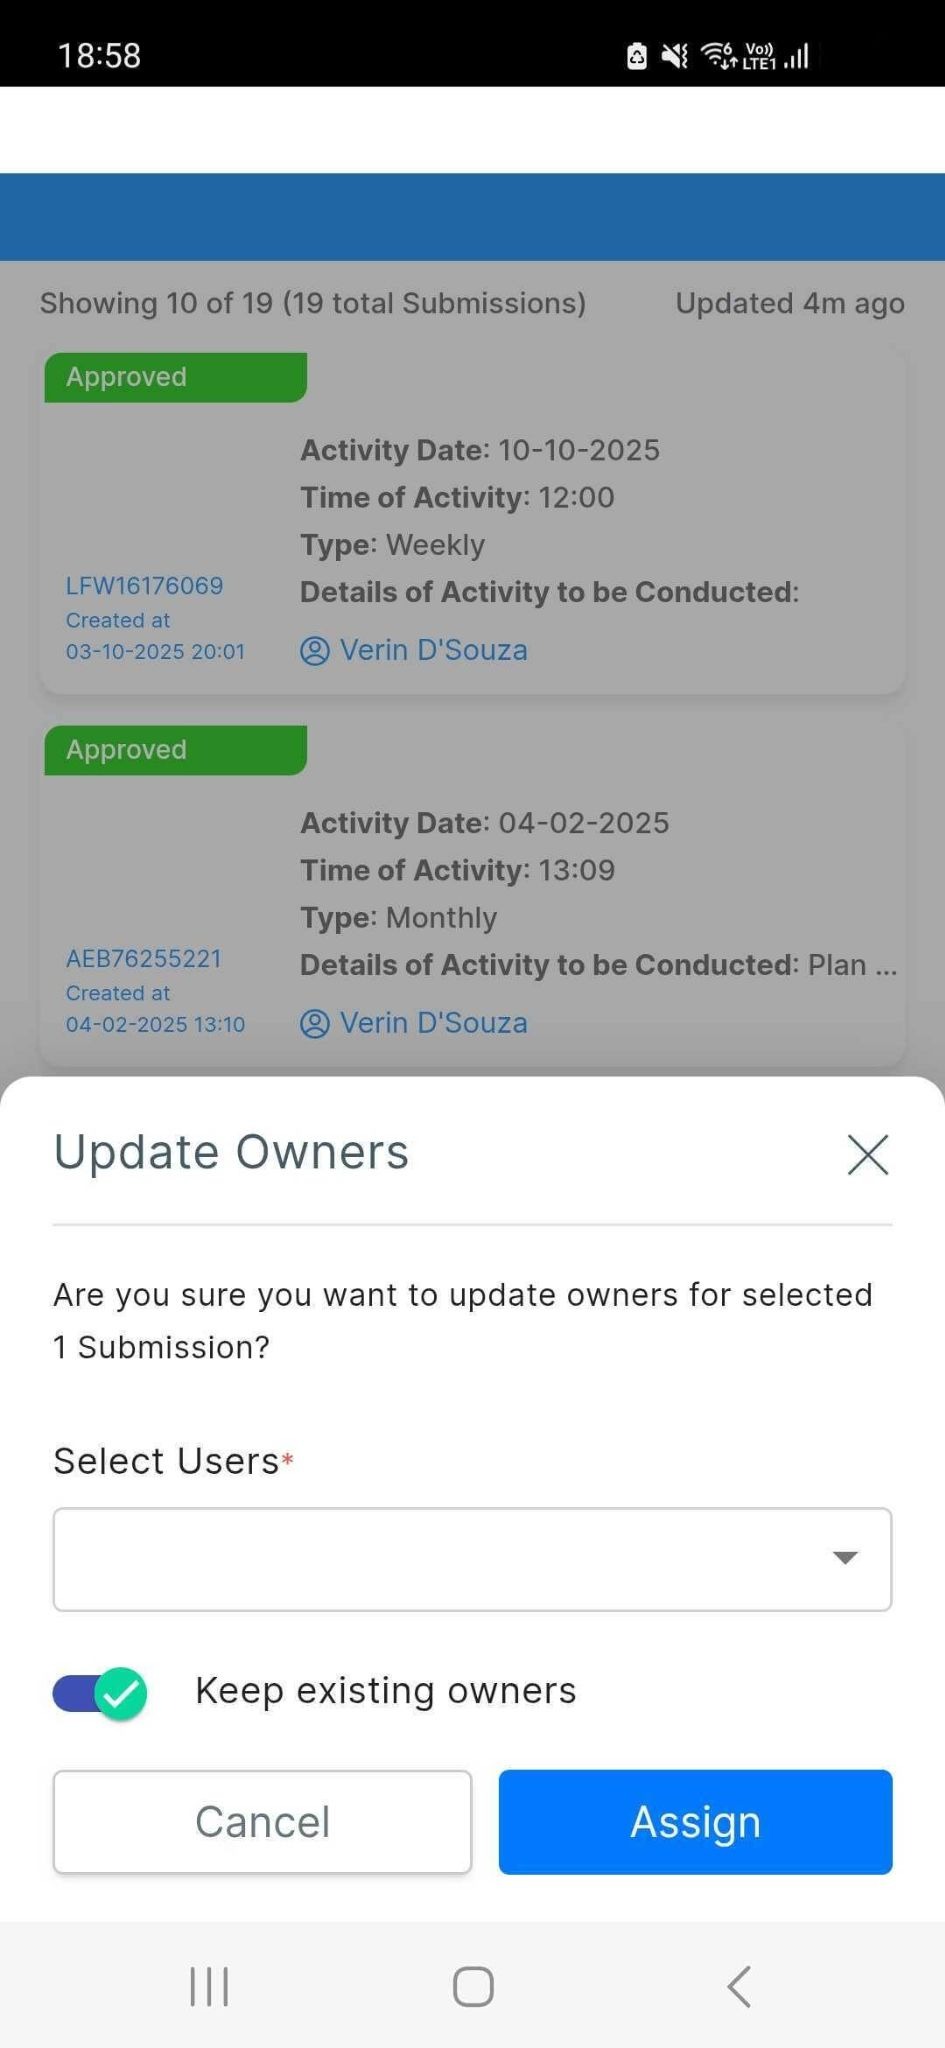
Being an owner means the user will be able to view the submission and make changes to it.
For example, suppose the user who submitted the submission has only Submitter access, which means they can only view their own submissions. If the owner is changed, they will no longer be able to view that submission because they are no longer its owner.
You can also keep the existing owners and add additional owners. In this case, all owners will be able to view and edit the submission.
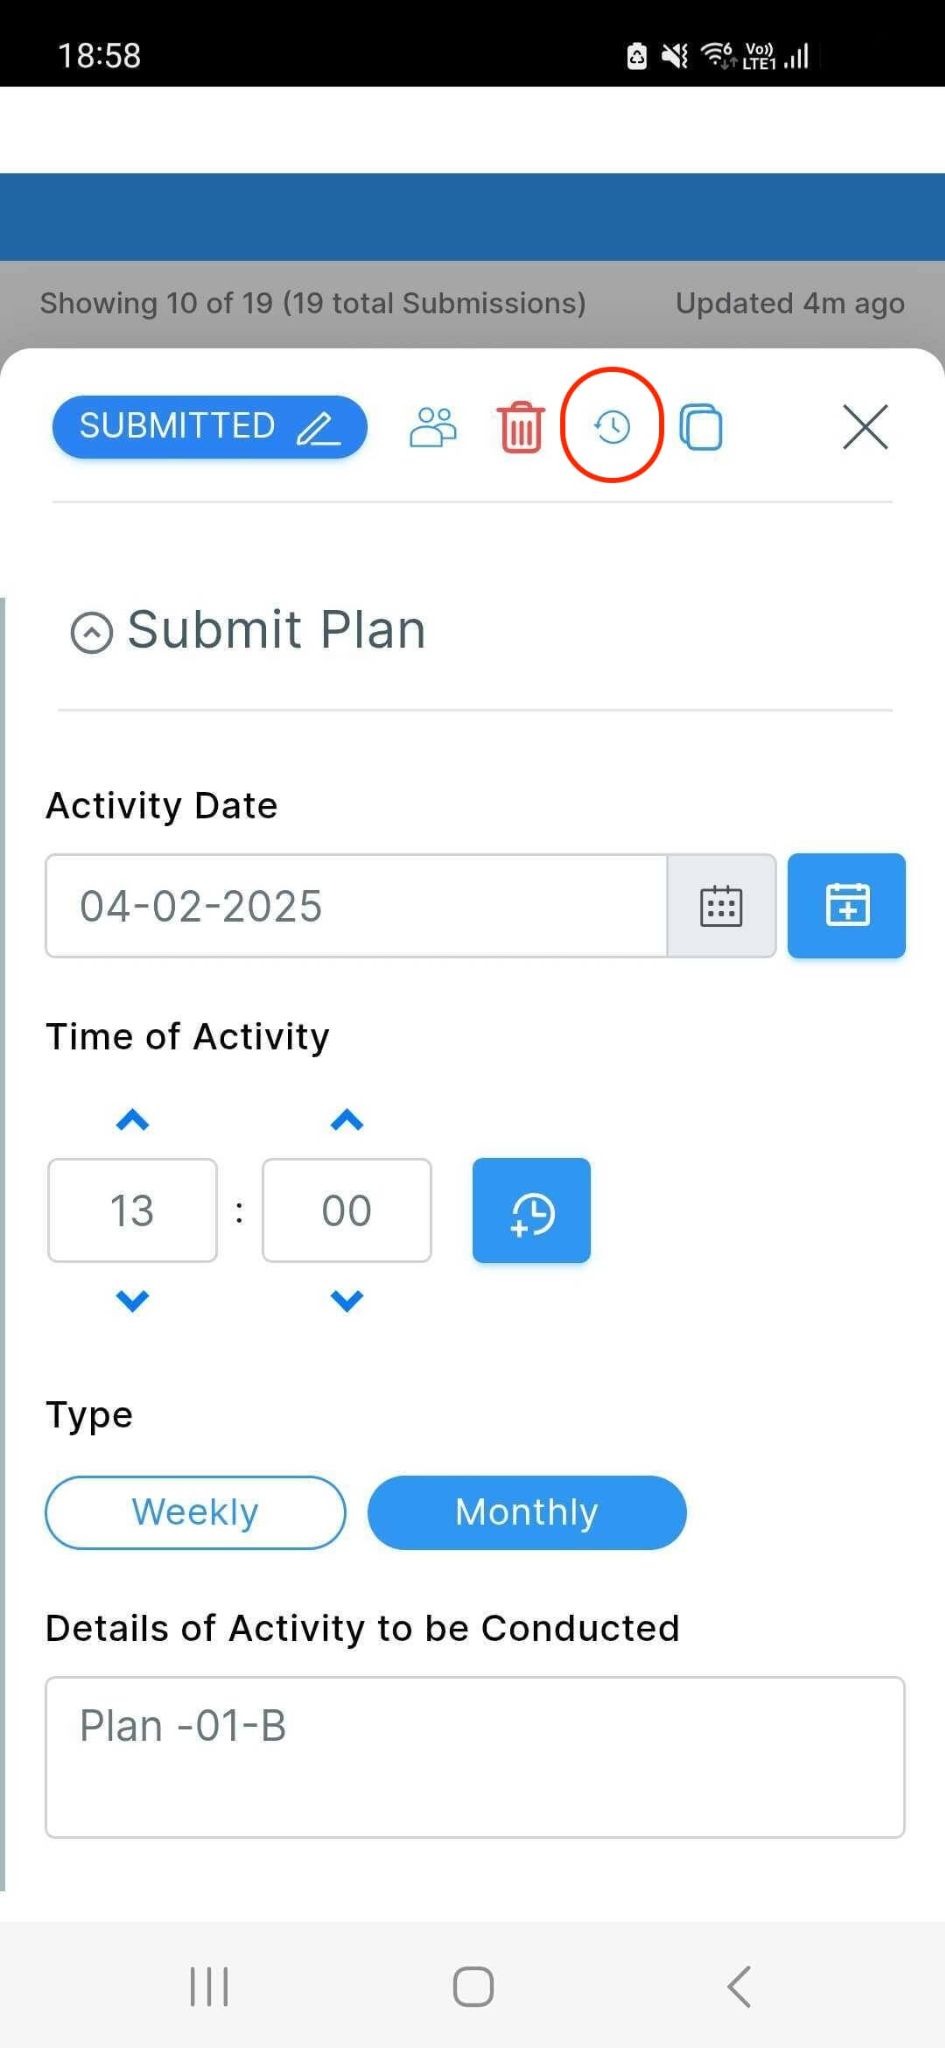
The History option allows you to view the changes made to a submission each time it is updated.
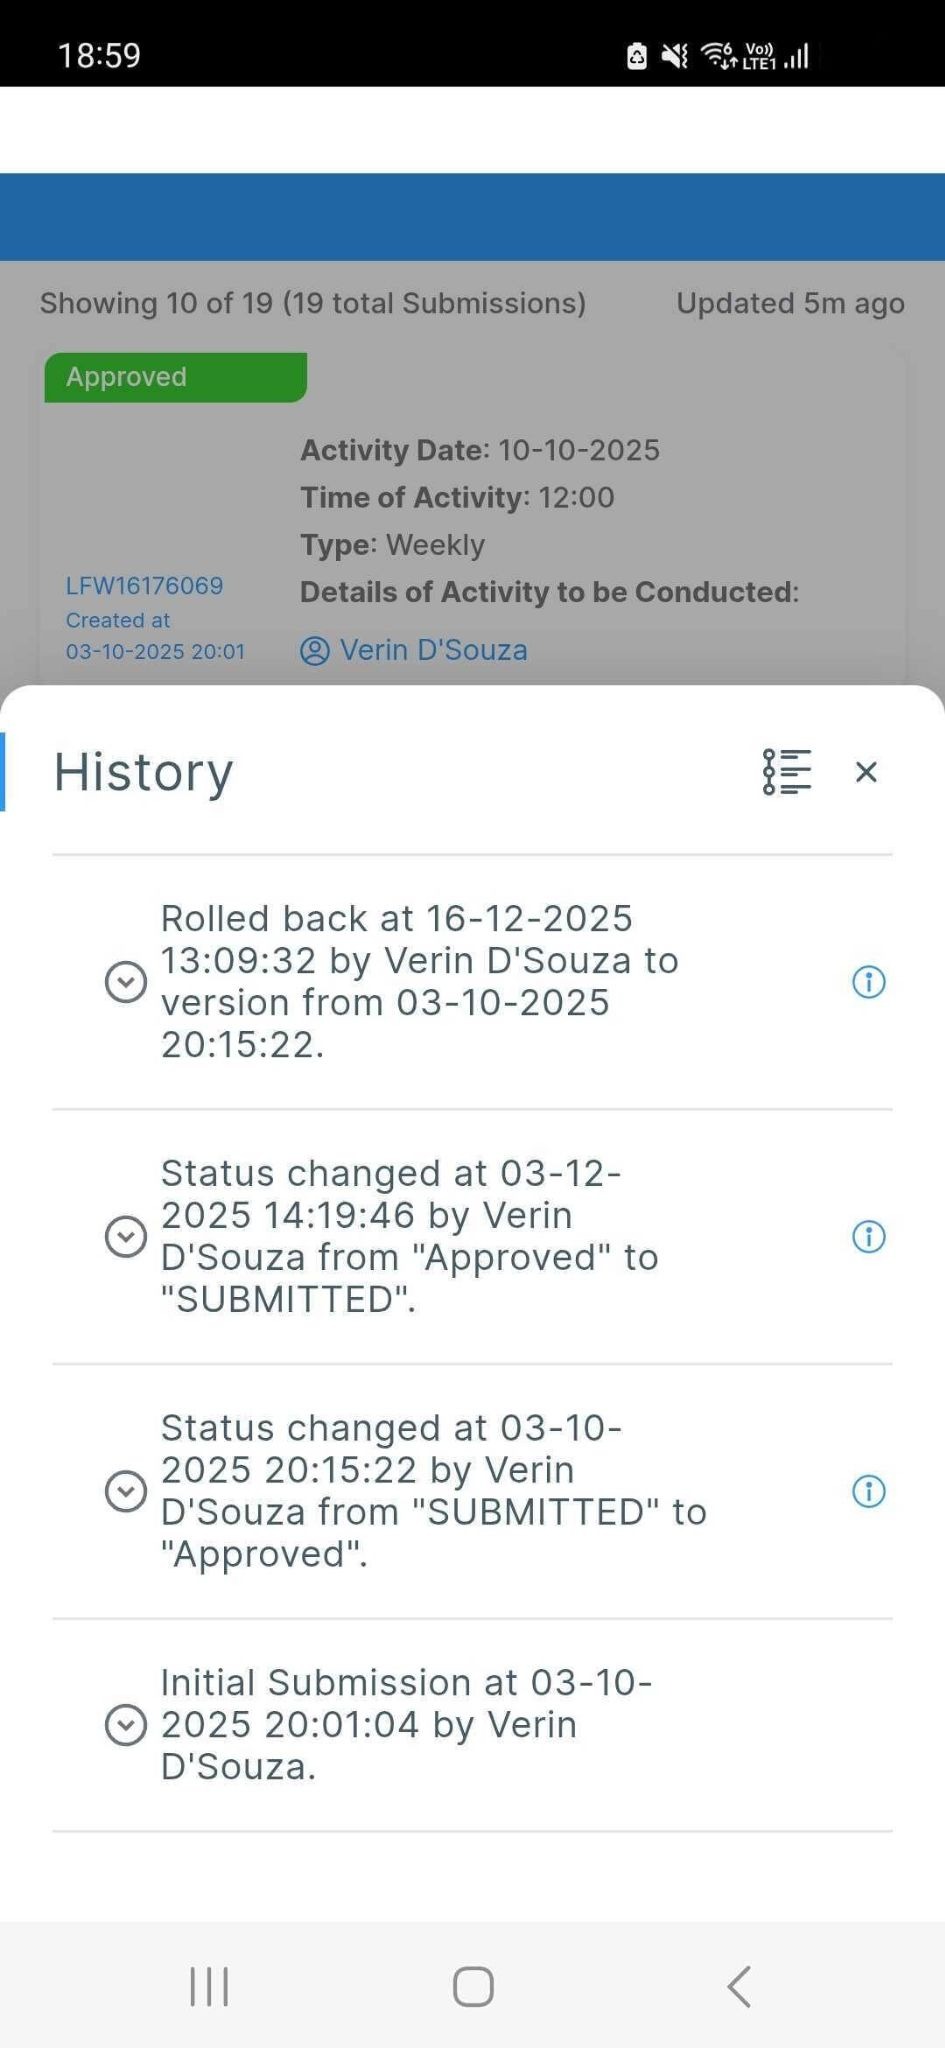
To view the history, open the required submission and click the History icon at the top, as shown in the image.
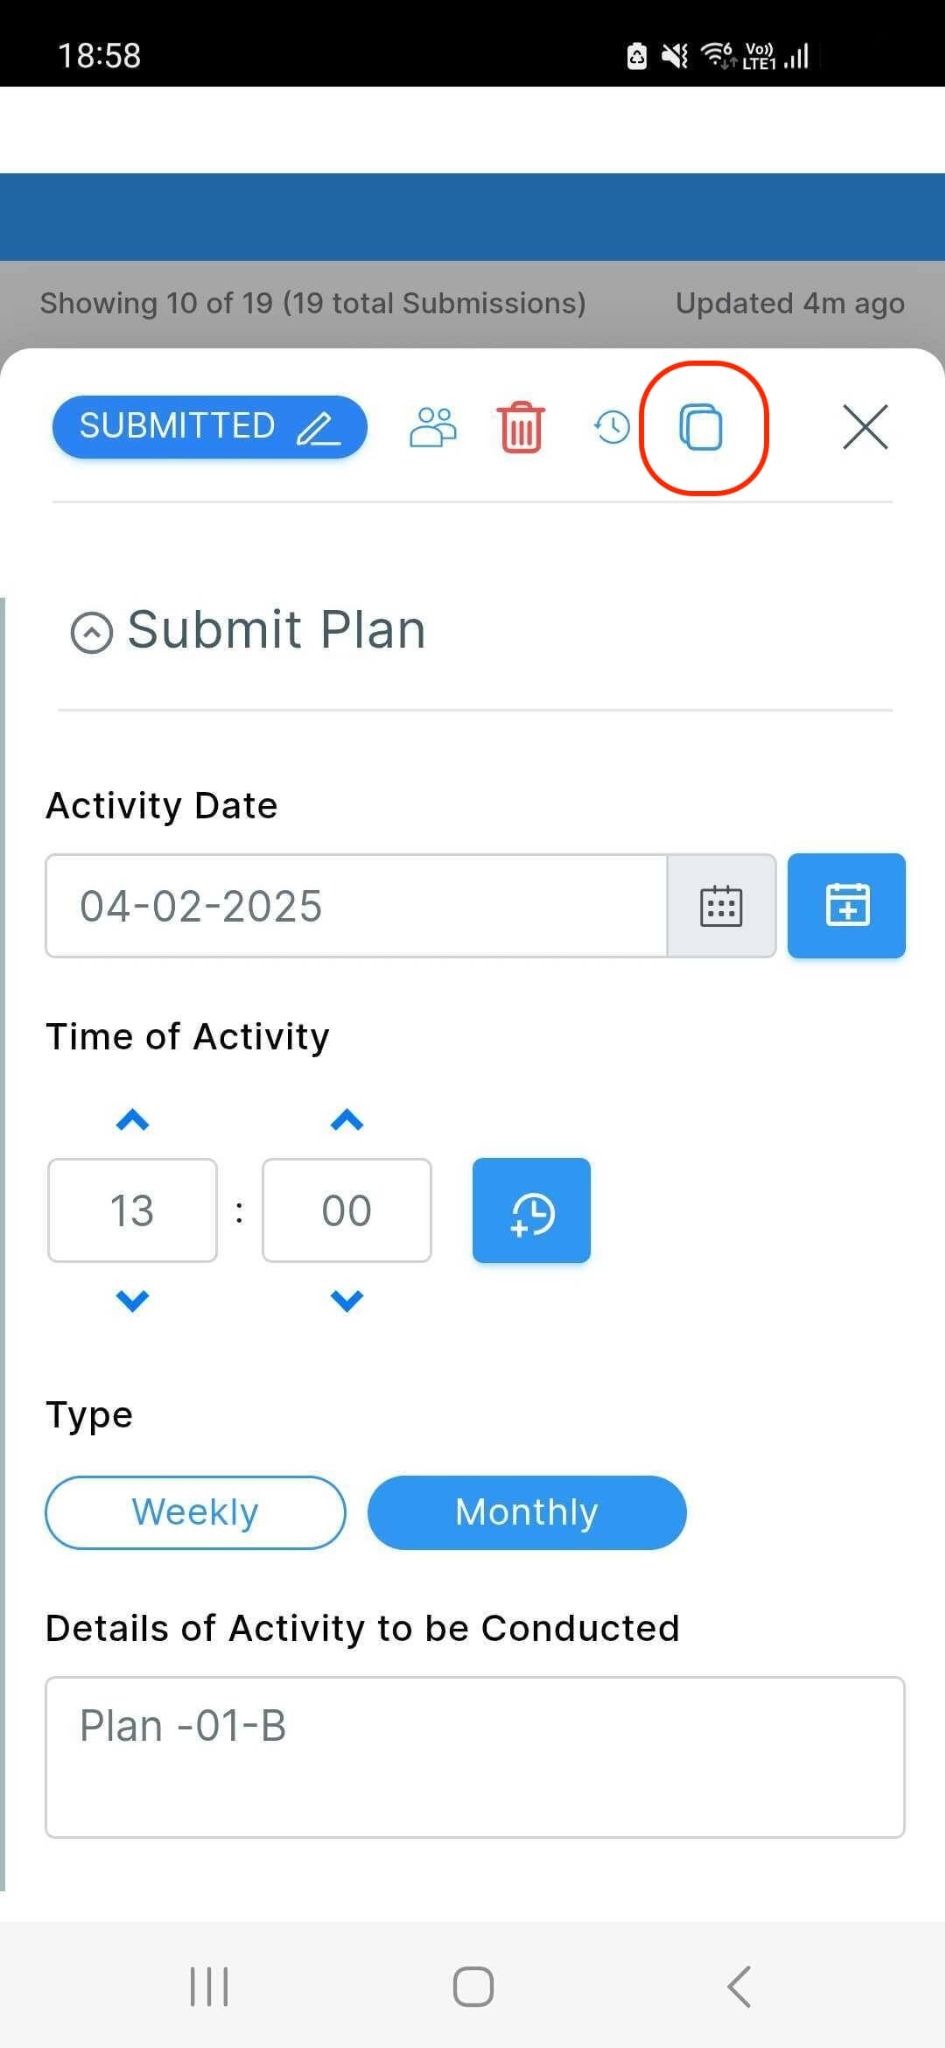
The Clone option allows you to create another submission with the same details.
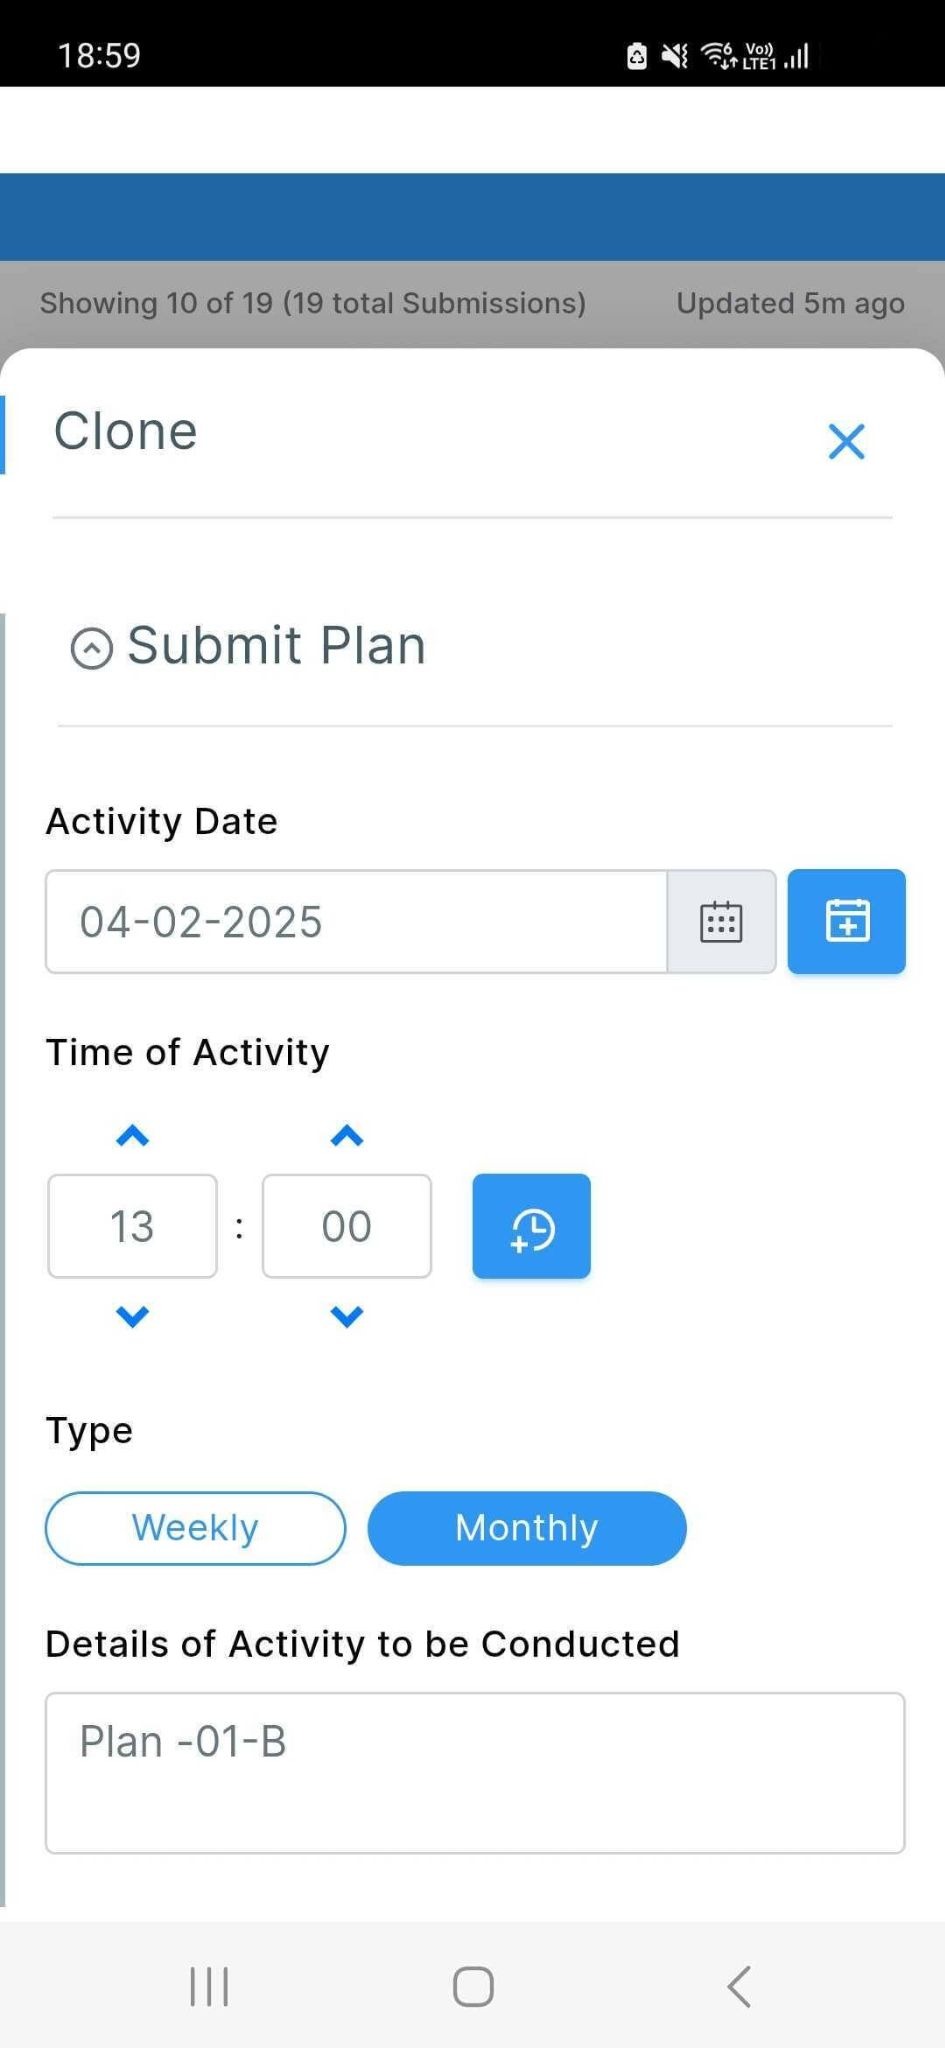
To clone a submission, open the required submission and click the Clone icon at the top, as shown in the image. Update the fields as needed, then click on Save.
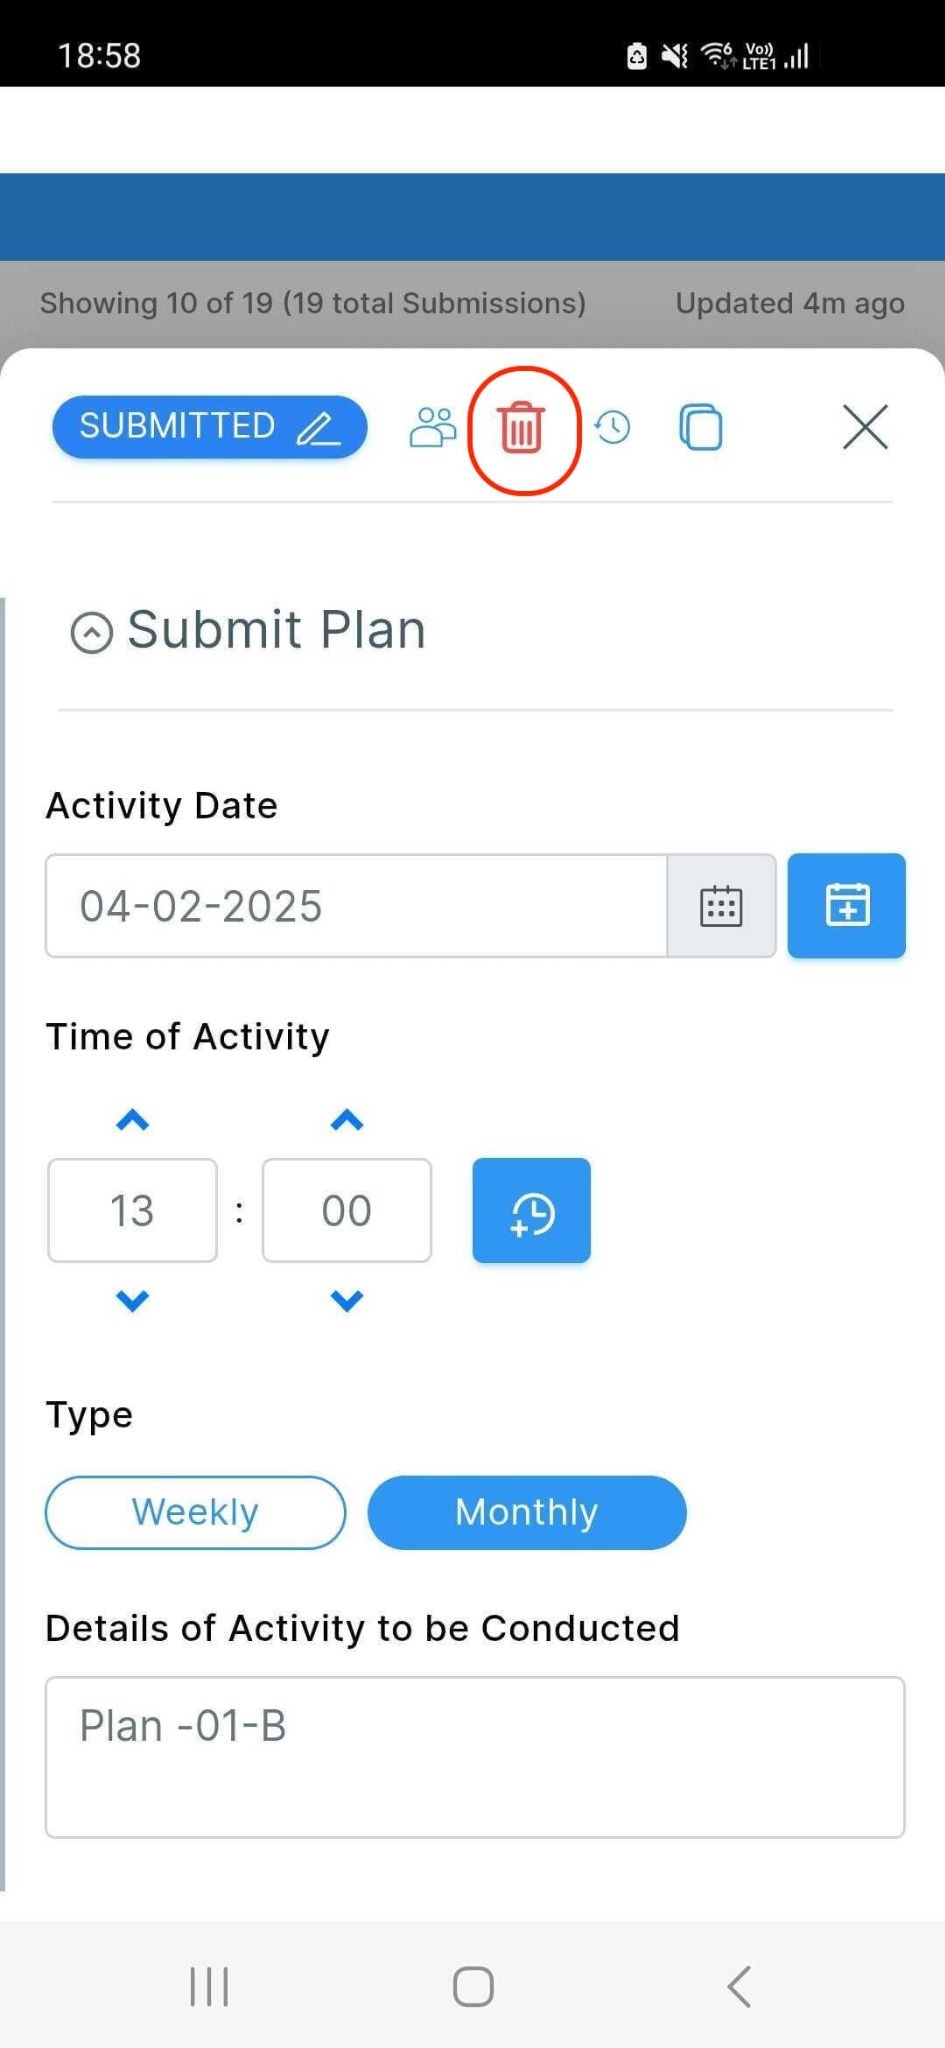
You can archive submissions, which can be retrieved later for a certain period of time, after which they are automatically deleted permanently.
You can also permanently delete archived submissions at any time. Once permanently deleted, these submissions cannot be recovered.
Click here to know more about retrieving archived submissions.
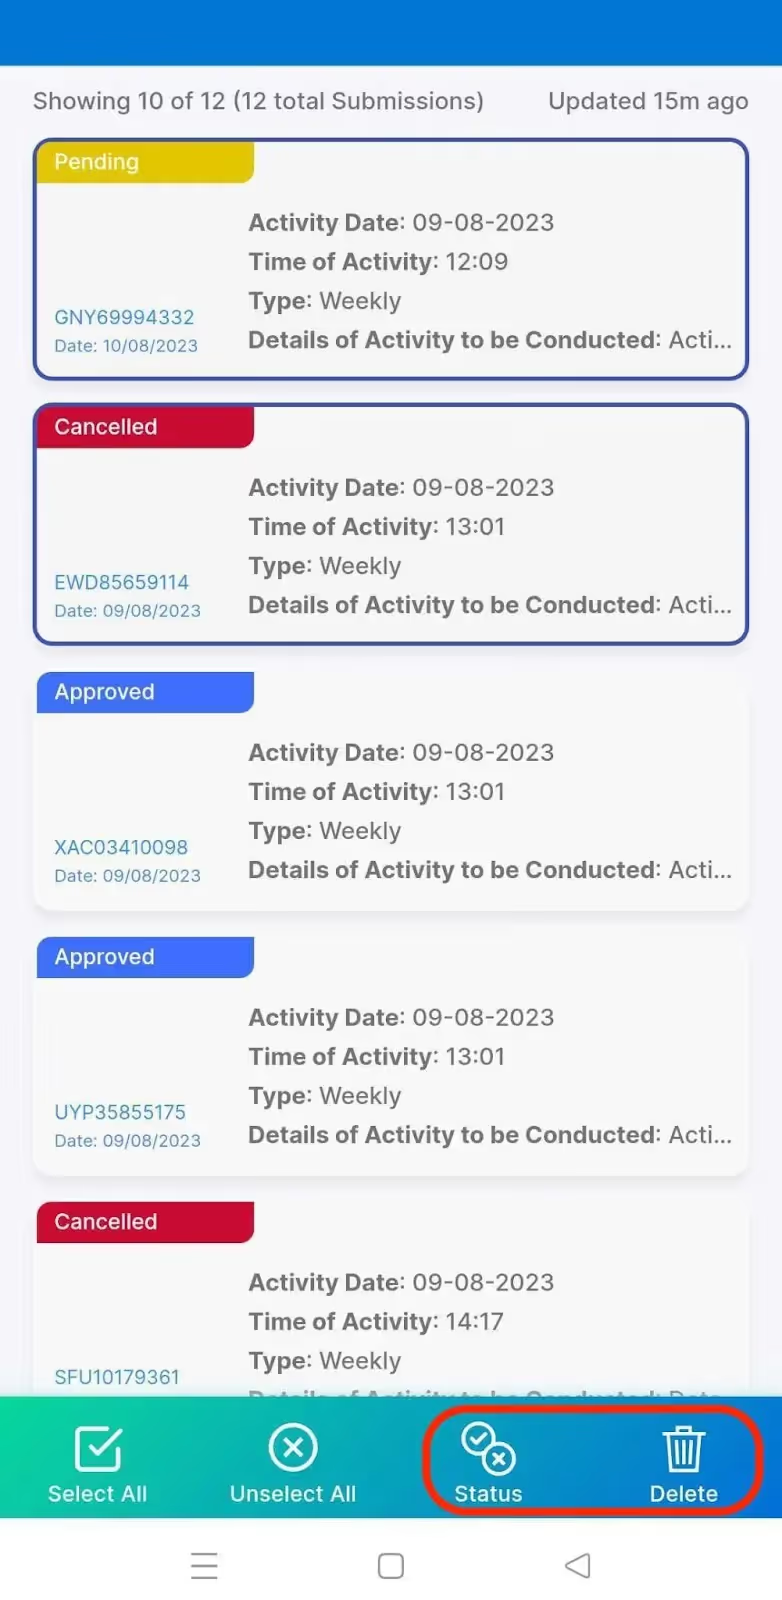
You can also do status updates or submission deletions for multiple submissions in your mobile app. Simply select multiple submissions by holding down the screen for a few seconds on a submission till it gets highlighted, then select the rest. You should get the options to change status or delete them in bulk.
L374, 1st Floor, 5th Main Rd, Sector 6, HSR Layout, Bengaluru, Karnataka 560102, India
3500 S DuPont Hwy, Dover,
Kent 19901, Delaware, USA


.svg)




3500 S DuPont Hwy, Dover,
Kent 19901, Delaware, USA
L374, 1st Floor, 5th Main Rd, Sector 6, HSR Layout, Bengaluru, Karnataka 560102, India